RepRap Wilson Discount LCD Case & Mount
pinshape
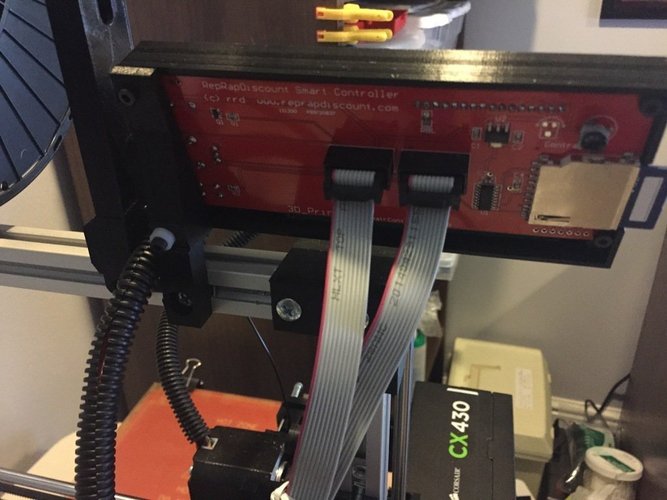
This stylish upgrade kit will perfectly fit your exposed RepRap Discount LCD Controller. In addition to the printed parts, you'll need the following components: M3 8mm machine screws - 2 pieces M3 10mm machine screws - 1 piece M3 25mm machine screws - 1 piece M3 nuts - 4 pieces You will reuse one of your existing M5 screws (and T-nut) to secure the final assembly in place. Enjoy your sleek new look! Instructions: Print out the LCD case and the mount separately. Carefully insert the 4 M3 nuts into the LCD case mount near the 4 corners of the case. Insert your RepRap Discount LCD screen into the newly printed case. Tighten the 2 M3 8mm screws into the corners closest to the SD card slot. Place the mount on top of the other side of the LCD case, ensuring the support overhangs the bottom edge of the case. Secure the upper remaining corner with the M3 10mm screw. Fasten the lower remaining corner with the M3 25 mm screw. Use your original M5 screw and T-nut to attach the assembly to the Wilson frame.
With this file you will be able to print RepRap Wilson Discount LCD Case & Mount with your 3D printer. Click on the button and save the file on your computer to work, edit or customize your design. You can also find more 3D designs for printers on RepRap Wilson Discount LCD Case & Mount.