Removable Universal Pen Plotter - Can Fit Any Printer
prusaprinters
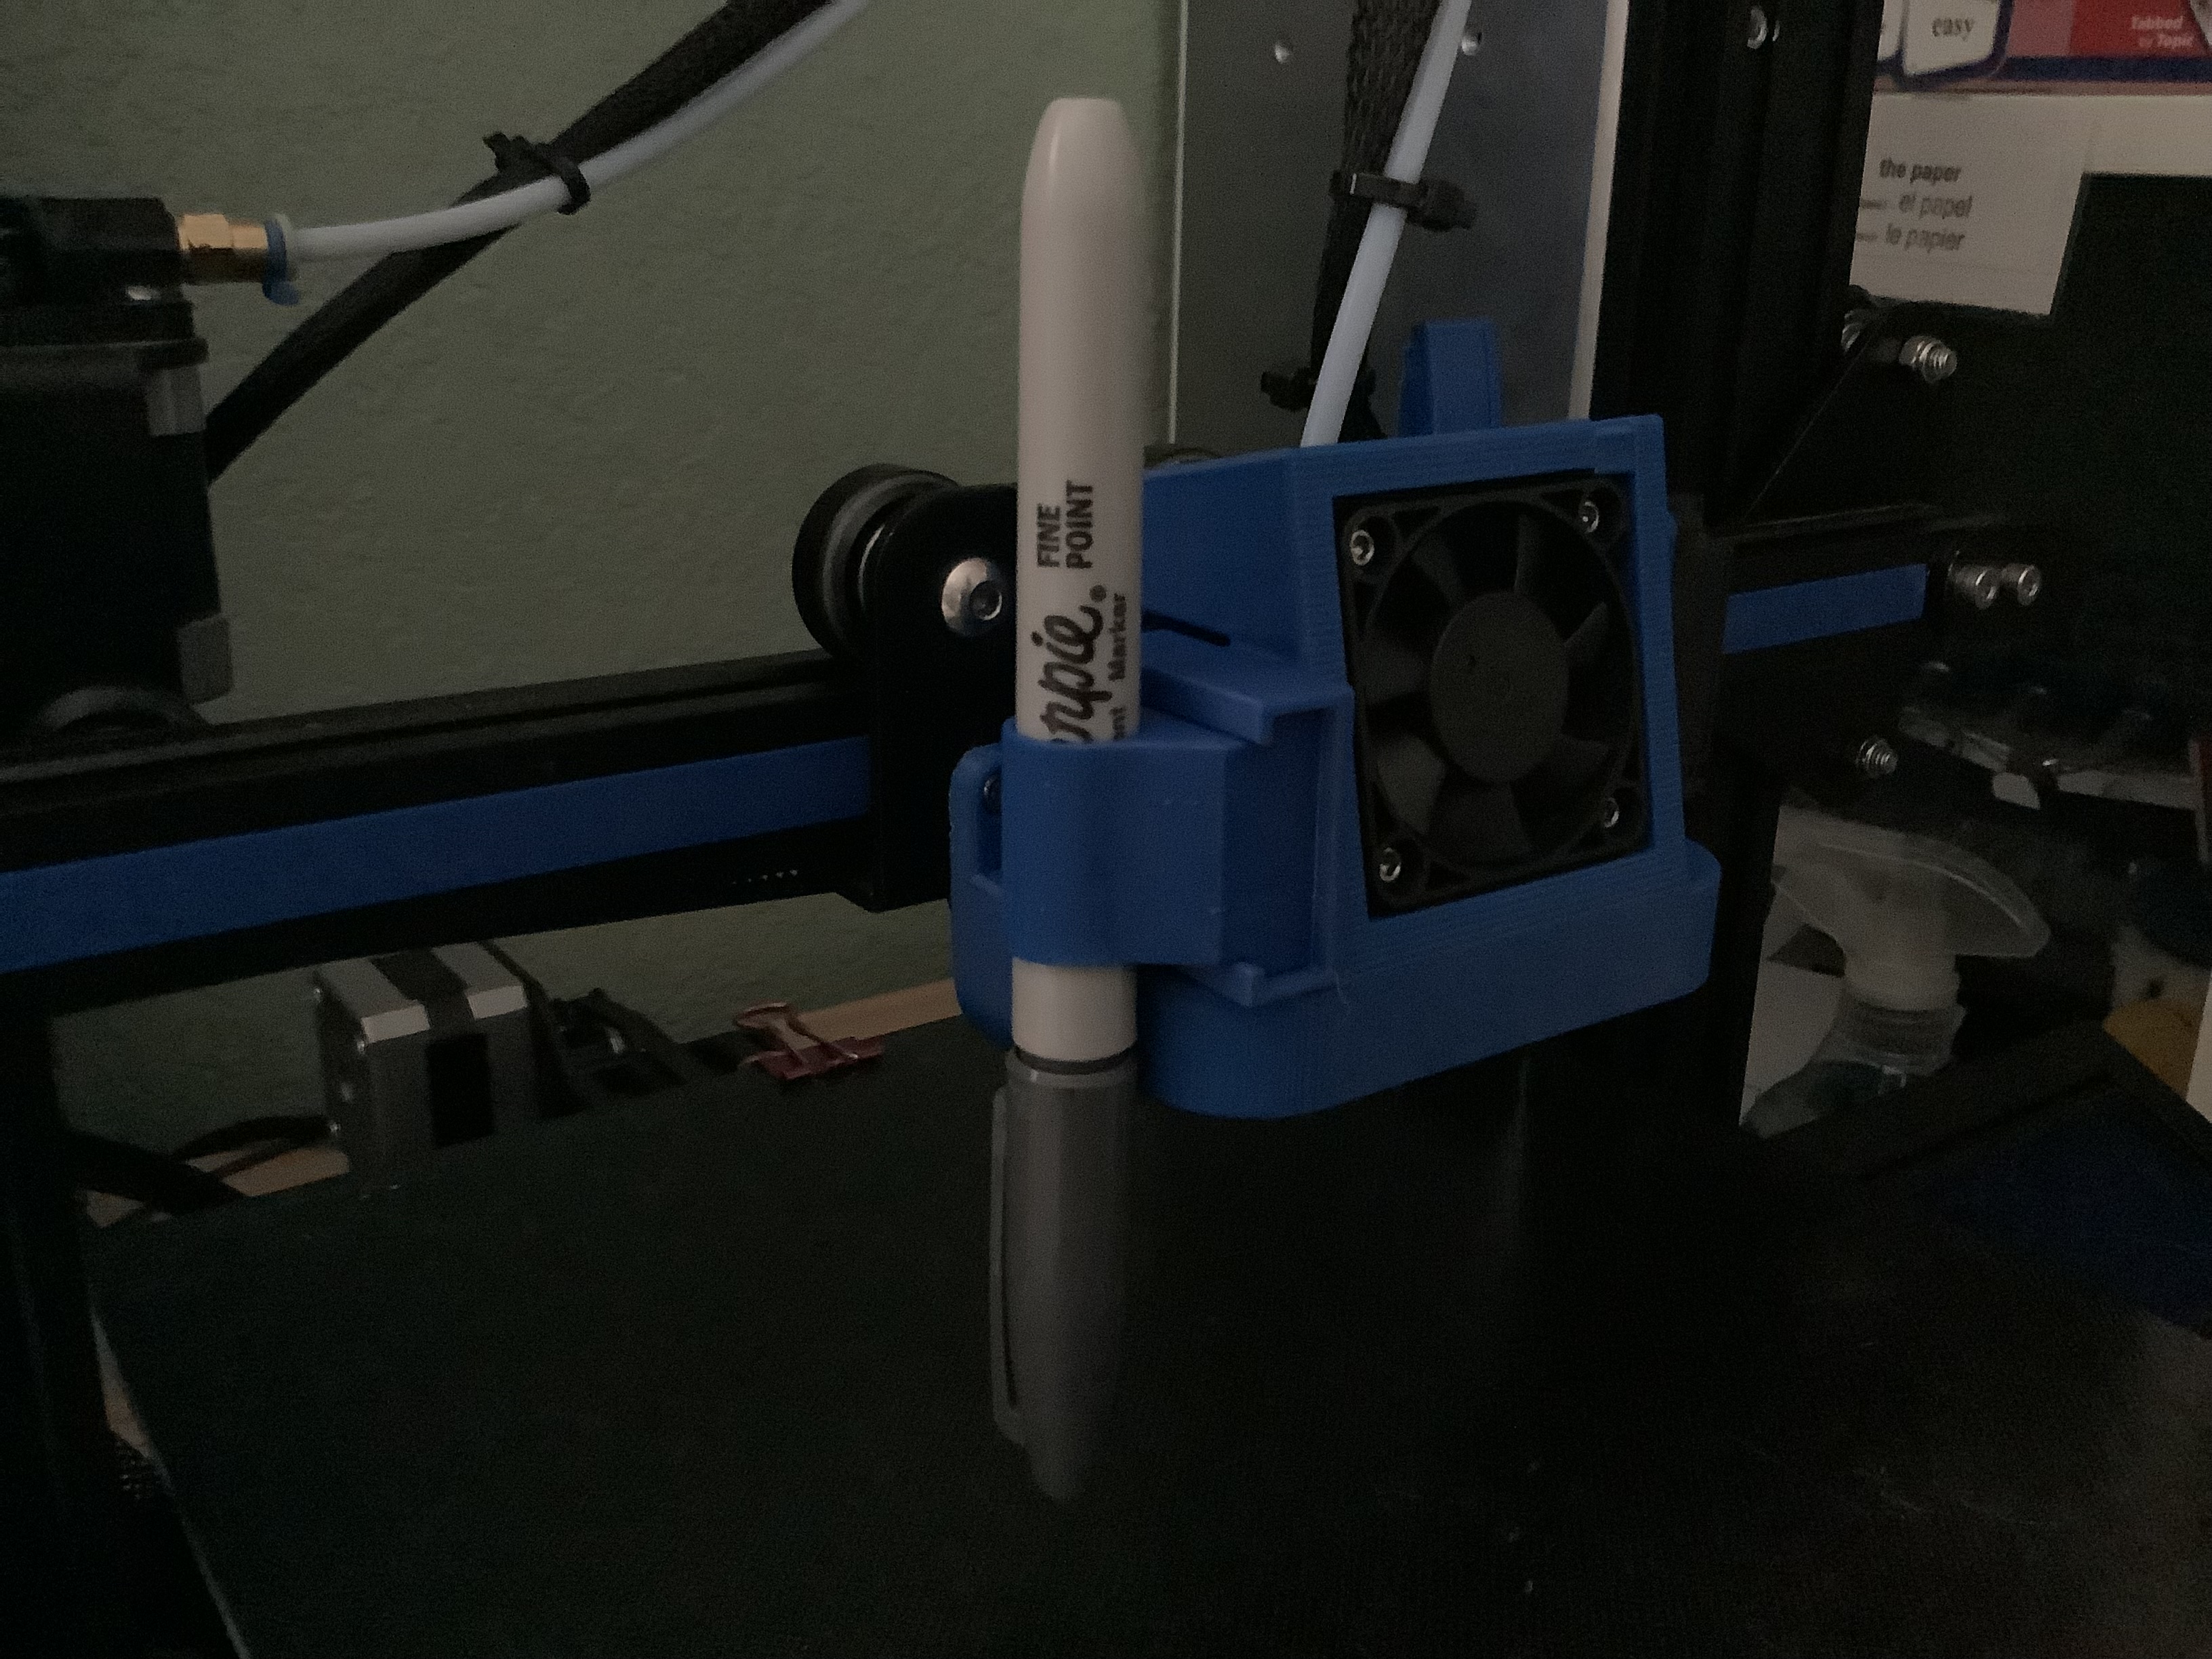
<p>Creating A Slicer Profile: </p><p>Create a new slicer profile, and set the extrusion/line width to the width of the sharpie line. This can be done by drawing a line and measuring the width with calipers or a ruler. Next home your printer and adjust the Z axis until the marker touches the paper. Take whichever length the Z axis traveled and set it to the z-offset. This setting can be found in PrusaSlicer, or installed into Cura. Next turn on z-hop and set it to at least 2 mm, if you don't turn it on when your printer makes a travel move, it will continue drawing and ruin your project.</p><p>Assembly:</p><p>The first thing you have to do is find a flat spot on your hotend/extruder, and glue the slider case on. The sharpie is removable, so its okay to glue it on. Next you need to friction fit a sharpie color of your choice into the slider. Then place the slider into its casing, you might want to put masking tape under the slider so it is not loose. The final step is to either remove the filament, or unplug the extrude.</p><p>Importing Files:</p><p>The first thing you need to do is find a picture that you want, its better to use an outline. Next convert that file to an STL. That can be done for free here: <a href="https://anyconv.com/stl-converter/.">https://anyconv.com/stl-converter/.</a> Download the file and load it into you Slicer </p>
With this file you will be able to print Removable Universal Pen Plotter - Can Fit Any Printer with your 3D printer. Click on the button and save the file on your computer to work, edit or customize your design. You can also find more 3D designs for printers on Removable Universal Pen Plotter - Can Fit Any Printer.