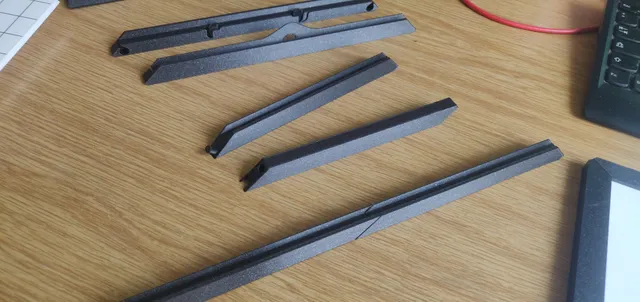
Remix: Picture frame (A4) for prusa mini
prusaprinters
I adjusted the original design, mainly on the side parts, to make it fit on the prusa mini. I made a 45° cut along the side and put a pin on it for better adhesion/connection. Using some kind of glue is a must, though. I used 2 component adhesive (epoxy), and it worked best. It just takes almost a day to dry completely and solidify. I also used hot glue, which works instantly, it is just much more dense and might leave a slit between the parts, also some glue might come out and dry out on the surface, so you need to put the perfect amount of glue, act very quickly and press hardly.Super Glue is also applicable, it will leave permanent white stains, however, due to the fumes and so on, but may be you can paint it afterwards?Anyway, I also added some mickey mouse ears, so have fun!
With this file you will be able to print Remix: Picture frame (A4) for prusa mini with your 3D printer. Click on the button and save the file on your computer to work, edit or customize your design. You can also find more 3D designs for printers on Remix: Picture frame (A4) for prusa mini.
