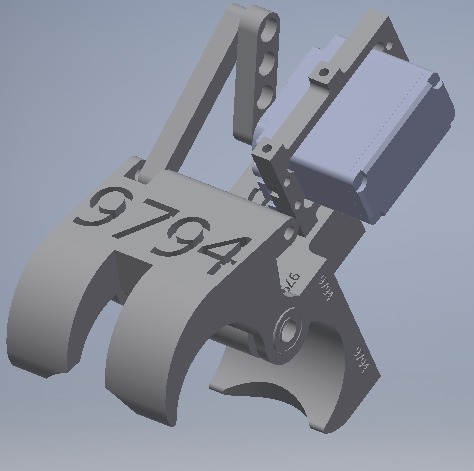
Relic Recovery Relic Claw
thingiverse
This is the Relic Claw designed by FIRST Tech Challenge team 9794 Wizards.exe. It's primarily 3D-printed, but it does incorporate other components. The WITHOUTNUMBERS parts have the 9794 embossings removed. Materials Needed: * 1 Bracket.stl or BracketWITHOUTNUMBERS.stl (3d printed) * 1 RotatingPart.stl or RotatingpartWITHOUTNUMBERS.stl (3d printed) * 1 Linkage.stl (3d printed) * 2 Actobotics 535198 (Flanged 1/2" OD 1/4" ID bearing) * 2 Actobotics 633104 (1/4" Shaft Spacer) * A standard size servo (The 2 servos we have used are the Rev smart robot servo and the Hitec 485HB) * Actobotics 575124 (Standard Servo Plate B) * Actobotics 525116 or other compatible servo horn * 1 1/4" shaft (Minimum length - 2.25") Note: Any 1/4" shaft will work. There are four mounting holes on the bracket.stl part. On our robot, these are connected to an Actobotics ServoBlock which is attached to the robot, but mounting is up to you. To assemble this claw, press the bearings into the holes on RotatingPart.stl with the flanges facing inward. Then, insert your shaft and position the shaft spacers between the bearings and the bracket.stl part. After that, attach the horn to the servo so that the limits are parallel to the servo's long side. Screw in the servo and the servo mount. Finally, screw in the linkage.stl part. If you use this claw, please send us an email at wizards.exe@gmail.com letting us know and attribute the claw to us.
With this file you will be able to print Relic Recovery Relic Claw with your 3D printer. Click on the button and save the file on your computer to work, edit or customize your design. You can also find more 3D designs for printers on Relic Recovery Relic Claw.
