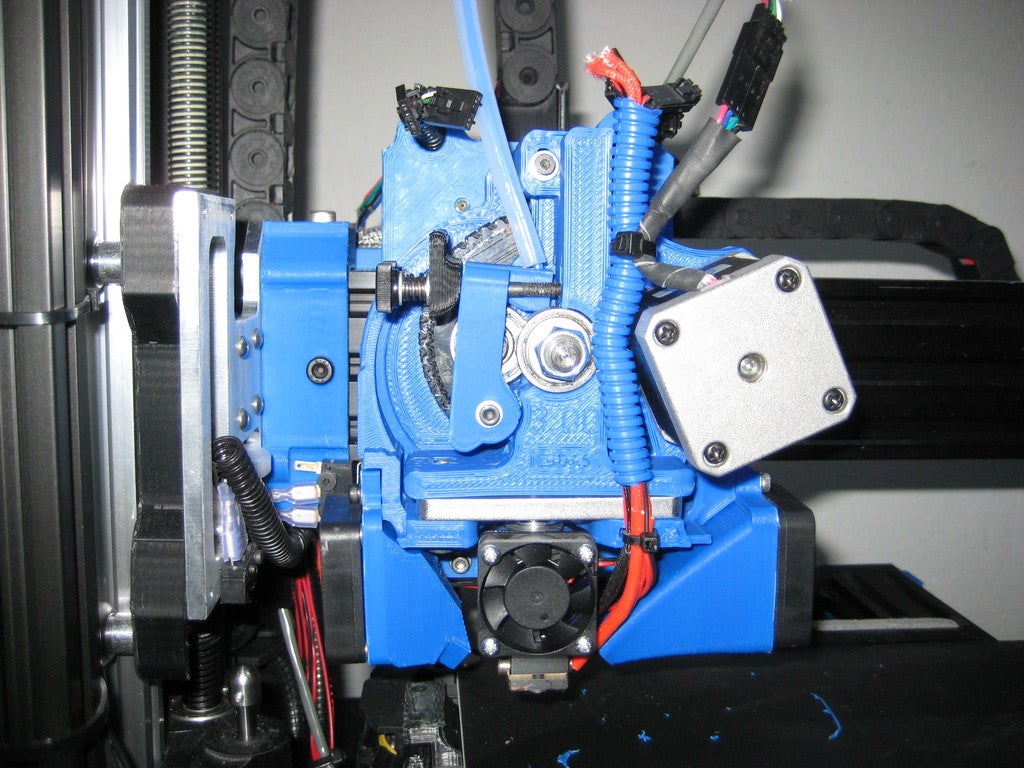
Reinforced Carriage, Taller Extruder mount and Left side fan duct for using E3DV6 with a lulzbot Taz Printer
prusaprinters
<p>This is a variant of the taller extruder modification and my reinforced extruder carriage designed to work with the E3Dv6 using a 6mm metal mount plate. It retains the stock E3DV6 fan mount (switch to a 5v 30mm fan though for use with a Taz) and gets rid of the hexagon left hand cooling duct in place of a very functional, but shall we say less than asthetic fillament cooling duct for the left side.</p> <p>I'm working on it.</p> <p>You will need 11 M3 heat set inserts, several 10mm long M3 bolts and M3 wsahers, one rediculously long 65mm M3 bolt, 2 24 volt 40mm fans and associated wiring, an E3DV6, and a 6mm thick E3DV6 mount plate. Please note that the V5 5.5mm mount plates will not work here. There is one ebay shipper, one amazon shipper and one other I forget shipper that sells a wooden variant that will work.</p> <h3>Print instructions</h3><h3>Category: 3D Printer Extruders Summary</h3> <p>This is a variant of the taller extruder modification and my reinforced extruder carriage designed to work with the E3Dv6 using a 6mm metal mount plate. It retains the stock E3DV6 fan mount (switch to a 5v 30mm fan though for use with a Taz) and gets rid of the hexagon left hand cooling duct in place of a very functional, but shall we say less than asthetic fillament cooling duct for the left side.</p> <p>I'm working on it.</p> <p>You will need 11 M3 heat set inserts, several 10mm long M3 bolts and M3 wsahers, one rediculously long 65mm M3 bolt, 2 24 volt 40mm fans and associated wiring, an E3DV6, and a 6mm thick E3DV6 mount plate. Please note that the V5 5.5mm mount plates will not work here. There is one ebay shipper, one amazon shipper and one other I forget shipper that sells a wooden variant that will work.</p> <h3> Print Settings</h3> <p><strong>Printer Brand:</strong> LulzBot</p> <p><strong>Printer:</strong> TAZ 5</p> <p><strong>Rafts:</strong> No</p> <p><strong>Supports:</strong> No</p> <p><strong>Resolution:</strong> 0.5mm Nozzle</p> <p><strong>Infill:</strong> 85% or better</p> <p><strong>Notes:</strong></p> <p>ABS is reccommended. Or another high temperature thermoplastic</p> <h3> Post-Printing</h3> <p><strong>Instructions</strong></p> <p>Insert the 3 heat set inserts for the fan duct mounts into the carriage and 4 heat set inserts into each fan duct. Print the extruder body and glue the spacer to the back side to support the top. You can omit the glue, it just makes for a cleaner installation. Build the toolhead as normal using a lulzbot extruder idler latch, hobbed bolt, wheels, motors and hardware as needed. Install the 2 24 volt fans - one per duct, then wire them in paralell to a fan header appropriate for your variant of the Taz.</p> <p>Now plug it all in. if it doesn't catch fire and explode, you did it right.</p> <p>Variant note: this version of the hotend has an additional area of reinforcement around the hobbed bolt that may, and again I say "may" only, allow it to print flexible fillament at low speeds. If anyone tries that and succeds before I get a chance to, please let me know!</p>
With this file you will be able to print Reinforced Carriage, Taller Extruder mount and Left side fan duct for using E3DV6 with a lulzbot Taz Printer with your 3D printer. Click on the button and save the file on your computer to work, edit or customize your design. You can also find more 3D designs for printers on Reinforced Carriage, Taller Extruder mount and Left side fan duct for using E3DV6 with a lulzbot Taz Printer.
