Redstone Lamp Night Light
prusaprinters
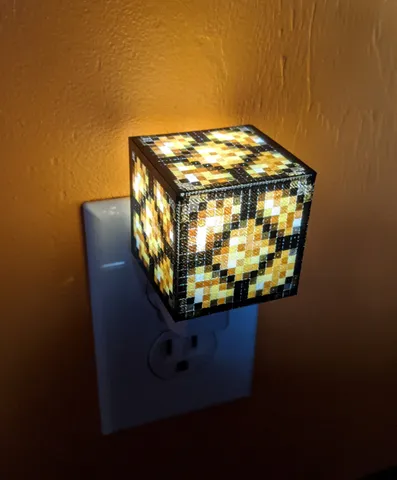
This is a nightlight I designed based on the Redstone Lamp in the game Minecraft. This idea was my justification for purchasing the Prusa MK3S and MMU. Printed with 5 colors and only 11 tool changes, each tile is individually printed with 2 color layers to create the many different tones. Model is printed flat, cooled, reheated to 65deg and folded into a cube shape. There are integrated clips to hold the model in shape. Model is finally fit to a commercially available LED night light (emotionlite ELN-085). Created with OnShape 3d modeling software Print instructionsThis is a complex print with 54 objects so use of the 3mf file is highly advised. While you might be able to print by manually changing the filament (there are 11 tool changes), use of the Prusa MMU is highly recommended. The model components are divided by layer, extruder, and position in the model (there are 5 illuminated faces and an opaque bottom layer with light mount) File Names: the filename has position and color coding. As examples: NightLite - A2 (2).stl A = first color layer (layer 2) 2 = tool 2 (2) = face 2 in the model NightLite - B3.stl B = Second color layer (layer 3) 3 = tool 3 no () = face 0 in the model NightLite - Face1.stl Face = layer 1 1 = tool 1 NightLite - Back_Clips2.stl Back = layers 4+ 2 = tool 2 All A2, B2 are assigned to extruder 2 All A3, B3 are assigned to extruder 3 Filament: This model is printed with PLA 1.75mm filament. Color sequence is critical for tool optimization and layering. I assigned the following colors to extruder 1-5 1 - Clear PLA 2 - Black PLA 3 - Tan PLA 4 - Brown (coffee) PLA 5 - Pink Flesh PLA Printing: Print on a smooth level bed! Layers and infill are critical for the desired effect. The following are my preferred print settings: Layer height = 0.2mm Vertical Shell: Perimeters = 1 Horizontal Shell: Solid layers: top = 1 bottom = 1 Infill: Fill density: 100% Fill Pattern: Concentric Top Fill Pattern: Concentric Bottom Fill Pattern: Rectilinear Skirt: Loops = 0 Forming: After printing, allow the bed and model to cool enough that the model releases. Place the model back on the print bed and heat to 65deg and carefully lift the 2 single sides and bottom (one at a time) so they form a 90deg angle to the front face. With the 3 sides lightly held together, fold the model 90deg over the top face and interlock the edges. Rotate the model again to fold the last joint (back). At this point, the model should be on its back with the bottom hanging down. Carefully press the bottom into the model so the clips engage with the light riser. While you could press the back onto the riser, it spreads the fingers more than needed and leads to a loose joint. The model should now be ready to press onto a nightlight body. LED Night Light I use the Emotionlite ELN-085 LED night light. Simply remove the diffuser lens by sliding sideways, then pull the trim ring off the top (helps to twist and pull). I have included a photo of the disassembled night light body for reference EDIT: I added the gcode for time and filament calculations, I would recommend you slice it yourself.
With this file you will be able to print Redstone Lamp Night Light with your 3D printer. Click on the button and save the file on your computer to work, edit or customize your design. You can also find more 3D designs for printers on Redstone Lamp Night Light.