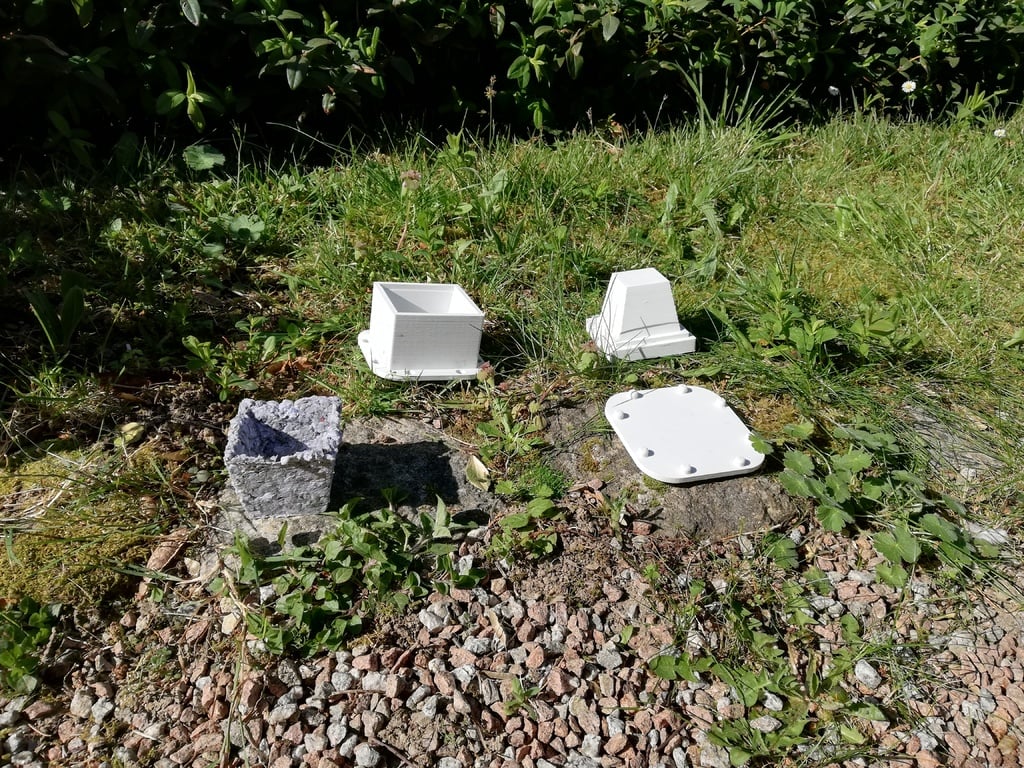
Recycled cardboard pot mold
thingiverse
This project is inspired by the XYZAidan project. XYZAidan's profile can be found at https://www.thingiverse.com/XYZAidan. The original project, "Recycled Cardboard Molding," is available at https://www.thingiverse.com/thing:3912997. To print this project, a 20% infill seems to be sufficient. Printing with a layer height of 0.3 or more can speed up the process without compromising the mold's quality. The mold does not require any special aesthetic appeal. To use this project, you will need some water, a bucket, cardboard or paper, and your 3D printed parts. No glue is required. Cardboard refers to either cardboard or paper. Here are the steps to create a pot: 1. Cut the cardboard into small pieces. They don't have to be extremely small. 2. Place the cardboard pieces in a bucket, add water, but not too much. The cardboard should be fully submerged but not over-saturated. 3. Mix, press, and shred the cardboard with your hands until it forms a paste. This process can be repeated multiple times. After several hours, large pieces will still remain. However, if you repeat this process regularly, after three days, the mixture will become more like a paste. Regardless of how long you wait, you can create a pot. 4. Once you're satisfied with the quantity of paste, place it in the mold and try to shape it before adding more paste. It's recommended not to add too much paste initially and press the mold gently while repeating this process until the mold is almost closed. 5. When you've added enough paste, press it firmly and weigh it down to allow it to dry. A 24-hour drying time is recommended, but it may vary depending on the "paste" consistency. 6. Carefully remove the pot from the mold by pressing gently from the bottom and allowing it to dry for another 24 hours outside the mold. It can be dried in direct sunlight or near a radiator. 7. Congratulations! You now have a pot. Pro Tips: 1. Please use cardboard or paper that is safe for the environment when creating this project. 2. If you're using cardboard with glossy paper, be cautious as it may not be biodegradable and could compromise the mold's integrity. 3. If you're using cardboard with glossy paper, you can remove the paper by submerging it in water. However, be aware that the water will contain a small amount of glue, which may affect the environment. Good Questions: Why did I create this project? Due to COVID-19, I was unable to purchase pots for my mini-greenhouse. Can I water my plants with this pot? Yes, but not excessively, as paper and cardboard act like sponges when wet. When wet, try not to move the pot, as it will be fragile. Will it resist rain? This project is primarily designed for use in a mini-greenhouse, so it should withstand light rain. How long will this pot last? I'm not sure yet. Can I reuse this pot? I suppose you can, but I haven't tested it extensively. Alternatively, you can plant the entire pot using environmentally safe cardboard. Thanks to XYZAidan for his project and ideas. You can find his profile at https://www.thingiverse.com/XYZAidan, and the original project is available at https://www.thingiverse.com/thing:3912997. I also want to thank "Les Frères Poulain" for showing me this type of DIY technique. Their video, "RECYCLAGE de tous les CARTONS !!! Ça redevient dur comme du bois avec cette technique DIY !," is available at https://www.youtube.com/watch?v=qF3U1Pqueps.
With this file you will be able to print Recycled cardboard pot mold with your 3D printer. Click on the button and save the file on your computer to work, edit or customize your design. You can also find more 3D designs for printers on Recycled cardboard pot mold.
