Real World Measurements and Tolerances
thingiverse
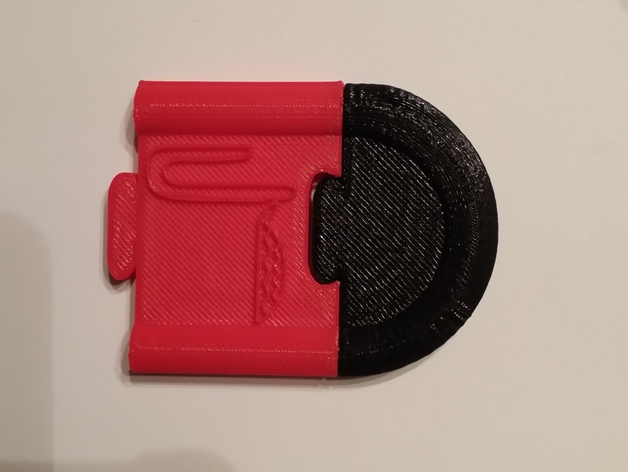
The Purpose of This Lesson We will be learning how to save time, frustration, and filament by making a few calculations in sizing your parts. Print Settings Printer Brand: MakerBot Printer Model: MakerBot Replicator 2 Rafts: No Supports: No Resolution: Standard Infill: 10% How I Designed This I designed the 3D printed parts in Tinkercad. Overview and Background We will be taking measurements of printed parts and depending on the type of "Fit" required, calculate the corresponding values. Each team will have a bag of printed 3D parts and pins to work with. Objectives Through this lesson, students will: Learn design concepts. Learn teamwork. Learn problem-solving techniques. Learn about simple machines and tolerances. Audience Ages: 10-14 Subjects: Robotics Design Technology Physical Science Skills Learned (Standards) National Science Education Standards Grades 5-8 (ages 10 – 14) CONTENT STANDARD B: Physical Science: As a result of their activities, all students should develop an understanding of Motions and forces, Transfer of energy. National Science Education Standards Grades 9-12 (ages 14 – 18) CONTENT STANDARD B: Physical Science: As a result of their activities, all students should develop an understanding of Motions and forces, Interactions of energy and matter CONTENT STANDARD E: Science and Technology: As a result of activities, all students should develop Abilities of technological design, Understandings about science and technology Standards for Technological Literacy – All Ages Lesson Plan and Activity For the purpose of this lesson, we will be using the following conventions: Snug fit = 98% of original size Loose fit = 96% of original size When trying to fit two real-world parts together, you have probably noticed that if you try to put a round peg into a round hole, they almost never fit. The purpose of this lesson is to show you that by taking a few items into consideration, you can save yourself time, frustration, and filament by making a few calculations in sizing your parts. First, determine what kind of "Fit" do you need. Do you need something to fit snugly with little wiggle room or do you need a loose "Fit" where the connecting object is free to spin in the socket? After determining fit, we need to use a set of calipers and measure the inner diameter of the piece that we are going to try and fit into. Next, multiply that number by .98 or .96 respectively to get the fit that you are looking for. So, for the above example: To get a snug fit, you would make the diameter of the inserting part 30.98=29.4mm To get a loose fit, you would make the diameter of the inserting part 30.96=29.76mm Materials Needed To prepare for this lesson, you will need the following supplies: Various printed appendage pieces Set of calipers Calculator Duration of Lesson 60 minutes Rubric and Assessment These reflective questions will help assess student understanding: Based on calculations, how close were your "Fits"? What is one thing you would change about your calculations based on your experience? Are there algebraic and physical principles that can be applied to this activity? How would you modify the percentages to create a better "Fit"? References TryEngineering (www.tryengineering.org) Design Your Own Robot (www.mos.org/robot/robot.html) FIRST Robotics Competition (www.usfirst.org)
With this file you will be able to print Real World Measurements and Tolerances with your 3D printer. Click on the button and save the file on your computer to work, edit or customize your design. You can also find more 3D designs for printers on Real World Measurements and Tolerances.
