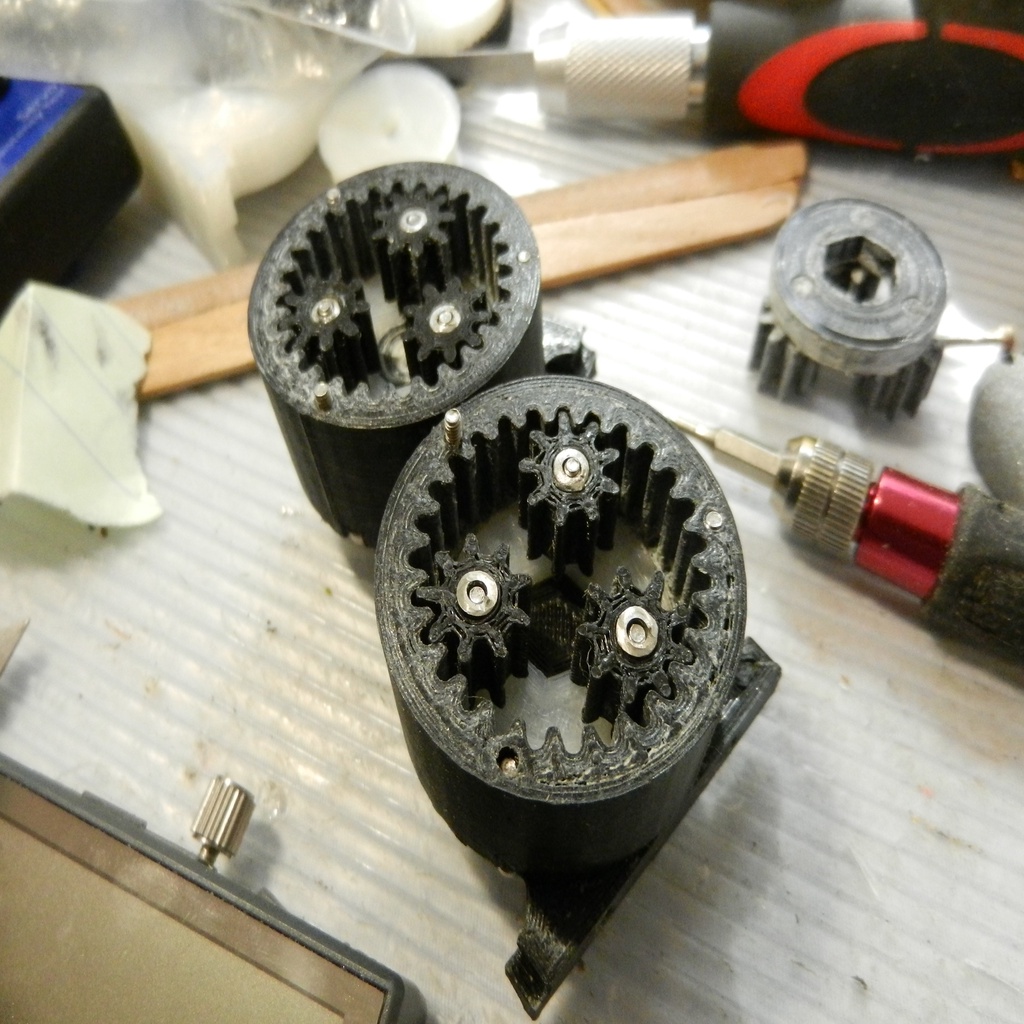
re-mix of Rover 2.0 planetary gearbox parts
prusaprinters
<p>10-5-2019 Update on metal shafts with bushings.<br/>This version has been more durable than prior versions. To date, failures with this version have been strictly from the sun gear on the motor shaft. Typically the gear becomes loose on the shaft & renders that track non-functional. On a couple of occasions the sun gear also broke (probably after being loose from the motor shaft). These failures have typically been associated with somewhat extended high power operation. I never ran across one while operating at lower power ranges. If you have the option of printing at least the sun gear in Nylon, rather than PLA, it might be a viable version for general use.</p><p>An alternative is the 4:1 gear set I did as a remix of the original gear set. That has held up for longer periods of high power operation before needing adjustments. That can be found here: </p><p><a href="https://www.prusaprinters.org/prints/96509-41-gear-set-for-fpv-rover-20">https://www.prusaprinters.org/prints/96509-41-gear-set-for-fpv-rover-20</a></p><p>(NEW UPDATE 9/2019 - METAL SHAFTS ON GEAR CARRIER w/BUSHINGS)</p><p>I built a Rover 2.0 & incorporated the changes made by escexed in his "<br/>Planetary Gearbox Upgrade for FPV-Rover V2.0" to take advantaqe of the 4:1 planetary gearbox.</p><p>After building & testing a bit, I decided to modify the gearbox casing to accommodate use of the original Rover 2.0 motor mount position to better maintain alignment between the bevel gears on main cog & gearbox. Doing so was simply a matter of merging the original Rover 2.0 motor mount to the gearbox output end.</p><p>Not elegant, but it worked. This allows the gearbox to be secured at the output end with 3mm nuts & recessed screws just like the original Rover 2.0 motor mount, as well as 3mm recessed screws in the locations used on escexed's original design.</p><p>I also ran into a lot of flexing on the inner frame top louvers when the long screws were tightened & distorted the frame. This eventually led to a large number fracturing & eventually breaking off. These louvers are very thin & would likely have cracked in normal use at some point even without the distortion. The gaps left by missing louvers allowed a lot of trash to find its way in during off road use.</p><p>I modified the inner frame components to make for a stronger top deck while maintaining the internal clearances by adding 2mm thick "grates" in place of most of the louvers. Air flow may not be as robust, but it still allows for air movement.</p><p>I made another modification. The gear carrier has been a weak point on the build drive line. At high power, heat build up on the shafts allows for distortion & eventual failure.</p><p>I did a re-mix of the carrier in which 4mm dowels are inserted in place of the printed shafts. The gear bores are modified to match the 4mm dowel shafts. I cut 4mm OD stainless tubing to 13.8mm lengths which were pressed into the re-mixed carrier base.<br/>Some run in is needed prior to mounting in the frame to ensure smooth gear engagement.</p><p>While this change allows a longer run time before failure, I found that extended use of high revs can result in enough heat build up to allow the carrier plate holes to soften & deform. It lasts longer than with the printed shafts & allows higher speeds, but will eventually fail if used for a significant time at higher speeds.</p><p>A new variation, similar to the 4mm dowel approach, is with the carrier modded for 2mm cap head screws (12mm long). A counter-sink area allows the cap end to be screwed flush to the carrier surface. The same 4mm OD 2mm ID stainless tubing is used to make bushings for the planetary gears & you use the same gears as with the 4mm dowel approach. The idea is that there would be no plastic/metal turning interface to build up heat that can be transmited to the carrier & potentially soften it enough for deformation. I have done some initial function tests but it has not been tested for long term durability.</p><h3>Print Settings</h3><p><strong>Rafts:</strong></p><p>No</p><p> </p><p><strong>Supports: </strong></p><p>Yes</p><p><strong>Infill:</strong></p><p> </p><p>100%</p><p><strong>Filament:</strong> any PLA <br/> </p><p><strong>Notes: </strong></p><p>When slicing the gearbox housing, it should be printed with the output side down & using supports. Please note that the mount lower edge is not completely square, it is off just a hair.</p><p>In Cura, to ensure the proper print orientation, set the housing on the build surface with the mount side up & open side down. Use the "lay model flat" option so the open side is flush & parallel to the build surface, then rotate the model 180°. This will ensure flat surfaces & vertical orientation for the gear teeth & minimize the amount of support material. You can preview the sliced file to verify that bearing surfaces are truly flat & square.</p><p> </p><p>I printed all parts @ 100% infill. For the gearbox housing, choose a line width that provides for the most solid gear teeth possible.</p><p> </p><p>Category: R/C Vehicles</p>
With this file you will be able to print re-mix of Rover 2.0 planetary gearbox parts with your 3D printer. Click on the button and save the file on your computer to work, edit or customize your design. You can also find more 3D designs for printers on re-mix of Rover 2.0 planetary gearbox parts.
