RCM Jig with Internal Wire - M600 Pause Needed
prusaprinters
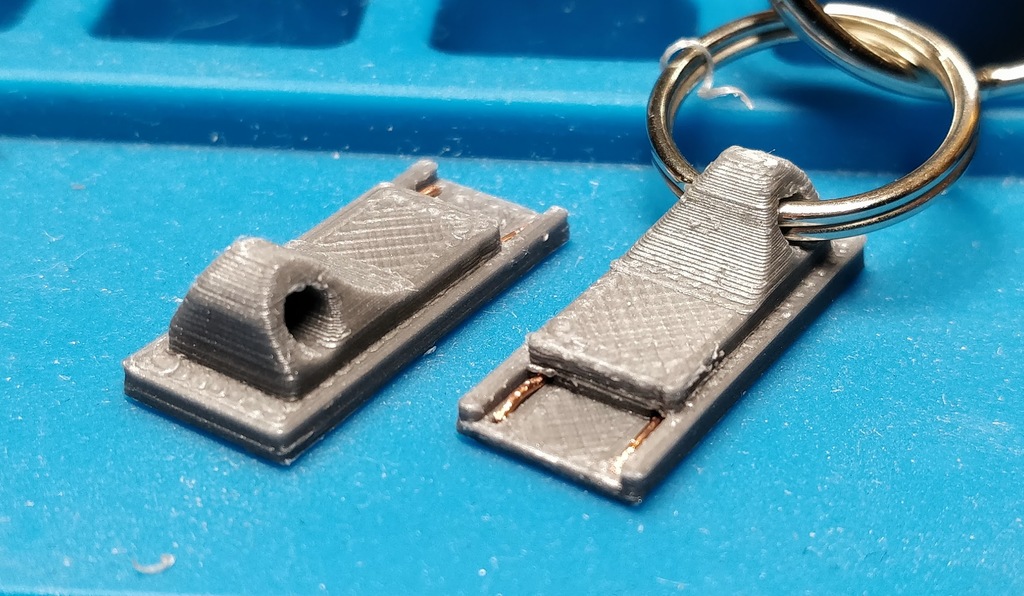
<h3>This is a remix of the excellent <a href="https://www.thingiverse.com/thing:2973594">RCM jig by Sulya</a>. See his model for instructions.</h3> <p>By far, the hardest part of making Sulya's jig was inserting the copper ethernet wire through the holes, so I gave up and just paused my print at 1.6mm and put the wire in before the print finished. This worked so well that I decided to remix the model and close up the back so the wire was a permanent fixture of the piece and could never be pulled or fall out.</p> <p>There are two versions: the one with the squared back will support a wire bent using Sulya's bending template and the rounded one (my preference) makes it exceedingly easy to place the wire in the slot and trim to length afterwards.</p> <p>NOTE: you absolutely must put a M600 after the layer at 1.6mm finishes, or you need to watch the print and pause near the end of the layer at 1.6mm (in case your printer doesn't support M600 for whatever reason). Place the wire in the slot and make sure nothing protrudes above the last layer, then resume the print.</p> <p>The only potential downside to this model that I can see is that there is no relief out the back side for the wire to slide if the wire jams up against the contacts in your Switch. Be careful when applying this jig to your switch, it will not be forgiving if you have allowed one of the wires to bend out of place or if you cut them too long. Of course, I assume no fault or responsibility if you use this wire in a way other than directed or cause any damage to your self or your property.</p> <p>Good luck!</p> <h3>Print Settings</h3> <p><strong>Printer Brand:</strong></p> <p>Prusa</p> <p class="detail-setting printer"><strong>Printer: </strong> <div><p>i3 MK3</p></div> <p><strong>Rafts:</strong></p> <p>Doesn't Matter</p> <p class="detail-setting supports"><strong>Supports: </strong> <div><p>No</p></div> <p><strong>Resolution:</strong></p> <p>0.1mm</p> <p class="detail-setting infill"><strong>Infill: </strong> <div><p>100%</p></div> <p><strong>Filament:</strong> 3D Solutech PLA <br/> <p class="detail-setting notes"><strong>Notes: </strong></p> </p><div><p>Like the original model from which this is remixed, print with only 1 perimeter or certain small details (namely, the notches that the ends of the wire fit in to) will not come out correctly.</p> **IT IS REQUIRED TO PAUSE THE PRINT AT 1.6mm AND/OR PUT AN M600 COMMAND IN YOUR PRINT AFTER 1.6mm LAYER FINISHES**. If you do not do this, you miss the whole point of this model: just print the original one that I remixed. <h3>How I Designed This</h3> <p>This remix was designed in Tinkercad: <a href="https://www.tinkercad.com/things/g2gPLocZ4v3">https://www.tinkercad.com/things/g2gPLocZ4v3</a></p> </div></p></p></p> Category: Video Games
With this file you will be able to print RCM Jig with Internal Wire - M600 Pause Needed with your 3D printer. Click on the button and save the file on your computer to work, edit or customize your design. You can also find more 3D designs for printers on RCM Jig with Internal Wire - M600 Pause Needed.
