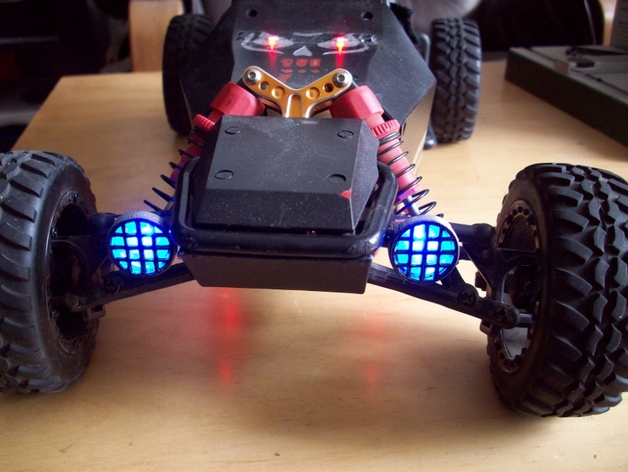
RC Sandmaster Front Light
thingiverse
Front lights for the Sandmaster 1:10 Buggy are a great addition. It's best to place the model with reflectors facing down when printing. You'll need two LEDs, 5mm each (and possibly corresponding resistors), chrome spray (possibly acrylic spray), sandpaper, cable, and a socket/plug. After printing, smooth out the inner surfaces of the reflectors, which doesn't have to be perfect. Except for the reflectors, everything gets slightly sanded down and then sprayed with one or two coats of acrylic paint until it's dry, otherwise there will be problems with the chrome paint that comes next in the reflectors. If you don't have acrylic paint, apply two coats of chrome paint, if the first coat isn't enough. Then drill out the LED sockets carefully using a 5mm drill bit until the LEDs fit tightly. Next, assemble the electronics as desired. I used two blue LEDs. The cables can be threaded through the tubes to the center and secured with a socket/plug, depending on what you need. Now you can power the LEDs directly from a single lithium-ion battery (3.7V) or connect them to a free channel on the receiver using a switch component. I added a 56 ohm resistor in series with each LED. For the caps, cut two transparent plastic pieces to size. The holes for securing the parts were not included in the model and need to be measured and drilled separately by each user - diameter: 3mm, center-to-center distance: 12mm for the Sandmaster. Measure your own model if it fits. I hope you like this and soon see some illuminated Sandmasters driving around, send your photos!
With this file you will be able to print RC Sandmaster Front Light with your 3D printer. Click on the button and save the file on your computer to work, edit or customize your design. You can also find more 3D designs for printers on RC Sandmaster Front Light.
