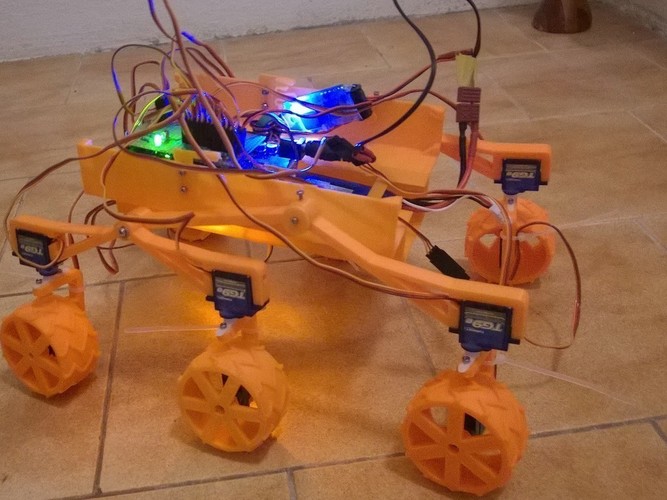
RC MARS Rover
pinshape
RC Vehicle Inspired by Mars Rover Curiosity The innovative RC vehicle is heavily inspired by the remarkable Mars rover Curiosity. The construction process involves 3D printing of parts, which brings a new level of precision and customization to the project. Main Processing Unit: Arduino Mega At the heart of this incredible device lies the powerful Ardunio Mega, an advanced Main Processing Unit that handles all the complex calculations with ease. Movement and Steering: 9g Servos To achieve smooth movement, six 9g servos with metal gear are utilized for wheel rotation. Each servo is precision-engineered to provide a full 360-degree range of motion. For steering, another set of six standard 9g servos is used, ensuring precise control and stability. Control: Standard 4-Channel System The vehicle is controlled through a standard 4-channel system, allowing for seamless navigation and manipulation of the device. Power Supply: 2S or 3S Lipo Battery A robust power supply system is provided by a 2S or 3S lipo battery, connected to a reliable SBEC (Switched-Mode Power Supply) that ensures a stable voltage output of 6V. Must See: Rover Mk II on YouTube The impressive build is showcased in a captivating video available on YouTube. This must-watch video provides an in-depth look at the device's capabilities and features. Instructional Videos: 1. Presentation Control - https://www.youtube.com/watch?v=wAg5VBJ3dfA 2. Overview of Features - https://www.youtube.com/watch?v=4kdi7T4iqAI 3. Detailed Walkthrough - https://www.youtube.com/watch?v=Wh_syhhbGSI Simple Instruction Guide: http://www.mochr.cz/index.php?id=rc-rover Warning: New Homepage URL The official website for the project has been updated to a new homepage, located at http://www.mechr.cz/index.php?id=rc-rover. Required Components: - 6x 9g Servos (TG9e, TowerPro SG90) - 6x 9g Servo with Metal Gear (TGY-5009M) - Arduino Mega 2560 - SBEC Lipo 5/6V 5/6A for 3S Lipol - 3S Li-pol Battery (1300mAh) - 12x Servo Extension Cables (10-30cm) - 12x Resistors (2.2K ohm) - Universal PCB - Green LED, Red LED, Yellow LED (3mm each) - 3x Resistors (160 Ohm each) - Some Pins - 42x Screws M2x6 - 6x Screws M2.5x6 - 2x Screws M3x25 - 8x Screws M3x6 - 8x Nuts M3 - 4x Nuts M2 - 4x White LED (5mm each) - 4x Red LED (5mm each) - RC TX and RX - Connector to Arduino - Cable Ties - 3D Printed Parts Arduino Setup: After assembling the device, it is necessary to center the servos. This involves uploading a specific file to the Arduino. Servo Calibration File: // Data from calibration servos - center position of servo int W1_center = 1350; int W2_center = 1390; int W3_center = 1360; int W4_center = 1370; int W5_center = 1435; int W6_center = 1355; int S1_center = 1500; int S2_center = 1480; int S3_center = 1420; int S4_center = 1410; int S5_center = 1480; int S6_center = 1480; Calibration of RX Signal: Now, it is necessary to calibrate the signal from the RC. Connect the RX to the PCB and Arduino to a PC. Set the control stick on TX to neutral, then use the serial monitor to write some values. Copy these values into Excel, calculate their average (about 50 values are sufficient), and repeat this process for the second channel. Servo Modification: Servos with metal gear are used for wheel rotation. To achieve continuous rotation, it is necessary to modify them by cutting off the potentiometer, adding two resistors, and cutting off a pin on the tooth wheel. Example Instruction: https://learn.adafruit.com/modifying-servos-for-continuous-rotation/overview
With this file you will be able to print RC MARS Rover with your 3D printer. Click on the button and save the file on your computer to work, edit or customize your design. You can also find more 3D designs for printers on RC MARS Rover.
