RC Jet Boat
thingiverse
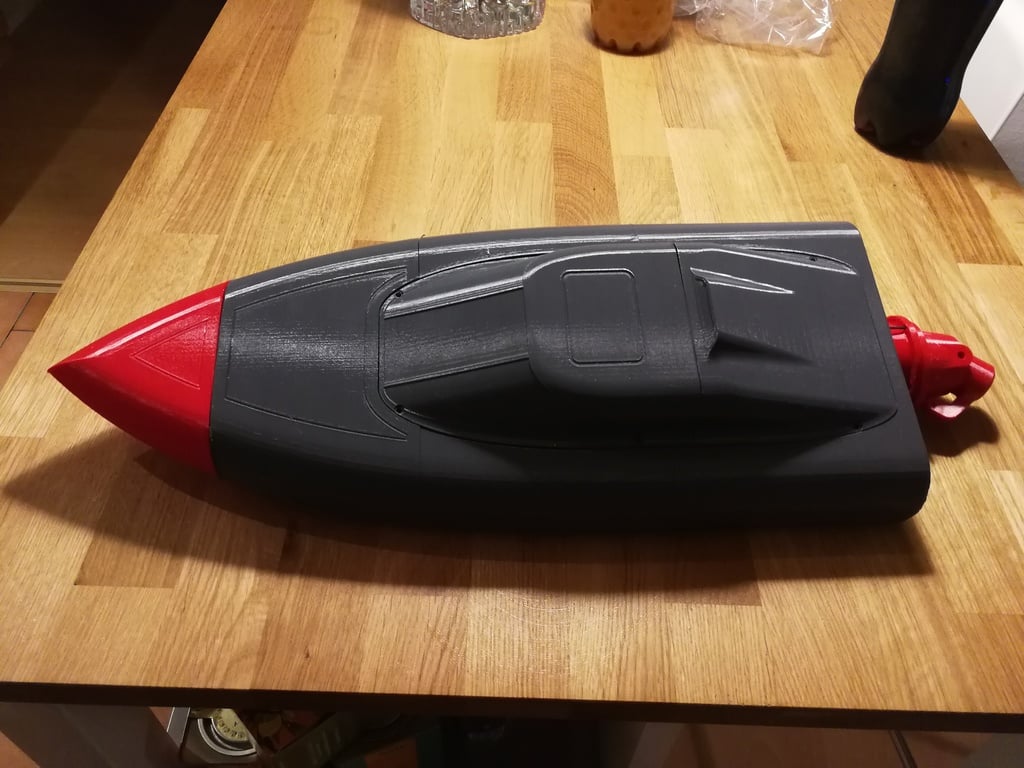
The boat remains a work in progress. Update September 13, 2019: I added step files so you can better modify the boat according to your needs. Update July 7, 2019: I added a new nozzle to reduce motor current. Initial tests looked promising. You will need a 4mm shaft (approximately 170mm long), two ball bearings with an 8mm outer diameter and a 4mm inner diameter. The jet is attached using M4 screws; the rest use M3. Note that the four M4 screws go directly into the Jet without nuts. All screw holes are designed to thread themselves into the plastic. You will also need two M5 screws for the jet nozzle. The frontend and deck have holes that align the parts with 1.75mm filament. For assembly, simply glue the parts together, then sand the gaps and leave the sawdust in place. Apply glue to the gap, and it will be watertight. Any standard servo will fit. I powered it using a four-cell Lipo and a 2200KV inrunner motor. It was extremely fast but required a lot of torque for the large propeller, so you may want to consider using an outrunner motor. To get the deck watertight, I used duct tape. Also, be sure to check out my Instagram for other projects (same username). Since this boat has no name yet, if you have an idea, write it in the comments. The first tests were conducted with a very powerful setup. You can see a short video of it on my Instagram. It utilized a 2200KV 1:8 scale motor on four cells and required approximately 240 Amps peak. This was far too much and resulted from too much restricted flow in the jet. So, we must redesign the propeller and rectifier.
With this file you will be able to print RC Jet Boat with your 3D printer. Click on the button and save the file on your computer to work, edit or customize your design. You can also find more 3D designs for printers on RC Jet Boat.