RC boat
thingiverse
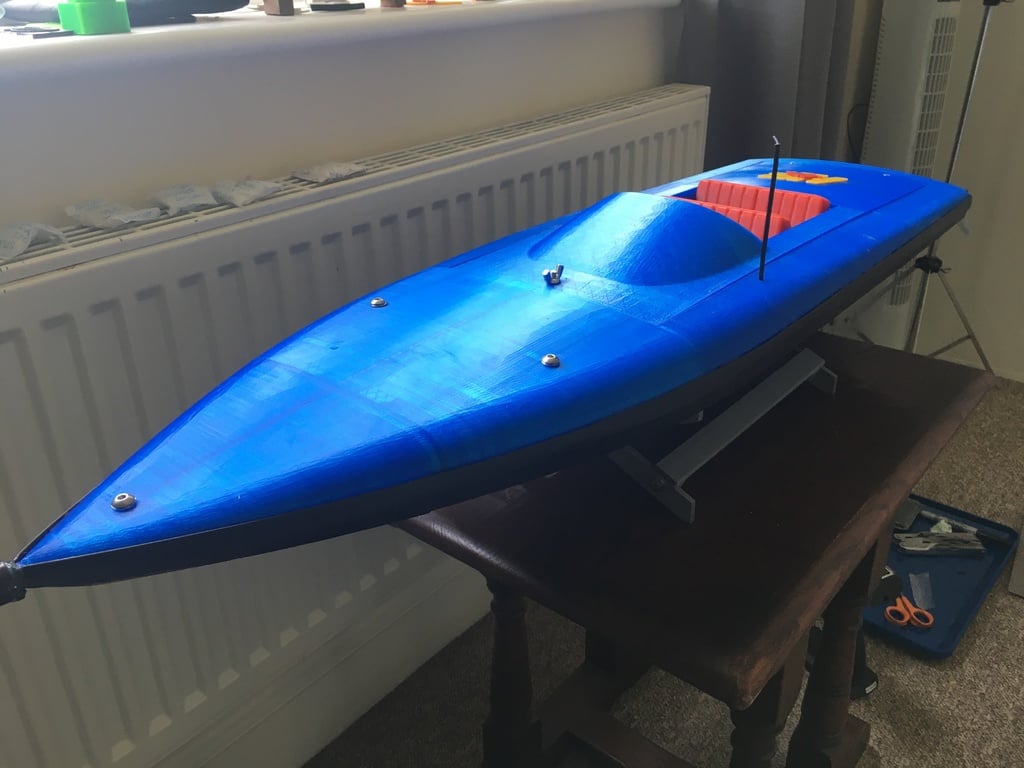
Edit June 18, 2020: Having put this boat through its paces, it works flawlessly and looks fantastic, especially if you're aiming for a two-color design with regular shaft drive. I've since switched back to the single-color version and created an RNLI version of this boat, equipped with all the necessary kit to make a top-notch rescue boat. It's on its way! This is a highly customized version of the RC boat from Sergey2484, primarily designed to make it more like a real boat. I built it using Tinkercad as a hobbyist, and it works, looks super neat, and you'll have loads of fun with it. The LOA (Overall length) measures 916mm. I also wanted to create some common ground between Barspin (Daniel Noree) engineering work on the OpenRC F1 car I built and this boat. To achieve that, I modified the servo holder and motor mounts as well as the pinion so you can fit the same electrical hardware from the OpenRC F1 car directly into the boat. The motor RPM and prop size are connected - high RPM isn't always ideal in water. I used a lower rpm 55T instead of the higher rpm 35T in the car, and it's an absolute blast to drive, with plenty of speed. You could certainly opt for a brushless setup, but too much RPM will cause the propeller to spin out of control in the air, so I decided against redesigning it for any water speed records. To enable this to be two-color printed and give it a finish more like a real speedboat, I split each section into a hull and top section. From front to back, they're labeled 1 to 5 as you'll see from the STLs. First, assemble the hull sections using silicone sealant and M5 bolts (see below), guided by the propshaft (fits between hull 4 and 5) to ensure everything aligns properly. When dry, remove any excess silicone, lightly sand the hull, and spray lots of car lacquer spray from DIY stores or car accessory dealers to seal the hull and make it slippery. Next, print the top sections, add a small bead of silicone sealant, and bolt them together. Using a shower seal held in place by sealant along the top edge of the hull section, install the adapter blocks in hull 2 and 3, then bring the top section down onto the hull and tighten it up. It's just like building a real boat to marry these two sections together. If you have any polystyrene, fill voids in case you accidentally crash into something and want to save your boat from the depths. Enjoy!
With this file you will be able to print RC boat with your 3D printer. Click on the button and save the file on your computer to work, edit or customize your design. You can also find more 3D designs for printers on RC boat.