RC Boat 134 parts - 1907 TUG from DAMEN
prusaprinters
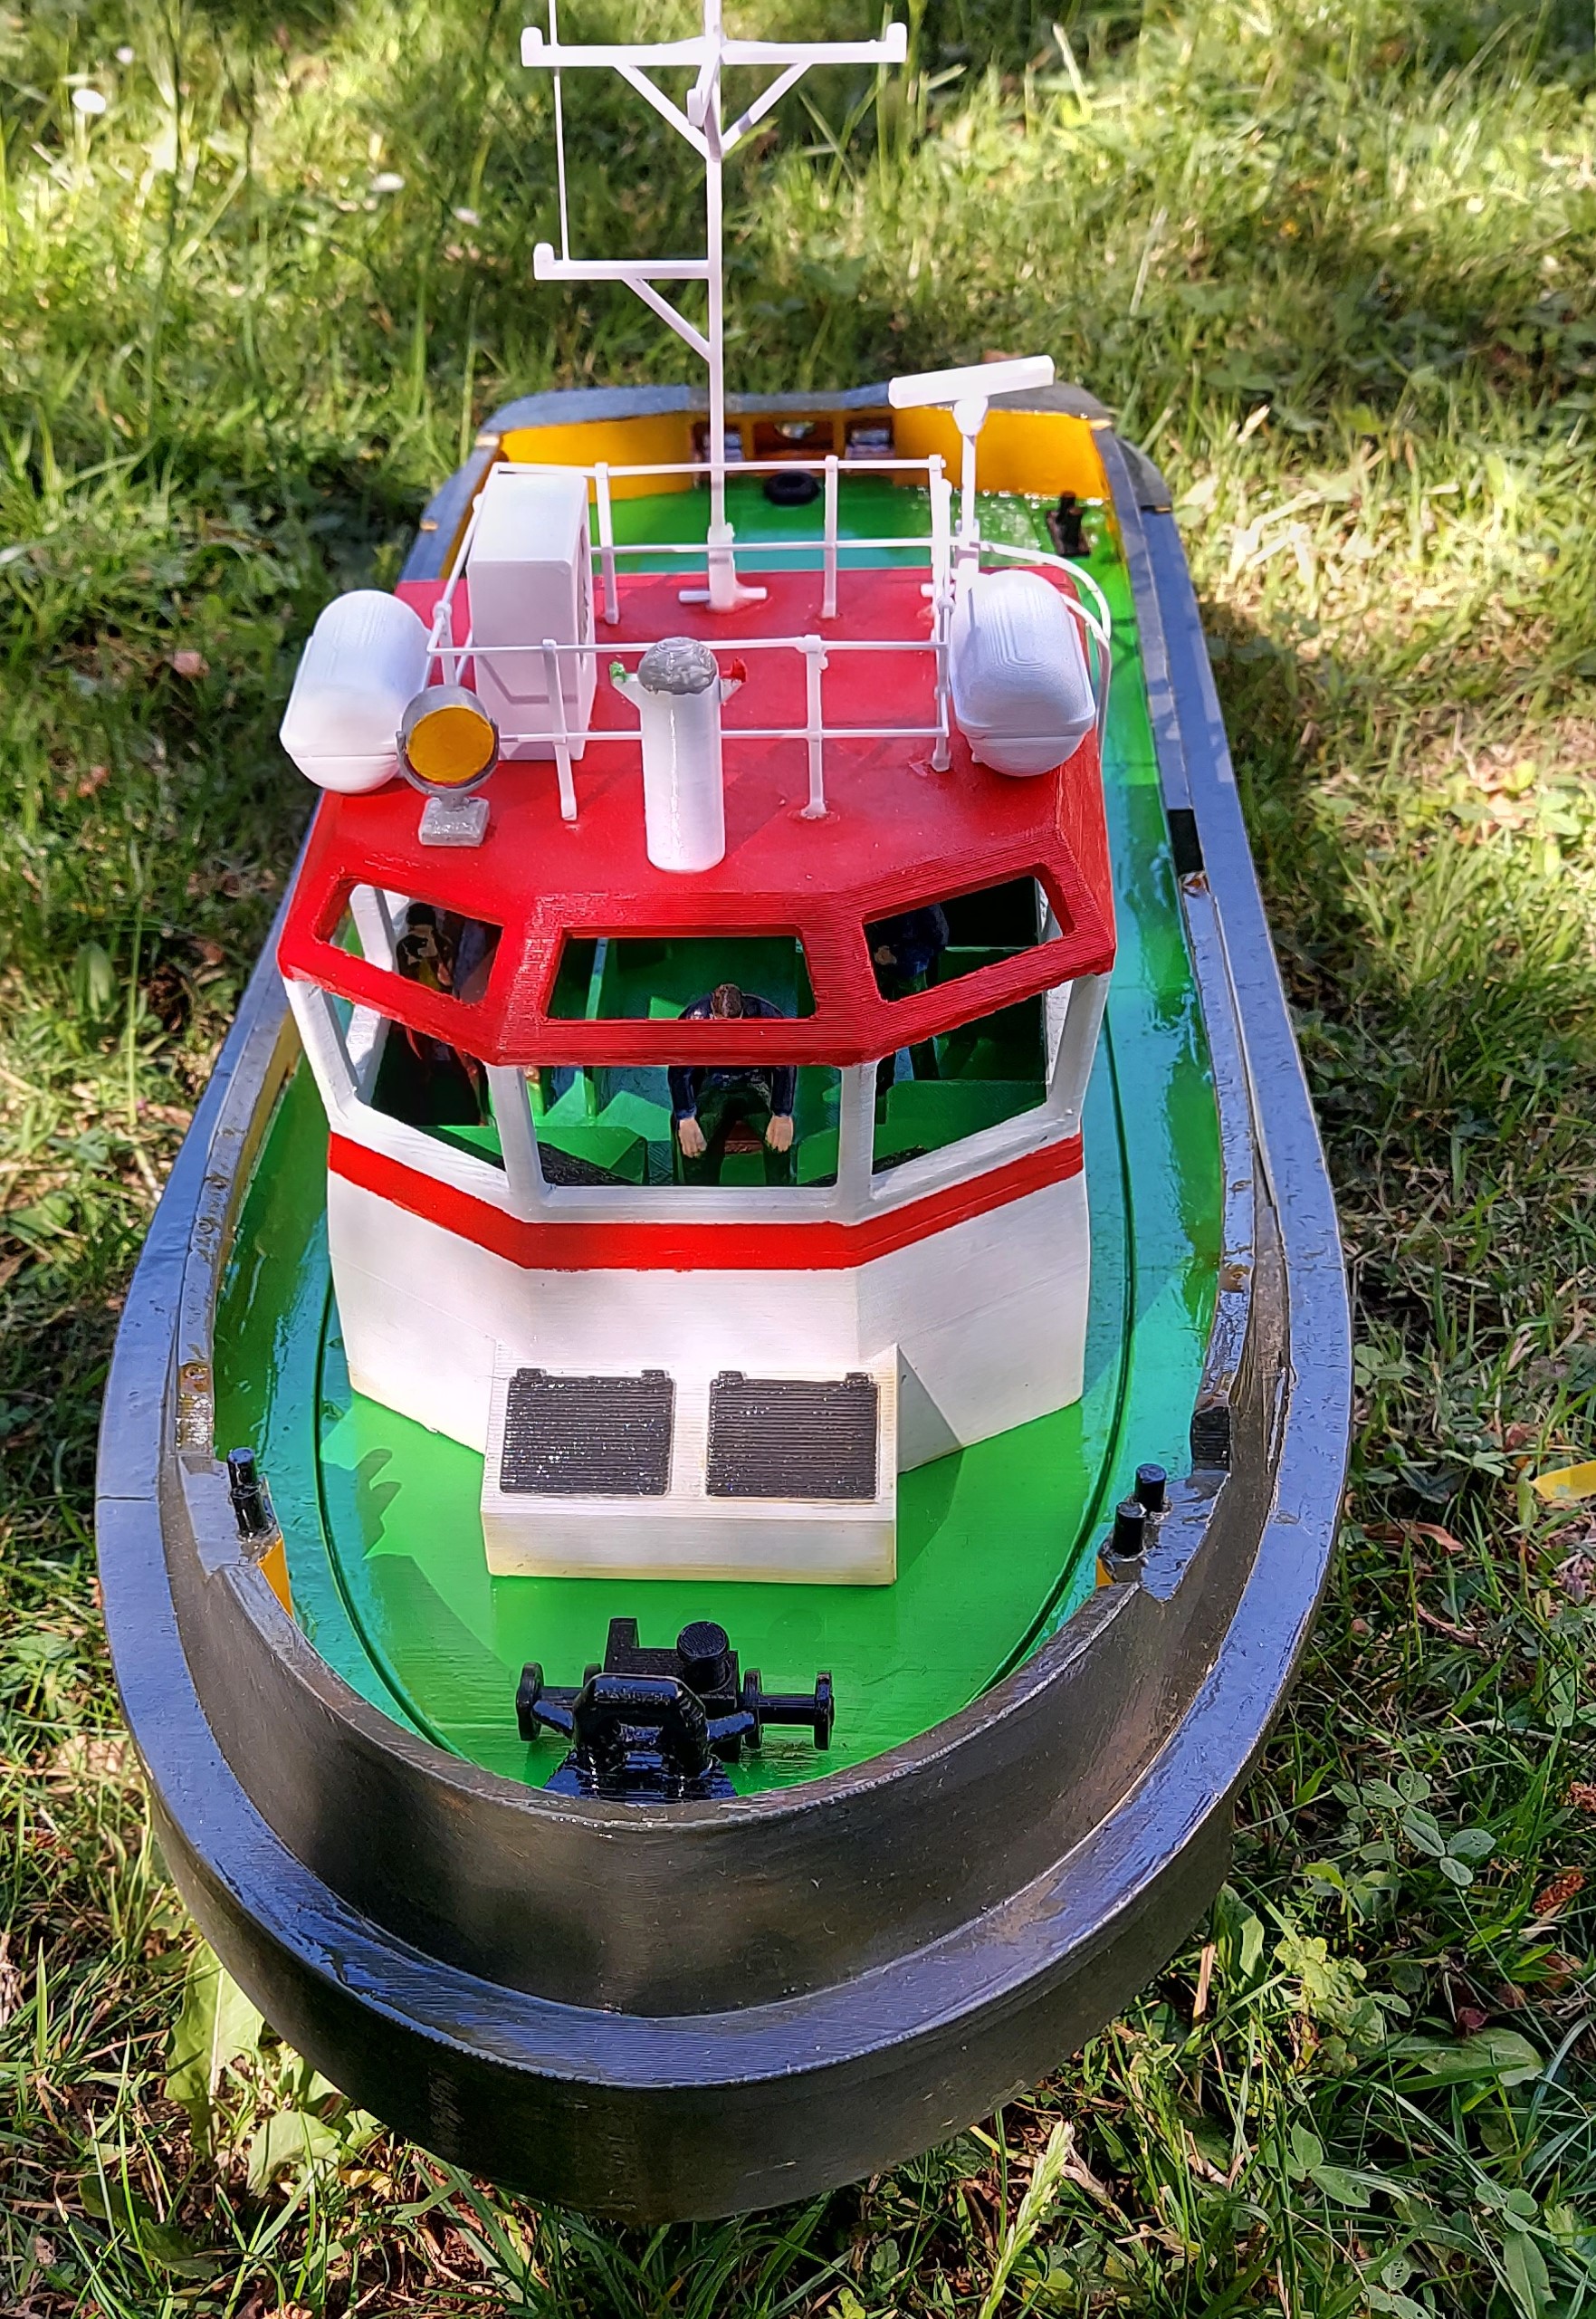
<p>11/22/22 update: If you are interested by RC boats check my other design at</p><p><a href="https://www.printables.com/model/322399-zryw-1-an-hydrofoil-rc-passenger-boat">https://www.printables.com/model/322399-zryw-1-an-hydrofoil-rc-passenger-boat</a></p><p>------------------------------------------</p><p>This is a project I did in 2021. I'd been toying with Fusion 360 for a while and I was looking for more challenge as intersecting cubes and cylinders can become quite boring after a few designs… I wanted something “real” with some complexity. So, I came up with the idea of building a boat; as blueprints were quite difficult to come by, I decided to use the famous 1907 Damen Tug. There is plenty of information on their website and a virtual tour that helps a lot. And as in shipbuilding, each ship is different (depending on the customer requirements) my 1907 tug is not a model of any of them. Also remember, my goal was not building a model but to do something cool that looked somehow like the real thing but with some streamlining. </p><p>The scale is 1:33 so the boat is 59.2 cm long for a real-life length of 19.54 meters.</p><figure class="media"><oembed url="https://youtu.be/6hSMCJPMkv8"></oembed></figure><p>Well, my tug boat did a few rounds at a local pond (small lake really), (see video) so one can tell that my design was proven: It can print, and it was able to go a few hundred yards! However, as it is a 2 propellers design, one of them rotates clockwise while the other one rotates counterclockwise… A nice way to lose a propeller while in the middle of the pond. So, you should glue the propellers to the shafts!</p><p>As for the Fusion 360 challenge, I think I used the software to some of its limits (which may also be due to my learning curve). One annoying thing that kept happening for some reason is that when modifying something someplace in the design it would break the design in non-related part. F360 would misplace the names of the bodies and the “combine bodies” or “split body” commands would fail. And make 1/3 of the design go red… Grrrr. I had 2 versions open all the time and had to fix the new one by looking at what was in the previous (correct) one. Rinse and repeat. You know, with hundreds of bodies and tens of components…</p><p>This uses a lot of PLA and takes a long time to print. Printing the 7 parts of the hull takes 3 days. I have a Prusa i3 MK3S so my plate is not huge and I needed to break the design in multiple parts. </p><p>But the Prusa is very reliable, and I had very few reprints due to printing problems… Most of the reprints were in fact design problems. I also printed the hull in 1/3 scale using the slicer (prusaslicer) to see how it was printing. I learned that the fact that overhangs print well at 1/3 is not a guarantee they will print well at full scale! Obvious, if you think about it: physical distance is what counts vs the design. But as this was inside the boat it didn’t matter so much. As you can see the hull is quite thick.</p><p>There are 134 parts, and a few props I got from other designers like the buoy, the anchor or 2 sailors a lady photographer and a dog! </p><p>Mostly, I’m only including my parts. When there is an exception the printing instructions mention the link to the original design (kudos to them!). I may have rescaled them (to fit the model scale).</p><p>As for print instructions, well, I hope that if you are trying to print this it means you have a good reliable printer and that you are not a rookie. Do NOT use a cheap noname printer!!! You’ll need to figure some things yourself! There is some post-processing to be done with sandpaper, glue (Loctite type). Use some wood filler, plaster coating and … paint with acrylic water-resistant paint. You will notice that one part of the hull (actually the deck, but design wise it’s the hull) can be removed and is held by a big PLA screw. The design of the dual rudder with one servo plus the fact that it needed to be watertight while blocked vertically lead to that.</p><p>I have made some sort of a bill of materials which is one folder per component. I have included a pdf file for each folder with some printing instructions and printing time estimates.</p><p>I bought all the RC stuff I used from the French AZ site. You will need</p><ul><li>2 batteries, one for each motor (easier); you need to decide how many cells; I chose two 2S 5000 mAh. 2S means 2 cells and they deliver 7.4V</li><li>2 motors; I used two 2216-880V brushless motors </li><li>1 servo (for steering); I used a MG90S. Usually you get a copy not the original one from Tower Pro. But they work (sigh)</li><li>2 brushless ESC power regulators (30A will do)</li><li>1 RC command + receiver (I used a Flysky FS-T6 6CH and the R6-B receiver)</li></ul><p>My 2 cents on motors: They are rated in turns (T) and KV plus you have a set of numbers that define the size of the casing. It’s a real mess of multiple standards mix-ups. For a boat you need slow motors (you won’t take off anytime soon!) with torque - that means low KV. 880V means that for 7.4 volts you get a maximum speed of 6512 RPM. 2216 tells you the size of the casing (not with a straightforward rule however !). And you need to know this as it is going inside your design, so dimensions matter!</p><p>Motors are mainly designed for RC cars (bigger motors) and drones (smaller ones). The 2216 is usually used for quadcopters so you have 4 motors to lift a fairly small object. Two such motors are enough for this boat.</p><p>The Flysky: As the name may suggest this is best to fly RC planes or helicopters! So, you will need to adapt this to a boat and use some of the features to get one motor turn clockwise and the other one counterclockwise. Setting the 0 RPM for both motors may also be tricky. You will also need to adjust the servo angle and set the 0 angle. Plenty of tutorials on YouTube…</p><p>From the model shop you will need </p><ul><li>2 propeller shafts - external diameter 6 mm length 211 (I used the 301-23 from RABOESCH)</li><li>2 dual couplers (ca 53 mm)</li><li>2 propellers (1 Right & 1 Left) with a diameter of 5 cm (I have designed 2 3D printed props but they are not as good as the market ones)</li></ul><p>For the buoyancy tuning I've added parts I call ballast in the front where you can pour nuts for the weight.</p><p>I hope you like the design and it gives you some ideas for your own.</p><p>PS: I've added a picture of the steering part; the right rudder has the vertical blocker on while I've hidden the left blocker so you can see mounting steps.</p>
With this file you will be able to print RC Boat 134 parts - 1907 TUG from DAMEN with your 3D printer. Click on the button and save the file on your computer to work, edit or customize your design. You can also find more 3D designs for printers on RC Boat 134 parts - 1907 TUG from DAMEN.