RAWR TFT Firmware Artillery 3D - With M600
thingiverse
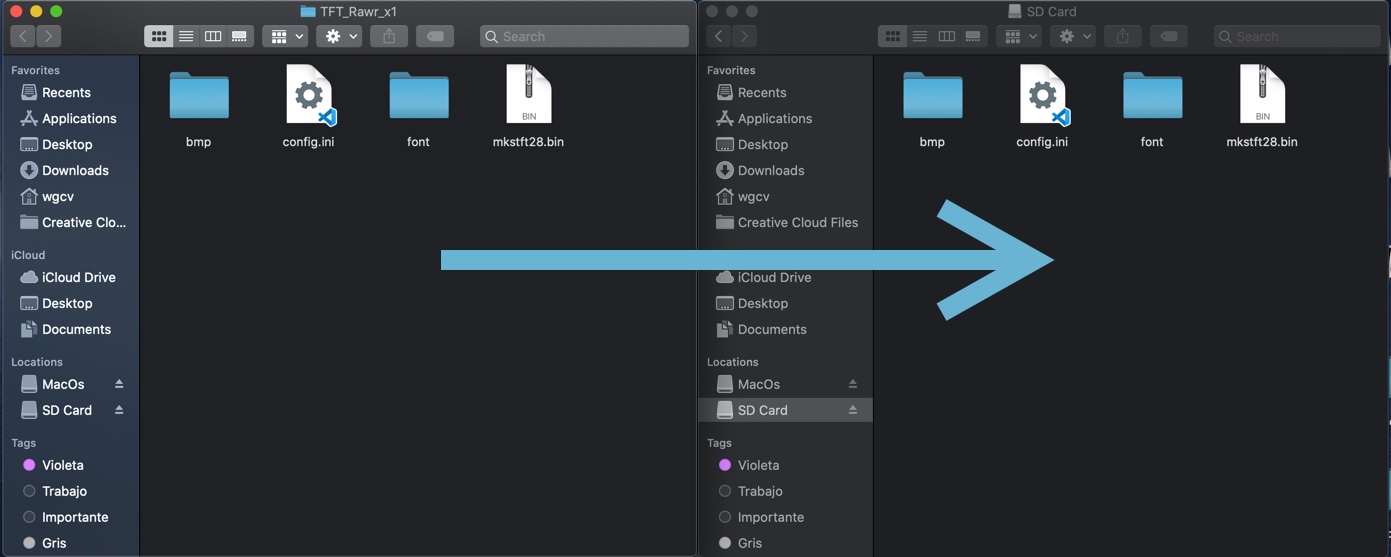
RAW TFT Firmware for the Artillery 3D Printer  <p align="center"> <img width=1080 src="https://raw.githubusercontent.com/wgcv/RAWR-TFT-Firmware-Artillery3D/docs/img/readme-banner.jpeg" /> The most powerful TFT Firmware for the Artillery X1 and Genius keeps the vanilla essence but with incredible tools. </p> #Feature - M600 from USB and MicroSD (Pause, Change Filament and Resume without changing Marlin) - Pre-Heat - PID for ABS and PLA - Extrude Calibration (E Steps) - Filament Change - Baby Steps - Gcode Console - Change configuration without rebuilding (config.ini file) - Auto Leveling and Manual Leveling (5 Points) #How to setup the TFT firmware 1. Download the last release from https://github.com/wgcv/RAWR-TFT-Firmware-Artillery3D/releases 2. Unzip the download file. 3. Copy the files `mkstft28.bin` `config.ini` and the folders `bmp` `font` to the root of a blank SD Card (less than 8GB and formatted as FAT32). 4. Insert the SD card in the TFT's SD card slot and restart the TFT by pressing the reset button or disconnecting and connecting the power cable. 5. Wait for the firmware, configuration, font, and icons to update.  If you get the error message: "NO PRINTER ATTACHED", go to settings->BaudRate->250000 (Or try it with the baud rate of your marlin, normally 115200 or default artillery firmware 250000). #Editing configuration The Firmware can be configured using the **config.ini** file. - To edit the pre heat values you can check the lines `224` to `231`, where the `T` is the extruder temperature and `B` the bed temperature. - For editing the bed size you can edit the line `155` for the x1, with default values of `size_max:X300 Y300 Z400`, and the genius `size_max:X220 Y220 Z250`. - For showing the flow and speed in the status screen change the line `308` to `show_status_speed_flow:1`. #Updating Firmware Configuration To update the Firmware configuration: 1. Edit the settings in **config.ini** 2. Copy the **config.ini** file to the root of the SD card (the SD card capacity should be less than or equal to 8GB and formatted as FAT32) 3. Insert the SD card in the TFT's SD card slot and restart the TFT by pressing the reset button or disconnecting and connecting the power cable 4. The TFT will update and store the configuration from **config.ini** file #Themes You can create your own themes changing the BMP images and share the link opening a PR. ##Reset To reset the TFT's touch screen calibration, create a blank file named `reset.txt` and place it in the root folder of the SD card. Insert the SD card into the TFT's SD card reader and power cycle your printer to start the reset process. #Repo https://github.com/wgcv/RAWR-TFT-Firmware-Artillery3D Feel free to collaborate, report issues, PR or sponsor it on [PayPal](https://paypal.me/wgcv).
With this file you will be able to print RAWR TFT Firmware Artillery 3D - With M600 with your 3D printer. Click on the button and save the file on your computer to work, edit or customize your design. You can also find more 3D designs for printers on RAWR TFT Firmware Artillery 3D - With M600.
