Ratrig v-core 3 dual x-rail mod
prusaprinters
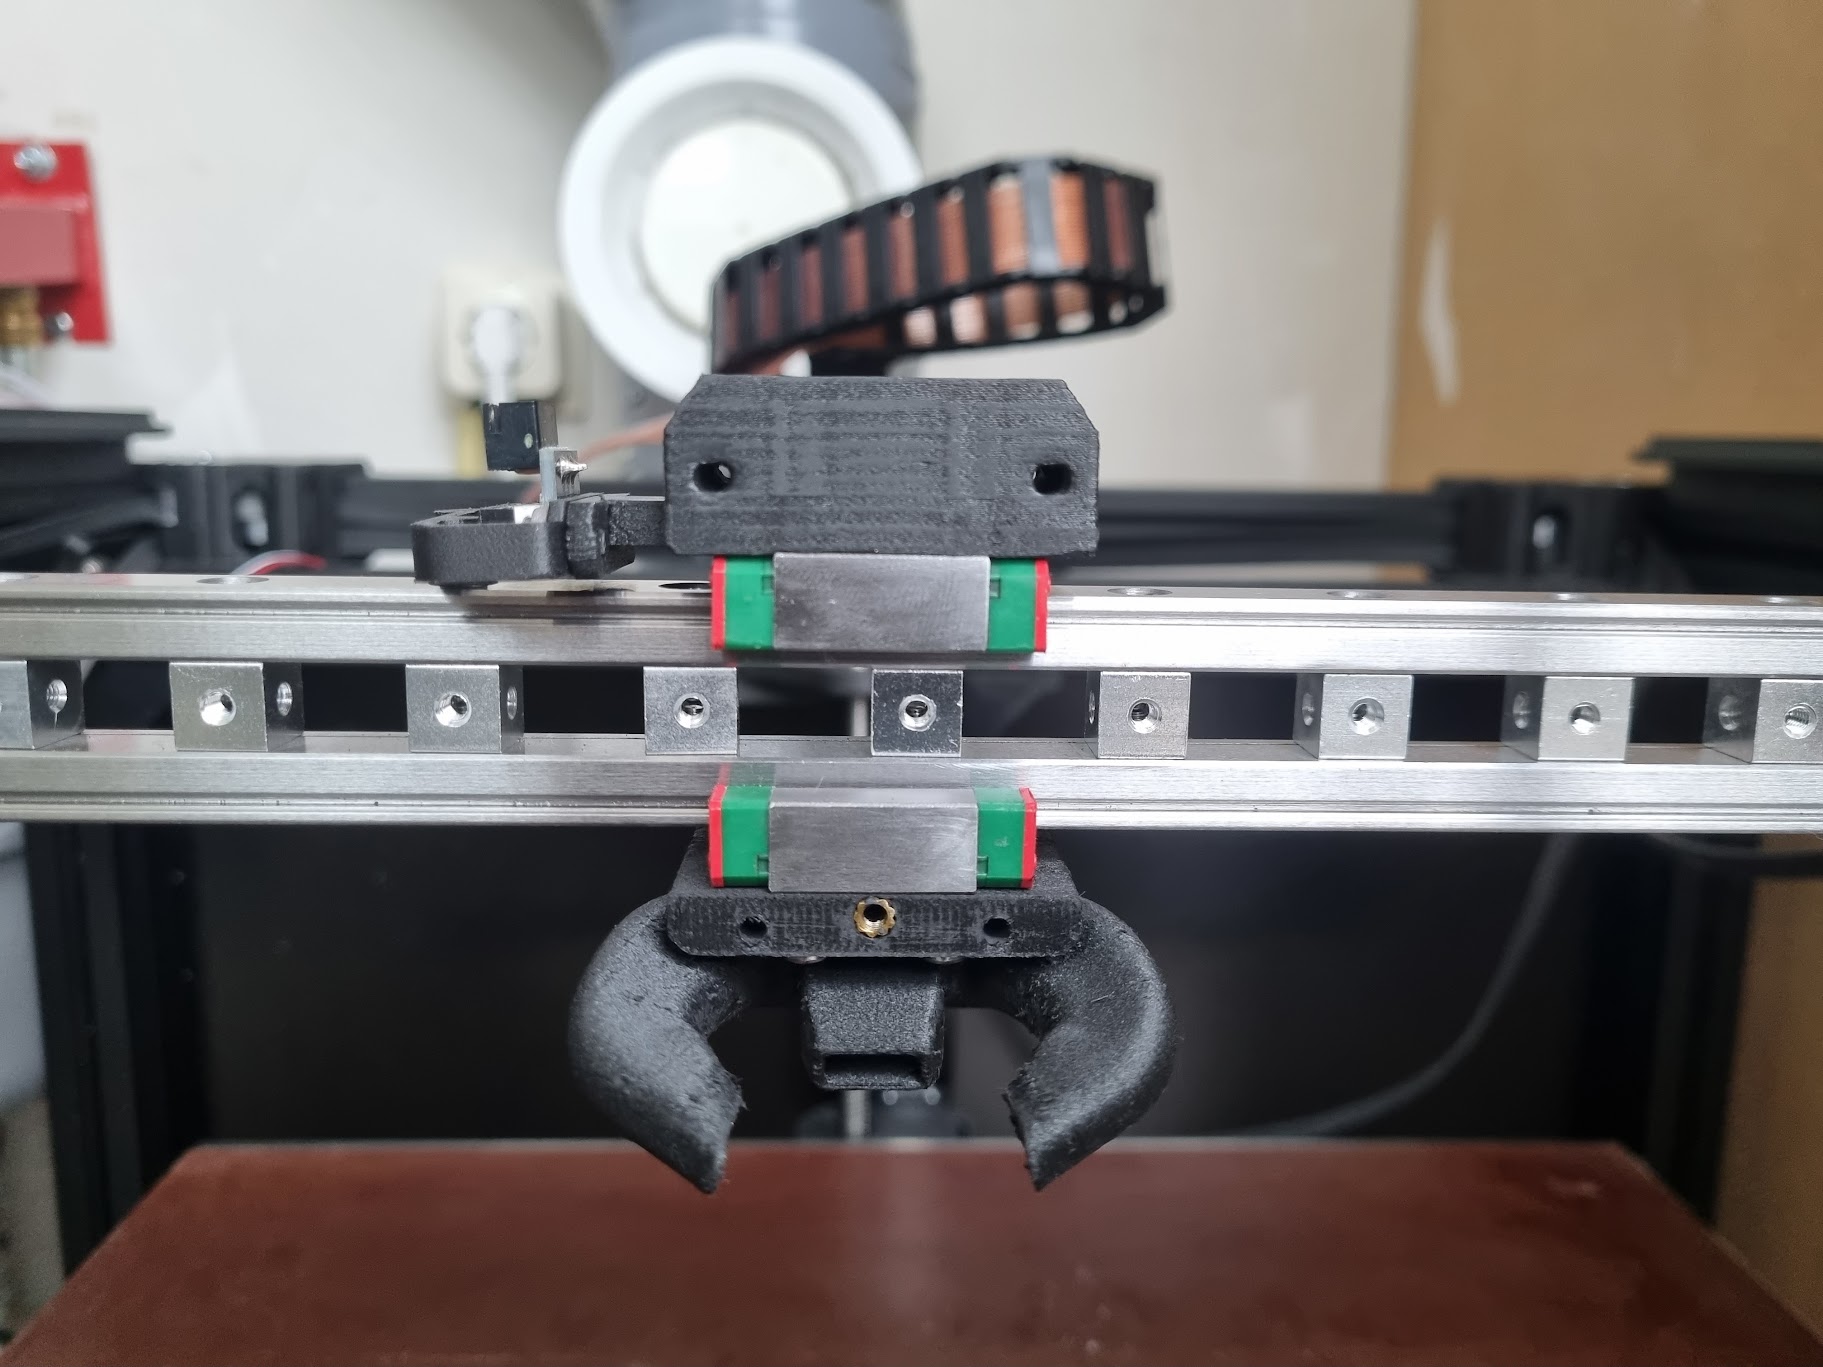
<p><strong>This version is obsolete. For an improved version see:</strong><br><a href="https://www.printables.com/model/230716-ratrig-v-core-3-extrusionless-x-gantry-mod"><strong>https://www.printables.com/model/230716-ratrig-v-core-3-extrusionless-x-gantry-mod</strong></a><br><br><br>I converted my v-core 3 to a dual linear rail for the x-gantry (top and bottom).<br>The main reason for doing this is to resolve inconsistent z-offset caused by the x-gantry warping if its temperature changes.</p><p>I kept having to adjust my z-offset and my first layer was unpredictable. I resorted to preheating the printer for a long time before starting a print, but still had problems prints that filled more of the bed. The first 2 objects would be fine, the next would be too close to the bed.</p><p>With this mod, all of those issues are gone. Perfect first layer every time, without having to preheat the printer.</p><p>Discord user yolo-dubstep did some more testing of the deflection in an enclosed printer and plotted these results:</p><figure class="image"><img src="https://cdn.discordapp.com/attachments/953815430710034502/953816108635406366/thermal_quant_yolo-dubstep8033_2022-03-16_13-44-41.defl_t.png"></figure><figure class="image"><img src="https://cdn.discordapp.com/attachments/953815430710034502/953816108903845909/thermal_quant_yolo-dubstep8033_2022-03-16_13-44-41.deflection.png"></figure><p> </p><p><strong>My results</strong></p><p>I did a bed mesh before and after the mod, with a cold printer and with a printer that was preheated for 15 minutes with the bed at 80C. The results speak for themselves. After the mod, the bed mesh is still flat when the printer is hot. The bed mesh doesn't change anymore in the x-direction. The z-offset will not change during the print. Finally I can rely on it.</p><p> </p><figure class="image"><img src="https://media.printables.com/media/prints/162857/rich_content/b31c6f36-8ce1-4c14-ada5-bf6ac5a82d65/bed-mesh-comparison-dual-x-rail.png#%7B%22uuid%22%3A%227b717b13-750a-407c-9e67-1f69e4fb6ff2%22%2C%22w%22%3A2374%2C%22h%22%3A1166%7D"></figure><p> </p><p>Why does this mod resolve the issues with z-offset changing? The stock v-core 3 has a stainless steel linear rail on top of a black aluminum extrusion. That extrusion is really good at absorbing heat from the bed. The aluminum and steel expand at different rates and the bimetallic effect warps the gantry.</p><p>With this mod, the top and bottom of the gantry are identical. The aluminum blocks in between are separate and cannot cause any warp. As an added benefit, I have attached the carriage of the bottom rail to the bottom of the EVA for extra rigidity. My y-resonances are almost nothing after this mod. This does not save weight. It adds about 100g, because rails are heavy. But my printer runs smoother than ever.</p><p><strong>Parts to buy</strong></p><p>This mod only uses off-the-shelve parts. You will need:</p><ul><li>1 extra linear rail, same dimensions as your x-rail. The z-rails are the same size, so you can swap with them if your new rail isn't straight.</li><li>16 aluminum blocks, 10x10x10mm, threaded. You can buy those from various sellers on aliexpress. I used these: <a href="https://www.aliexpress.com/item/4000377602362.html?spm=a2g0o.order_list.0.0.21ef1802WpRkWN.">https://www.aliexpress.com/item/4000377602362.html?spm=a2g0o.order_list.0.0.21ef1802WpRkWN.</a> I recommend buying some extra, so you can check their dimensions with calipers and pick 16 that are exactly the same height.</li><li>32 screws M3 x 8mm, DIN 912 (rail to blocks)</li><li>4 screws M3 x 20mm, DIN 912 (rail to xy-joiners)</li><li>4 slotted M3 nuts (DIN 546) that fit inside the rail holes (</li><li>4 screws M5 x 20mm, DIN 912 (xy-joiners to metal plate)</li><li>4 nuts M5 (regular not locking)</li></ul><p><strong>Printed parts</strong></p><ul><li><i>Left an right xy-joiners. </i>They attach to the bottom plate with 2 screws in the middle that you can tighten well. You can leave the 2 screws holding the idlers much looser (based on MFBS's design). I have them a long piece to be clamped between the rails, with slots to allow for some freedom in the hole positions on the rails. I moved the L/R indication to the top to make them easier to print.</li><li><i>Modified EVA bottom.</i> I have included a variant of MFBS's gaping maw duct with 4 holes for the rail carriage screws. I also took 0.4mm off the top. The normal EVA is 13mm for the rail + carriage, 20mm for the extrusion and 2.6mm clearance. This mod is 13 + 10 +13mm. Original here: https://www.thingiverse.com/thing:5322790</li></ul><p>I noticed that when I screwed my EVA back and front together, the rail carriages are squeezed in between. When they are squeezed to much, they start to bind. I will add a modified EVA top and bottom soon with 1mm extra width to avoid this.</p><p> </p>
With this file you will be able to print Ratrig v-core 3 dual x-rail mod with your 3D printer. Click on the button and save the file on your computer to work, edit or customize your design. You can also find more 3D designs for printers on Ratrig v-core 3 dual x-rail mod.