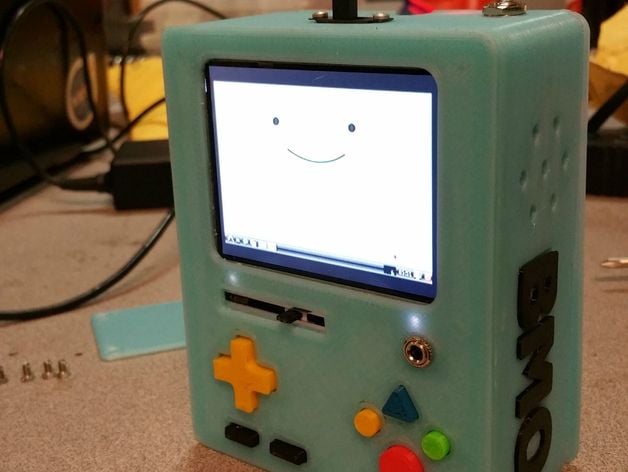
RaspBMO (Handheld Raspberry Pi Emulator)
thingiverse
This is a technical documentation of a DIY RetroPie project. Here's a summarized version: **Safety Warning** The Li-ion battery can be dangerous if mishandled, so double-check wiring and schematics before starting. **Power Supply** * 7.4V Li-ion battery powers the system * Display and UBEC wired in parallel to 7.4V * UBEC regulates power down to 5V for Raspberry Pi and speaker amplifiers **Case** * 3D printed case parts * Front face held with epoxy, use plastic butter knife to apply mixture and ensure correct orientation * Locking mechanism uses captive hardware, slightly undersized holes require tapping threads * Print test parts to dial in print settings **Controller** * Perf-board holds switches and Teensy 2.0 * Switches connected to individual I/O pins on Teensy, other side bussed to GND pin * Programming for Teensy as joystick HID using Teensyduino script **Routing Board (Optional)** * Organizes case wiring * Handles audio amplifiers, display signals, and power routing **Sound** * Stereo speaker system uses two 8 ohm speakers and separate left and right amplifiers * 5V regulated power from UBEC * Stereo headphone jack draws from Raspberry Pi audio signals **General Advice** * Use a charger designed for Li-ion battery * Be cautious with electrical connections and wiring Note: This text assumes that the reader has basic knowledge of electronics and DIY projects. It is recommended to follow safety guidelines and proper procedures when working with electronic components and tools.
With this file you will be able to print RaspBMO (Handheld Raspberry Pi Emulator) with your 3D printer. Click on the button and save the file on your computer to work, edit or customize your design. You can also find more 3D designs for printers on RaspBMO (Handheld Raspberry Pi Emulator).
