Raspberry Pi4 & Einsy Mount - MK3S+
prusaprinters
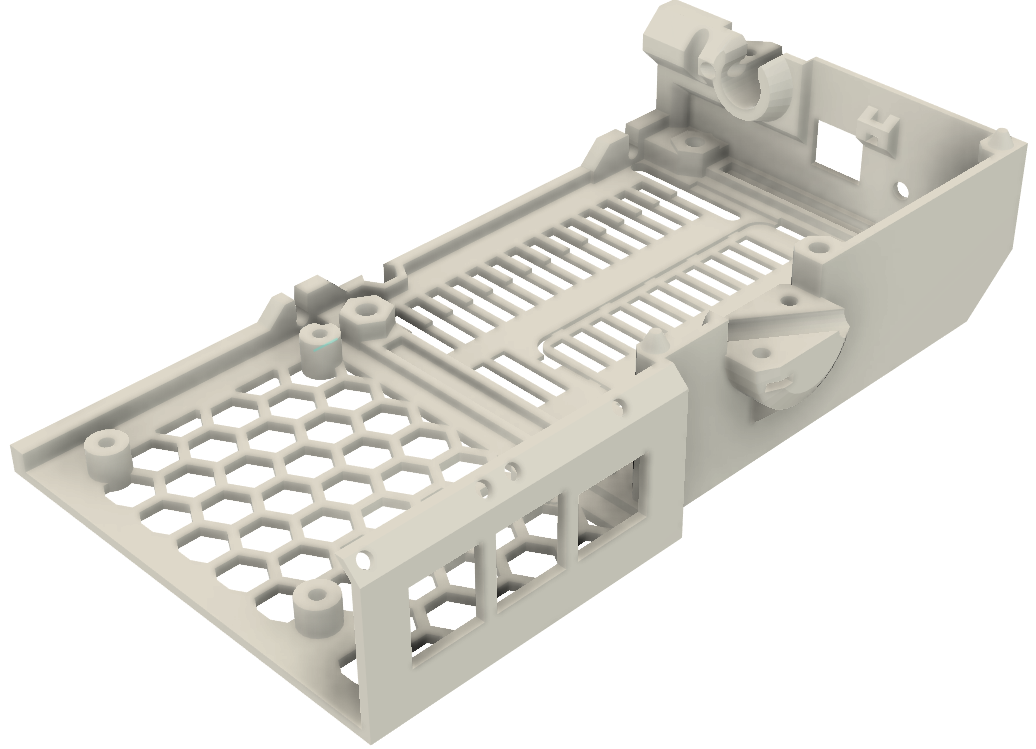
<p>This is an extension to the standard Einsy-base.stl model from the <a href="https://www.printables.com/model/57217-i3-mk3s-printable-parts/files">i3 MK3S+ Printable Parts</a> made to accommodate a Raspberry Pi4. This model was printed with <a href="https://www.prusa3d.com/product/prusament-petg-jet-black-1kg/">Prusament PETG Jet Black</a>. Please be aware that this model provides a few fairly tight fits, <i>patience will be required.</i></p><p>To disassemble and re-assemble the Einsy board mount you should always follow the official documentation for your printer. <a href="https://help.prusa3d.com/guide/8-electronics-assembly_34416#34920">The current documentation for assembling the MK3S+ can be found here.</a></p><p>According to the <a href="https://datasheets.raspberrypi.com/rpi4/raspberry-pi-4-mechanical-drawing.pdf">official documentation for the rpi4</a>, the mounting holes on the board are cut to 2.7mm. The holes for the mounting screws on this mod are sized at 3mm to account for shrinkage. I recommend using four M3-10 screws to mount the board.</p><p>Prior to installing the rpi4; place the board face-up on a flat surface and install the screws into the board's mounting holes, being careful to ensure they are perpendicular to the board. The screws will bite into the board and self-tap the material. Drive the screws sufficiently through the holes, then back them out until the ends are just proud of the bottom of the board. Use the protruding ends of the screws to align the board with the mounting holes, and install each screw a few turns at a time.</p><p>This mount can accommodate internal or external wiring, however there are no mounts for a buck converter. Powering externally will require a right-angle/low-profile USB-C, or requires clearance underneath. Installing any internal wiring may be easier before the boards are mounted due to tight spaces. Resources for internal wiring of data and power can be found online, all electronic mods are at your own risk.</p><p>The second set of models include two 25mmx25mm fan mounts above the board. <a href="https://www.canakit.com/raspberry-pi-fan.html">I installed these fans onto my printer.</a> Fans should be installed <i>before</i> the rpi4. The fans can be mounted with four M3-10 screws, however M3-12 provide an easier installation.</p>
With this file you will be able to print Raspberry Pi4 & Einsy Mount - MK3S+ with your 3D printer. Click on the button and save the file on your computer to work, edit or customize your design. You can also find more 3D designs for printers on Raspberry Pi4 & Einsy Mount - MK3S+.