Raspberry Pi3A+ mount for Prusa MK3/MK3S
prusaprinters
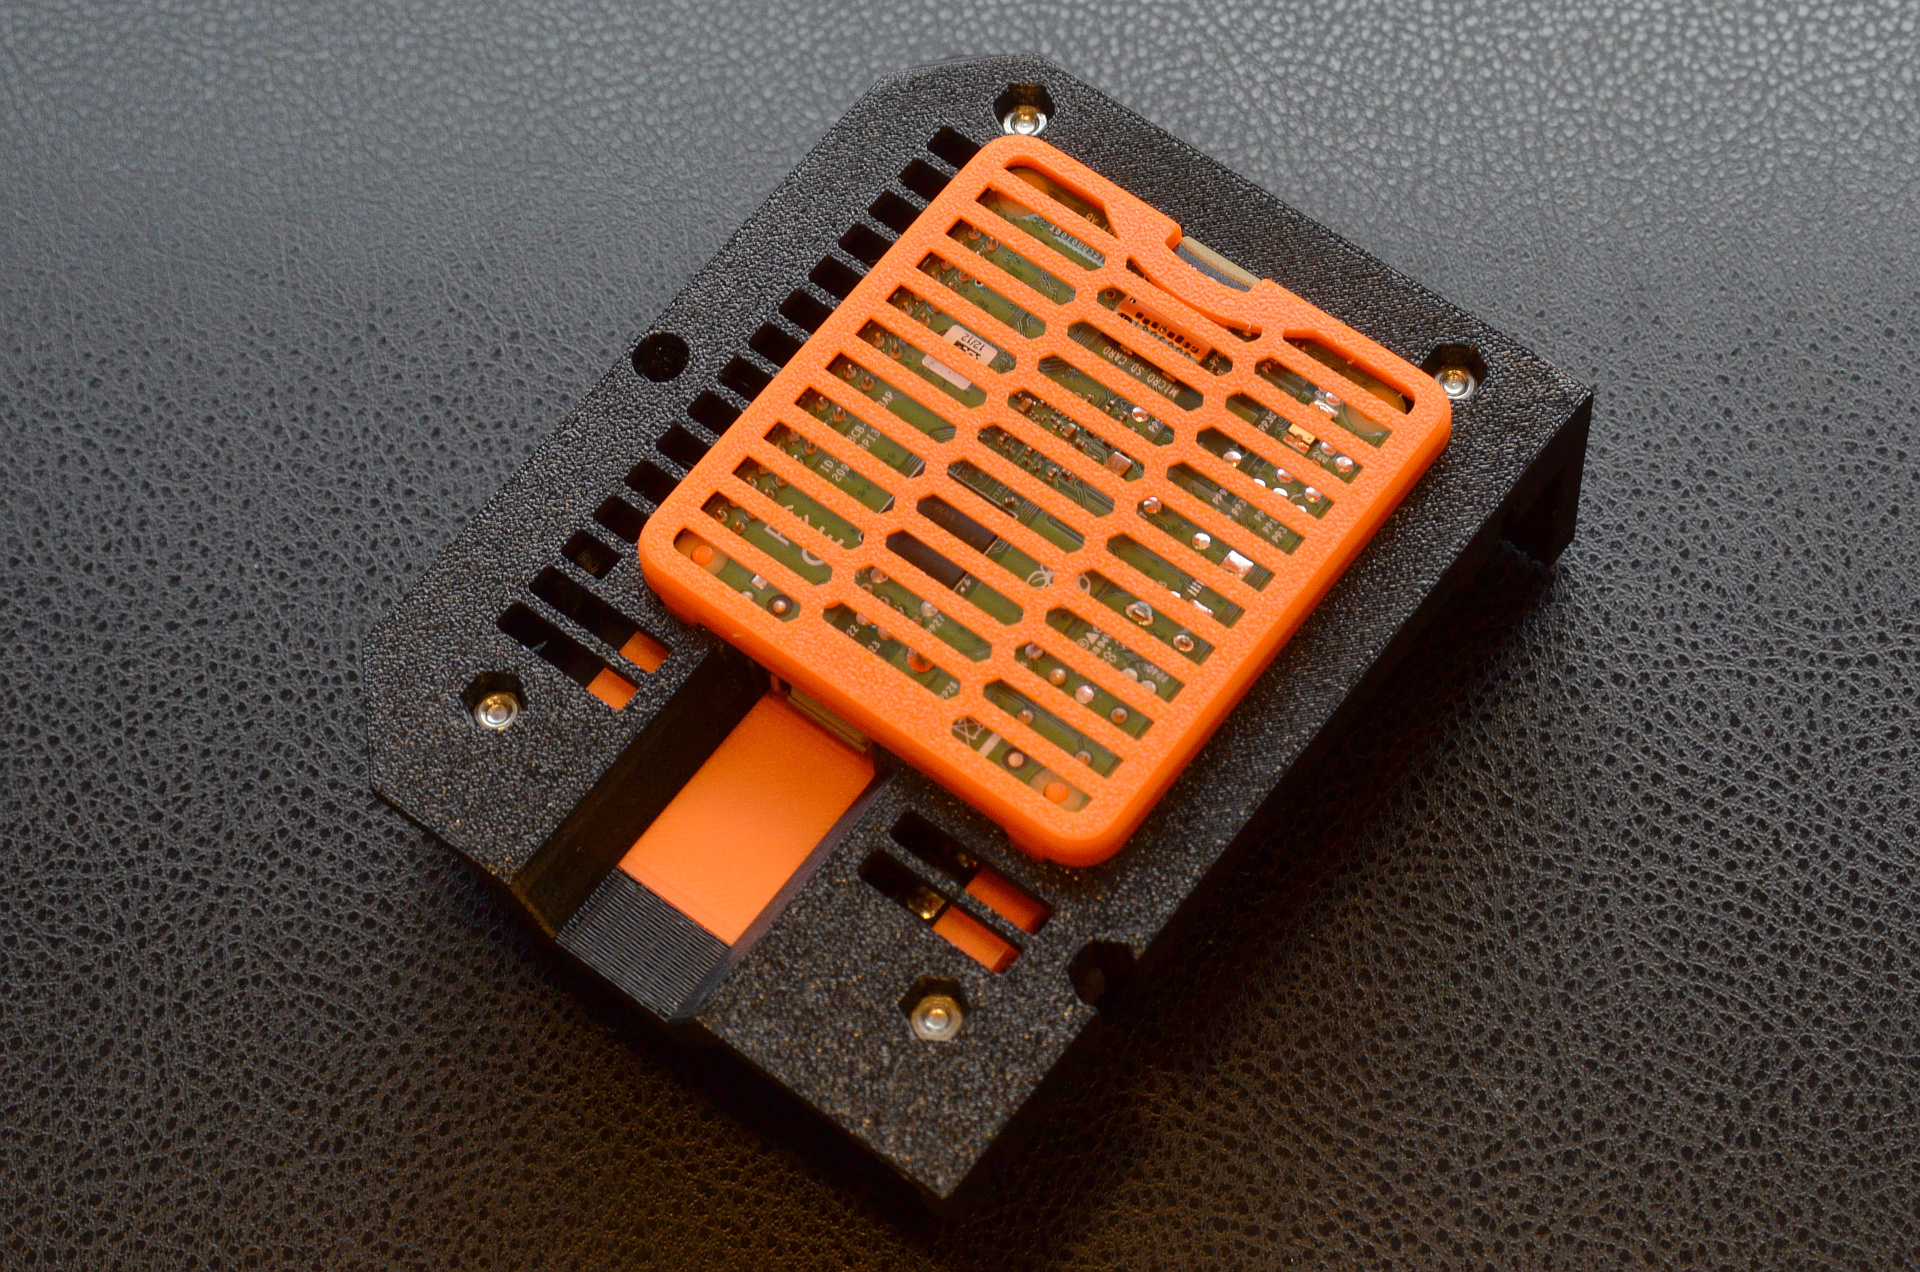
<p>Install a Raspberry Pi3A+ instead of an underpowered ZeroW! No soldering required! <a href="https://drive.google.com/open?id=1uh4MUrHPMmt2oGNcRB3LEzyNgbPnzjLR">PrusaPrint download for Pi3 included!</a></p> <h3>Print instructions</h3><p><p>This Raspberry Pi3A+ mount consists of a bracket, a tweaked Einsy base enclosure, and an external cover for tool-less Pi access. With these new parts, a Pi 3A+ mounts into the Einsy enclosure just like a ZeroW.</p> <p><p>Compared to the ZeroW, a Pi 3A+ provides better WiFi and 10X the processing power. It drastically improves OctoPrint boot time and responsiveness, handles HD webcams, and enables heavy server plugins like automatic print-failure detection. The mount grants unobstructed access to the Pi's USB and SD card ports and completely protects the underlying Einsy from any accidental contact with the Pi itself or errant USB plugs.</p> <p><p>There's no need to solder longer pins onto the Pi. The mounting bracket accepts six 'pin receptacles' (<a href="https://www.digikey.com/product-detail/en/mill-max-manufacturing-corp/0401-0-15-15-47-27-04-0/ED1165-ND/">25-50 cents each from DigiKey</a>), eliminating the need to alter the Pi in any way. Of course, you can still solder longer pins if you prefer that route.</p> <p><p>As PrusaPrint for the Pi ZeroW will not boot on a Pi3A+, I've also prebuilt a <a href="https://drive.google.com/open?id=1uh4MUrHPMmt2oGNcRB3LEzyNgbPnzjLR">PrusaPrint image for use with the Pi3</a>. Setup of PrusaPrint for the Pi3A+ is identical to the ZeroW version. It's flash, set the wireless network name, and go.</p> <h3>PREFLIGHT NOTES</h3><p><p>There is sufficient clearance to mount a low-profile heatsink to give the Pi3 better cooling if desired. At room temperature a heatsink is unneccessary. It might be needed in a heated enclosure.</p> <p><p>Power is provided through the header connection to the Einsy. Although the official specs suggest the Einsy doesn't have sufficient current capacity for the Pi3A+, the Pi has no need to run as a full desktop driving numerous peripherals, and does not appear to stress the Einsy's power capacity.</p> <p><p>The small-diameter holes in the bracket print are a bit tricky. The provided 3MF should be well tuned for Prusament PETG and prints reliably here across multiple printers.</p> <p><b>Recommended Pin Receptacle part:</b> Mill-Max 0401-0-15-15-47-27-04-0<br/> <b>DigiKey Part No:</b> ED1165-ND<br/> <b>Mouser Part No:</b> 575-0401015154727<br/> <b>Arrow Part No:</b> 0401-0-15-15-47-27-04-0</p> <h3>HARDWARE ASSEMBLY</h3><ol> <li><p>Choose appropriate, possibly contrasting colors for the three pieces. A black base and orange bracket+cover looks snazzy yet completely normal on a stock machine. <li><p>Print the parts. <li><p>Remove the integrated supports from the printed base. <li><p>Press-fit six pin receptacles into the W-shaped mounting bracket (into the holes that go all the way through). The recommended pin receptacle will sit flush with the top surface of the mounting hole when fully inserted. As designed, it will take a little force to get them to push all the way in. Pressing the upside-down bracket and pin onto a hard, flat object to set the pin is probably the best way. <li><p>Place the new Pi bracket into the base, slipping the larger diameter mounting holes over the posts that will support the Einsy board. The surface of the bracket should sit flush with the top of each mounting post. The bracket pins will point into the case interior. <li><p>Prepare the original Einsy enclosure base for removal by opening and removing the door. <li><p>Remove the plastic heatbed and extruder cable clamps from the original Einsy enclosure base. <li><p>Unplug the various cables from the Einsy. They're all pre-labelled/unique, and the online assembly manual gives detailed instructions for reassembly. <li><p>Remove the four Einsy mounting screws and remove the Einsy board from the base enclosure. <li><p>Loosen the two M3 button head screws holding the enclosure base to the frame, and pop the enclosure off by sliding it sideways out from under the screws. <li><p>Remove the four hex nuts and four square nuts from the original Einsy base and move them over to the same locations in the replacement base. <li><p>Remove the Einsy from the old case and fit the Eisny board into the new case. Insert by fitting the USB port into its hole first with the screw-terminal-edge of the board angled up in order to clear the header pins extending from the Pi mounting bracket. With the USB port and reset button properly fit into their openings, lower the board into place against the case/bracket. Take care that the pins in the bracket slide directly into the header connector holes on the underside of the Einsy. <p><p>Einsy insertion should be easy with a flush and precise fit. If something doesn't seat or want to move into position, stop and carefully examine the board and part placement before proceeding. <li><p>Inspect fit for correctness and bolt the Einsy board into place in the new enclosure. The original M3 screws are long enough, though they will not seat as deep into the nuts as in the original enclosure. <li><p>'Pop' the Einsy enclosure back into place on the Prusa frame, sliding the the upper and lower mounting slots under the M3 mounting screws left in the frame earlier. Tighten both mounting bolts gently using the ball-end 2.5mm allen key for M3 screws; there is less clearance to reach the screws than in the original base enclosure, but they should not be difficult to reach at a driveable angle. <li><p>Reinstall all cables. <a href="https://help.prusa3d.com/en/guide/8-electronics-assembly-b7-r3-design_75136#76000">Consult the assembly manual starting at Part 8, step 24.</a> <li><p>Reattach cable clamps, door, etc, give the machine a test-boot before adding the Pi. <li><p>Assuming all has gone well: Turn power off again and insert the Raspberry Pi3A+ into the back of the Einsy. The bracket holes and alignment pins will not allow the Pi to seat in a misaligned state. When correctly seated, it will sit on the bracket with the alignment pins of the bracket extending into each of the four mounting holes on the Raspberry Pi, sitting roughly flush with the surface of the PCB. <li><p>If there's a microSD card in the Pi, take it out before installing the Pi cover. <li><p>Place the Pi cover over the Pi and onto the Einsy. You'll need to insert either the upper or lower tab first, and then lever the other side into place. The fit is not tight, but it is fairly exact and secure. <li><p>With the cover in place, the microSD card can be inserted/reinserted into the Pi. Note that the card must be removed before trying to remove the cover. And you'll need to install software on it.... </p></li></p></li></p></li></p></li></p></li></p></li></p></li></p></li></p></p></p></li></p></li></p></li></p></li></p></li></p></li></p></li></p></li></p></li></p></li></p></li></p></li></ol><h3>SOFTWARE</h3><ol> <li><p>Assuming you want to run PrusaPrint (which is just OctoPrint that's pre-configured for a MK3/MK3S), grab the <a href="https://drive.google.com/open?id=1uh4MUrHPMmt2oGNcRB3LEzyNgbPnzjLR">Raspberry Pi3 PrusaPrint image here</a>. Otherwise, feel free to install what you like (but you're on your own for setup instructions). <li><p>Follow the software setup instructions (<a href="https://help.prusa3d.com/en/guide/octoprint-for-original-prusa-i3-mk3-1-preparing-necessary-components_95536#95824">Steps 8 and 9 in Part 1 of the official Prusa guide</a>) for the Raspberry Pi ZeroW. The only difference is that you're using PrusaPrint built for the Pi3. <li><p>Assuming all the hardware is ready to go, continue software setup at <a href="https://help.prusa3d.com/en/guide/octoprint-for-original-prusa-i3-mk3-4-einsy-case-with-the-rpi-preparation_96600#96688">Part 4, Step 4 of Prusa's official instructions</a>. </p></li></p></li></p></li></ol><p><p><b>Note!</b> When a Raspberry Pi 3A+ powers up correctly, it shows a solid red LED. SOLID RED IS GOOD. A blinking red LED indicates a power problem (insufficient or unstable power).</p> <p><p>After a few seconds of solid red, a fainter green LED will flicker erratically indicating SD card access-- the Pi is booting. If the green LED does not flicker at any point, there is some problem with the SD card preventing boot.</p> <p><p>Once booted, the Pi will start the onboard PrusaPrint server, acquire an IP address via DHCP, and print that address to the Prusa's LCD. It's ready for customization or just to go!</p> <h3>CREDIT WHERE CREDIT IS DUE</h3><p>I didn't use his files, but my basic implementation is directly inspired by the <a href="https://www.thingiverse.com/thing:3294204">Pi3A+ case by crzcrz</a> at Thingiverse. Aside from adding the pin receptacles, I've also avoided the clearance (and exposed 24V rail sparky) problems in his version.</p></p></p></p></p></p></p></p></p></p></p>
With this file you will be able to print Raspberry Pi3A+ mount for Prusa MK3/MK3S with your 3D printer. Click on the button and save the file on your computer to work, edit or customize your design. You can also find more 3D designs for printers on Raspberry Pi3A+ mount for Prusa MK3/MK3S.