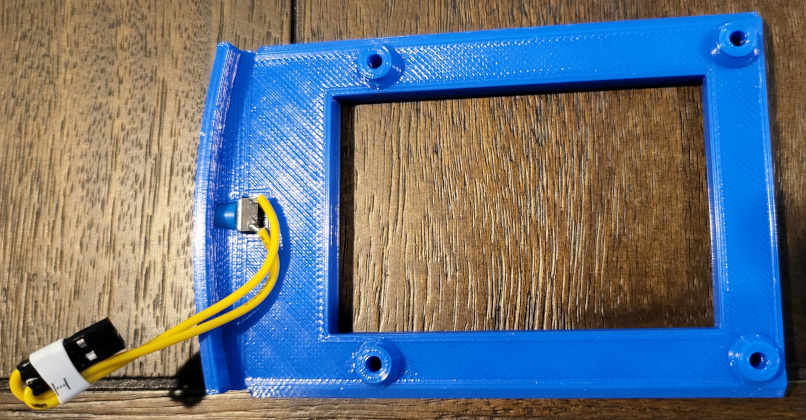
Raspberry Pi Rackmount Tray with Shutdown Button
thingiverse
This is a remix of the Raspberry Pi rack-mount tray that allows inserting a micro-switch and wiring that switch to pins on the Raspberry Pi to create a shutdown button. I modified this because I always found myself forgetting to shutdown the server remotely and needing to go back and run the shutdown, then come back before unplugging the server from the rack to make a change. The micro-swtches I used are here: https://www.amazon.com/dp/B07CMZCQS5?ref=ppx_yo2ov_dt_b_product_details I use pins 39 and 40 which equates to GPIO 21. All that was needed is to add the below line to the config.txt: dtoverlay=gpio-shutdown,gpio_pin=21 I hope this helps others as it is already saving me multiple trips back and forth to my server rack. These are the build steps: 1. Print the tray. 2. Clip the leads off the micro-switch leaving enough to solder to on one side 3. Solder the wire jumper to the switch, leaving about 3 inches or 75mm of wire between the solder points and the connectors (Make sure the solder points are small so that they don't touch the Pi when it is installed.) 4. Insert the switch into the tray 5. Insert the button cap through the hole in the front of the tray and press it down until it seats firmly onto the button 6. Mount the Raspberry Pi to the tray, tucking the wires up in front of the Raspberry Pi board between the Ethernet port and the USB ports 7. Plug the jumper connectors to pins 39 & 40 (or whatever pins you choose that can be used for the GPIO shutdown overlay) 8. Add the dtoverlay statement (from above) to your config.txt (or a modified version if you used different pins
With this file you will be able to print Raspberry Pi Rackmount Tray with Shutdown Button with your 3D printer. Click on the button and save the file on your computer to work, edit or customize your design. You can also find more 3D designs for printers on Raspberry Pi Rackmount Tray with Shutdown Button.
