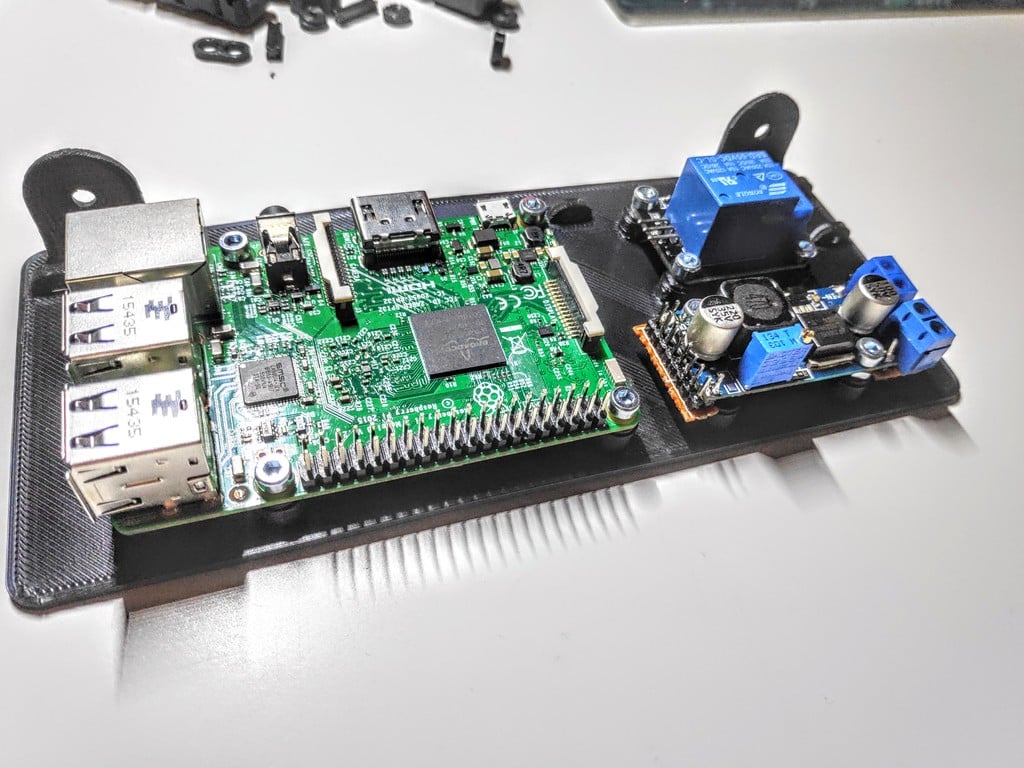
Raspberry Pi mount for Ender 5 electronics enclosure
thingiverse
ENDER 5 electronics mounting plate for Raspberry Pi This mounting plate is designed to be placed inside the electronics case of an Creality Ender 5. It hooks under the power switch on the left side of the case, using M4 Screws to screw onto the side of the Landy-PSU. Its main use is holding a Raspberry Pi with Octoprint. It can also hold a LM2596 Board for easy cable management. The LM2596 is set to output 5.1V with an input of 24V, powering the Raspberry Pi by connecting to the 5V and GND pins on the Pi. It can also hold a SRD-05VDC-SL-C Relay board to be used with Octoprint PSU Control. You can deliver 5V directly from the LM2596 and control it with any BCM-Pin from the Raspberry Pi. I used BCM-17. I had this laying around and don't remember where I got the board from. The mounting holes are 21mm and 28mm away from each other, easily tweaked in the FreeCAD File I included. Everything can be screwed in using M3 Screws, except for the PSU mount which needs M4. The screws will cut their own threads into the plastic. I tested this with 8mm M3 Screws, holding everything perfectly. There are loops for cable ties to allow a clean cable management. If you don't like them, just don't use them. I attached diagrams showing how I wired everything. This is just an example, not a recommendation. You might find other options, such as powering the Raspberry Pi separately and using the relay to switch the Printer-PSU on and off parallel to the printers Power Button. The wiring is pretty simple. If you don't understand what you're doing, please don't proceed! Setting the buck-converter wrong will fry your Raspberry Pi and might damage your printer's mainboard. It is mandatory to use a Multimeter to check for 5V before connecting the Buck Converter to the Raspberry Pi! You need to know how to use a Multimeter before proceeding. If you don't measure correctly, you'll kill your hardware. My rather old Raspberry Pi 3B had a broken Wifi chip since I bought it. I added a USB extension cord and mounted a cheap RT2571 stick at the outside of the printer. I assume that the built-in Wifi of the Pi will decrease significantly when isolated by the metal box. I recommend feeding an extension cord to the outside and sticking something cheap like MT7601, RT3572, RT3070 or AR9271 to the frame of your printer. I wanted to connect the Raspberry Pi to the printer board using just 3 wires and get a serial connection through that so that I don't have to use the USB port on the outside. It didn't work for me. Maybe I need some other Marlin configuration or the SPI port on the Creality 1.1.5 Board just isn't made for that. Maybe I will upgrade to a SKR E3, SKR v1.4 or something else. If you know something I could do, please let me know. For now, I simply wired a mini-USB-Cable out through the LCD connector hole and connected it externally to the Printer board.
With this file you will be able to print Raspberry Pi mount for Ender 5 electronics enclosure with your 3D printer. Click on the button and save the file on your computer to work, edit or customize your design. You can also find more 3D designs for printers on Raspberry Pi mount for Ender 5 electronics enclosure.
