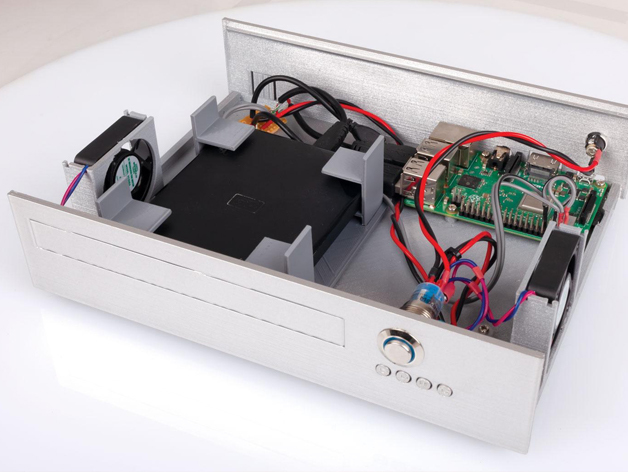
Raspberry Pi Media Centre with KODI
thingiverse
Build Your Own Raspberry Pi Media Center with Hard Drive Storage. Are you ready to take the leap and create your very own media center, complete with a robust hard drive storage system? Look no further! In this comprehensive guide, we'll walk you through every step of the process, from selecting the perfect components to installing the software that will bring it all together. First things first, let's talk about what you'll need. For this project, you'll require: A Raspberry Pi 4 model B or later A microSD card (at least 8GB) A USB hard drive or solid-state drive (SSD) for storage An HDMI cable to connect your media center to your TV Once you have all of these components in hand, it's time to get started. Begin by inserting the microSD card into the Raspberry Pi and booting up the device. Next, navigate to the official Kodi website and download the latest version of the software. With Kodi installed, it's now time to configure your media center. Start by setting up your network settings and connecting to your Wi-Fi or Ethernet connection. From there, you can begin organizing your media library and adding content to your hard drive. One thing to keep in mind is that a Raspberry Pi media center isn't just for playing back movies and TV shows. With the right software and hardware, you can also use it as a digital photo frame, music player, or even a streaming device for live sports and events. To get started with building your own Raspberry Pi media center, check out our step-by-step guide below: Step 1: Prepare Your Components Begin by preparing your components. Make sure that the microSD card is properly inserted into the Raspberry Pi, and that the USB hard drive or SSD is securely connected to the device. Step 2: Install Kodi Next, navigate to the official Kodi website and download the latest version of the software. Once downloaded, follow the on-screen instructions to install Kodi on your Raspberry Pi. Step 3: Configure Your Media Center With Kodi installed, it's now time to configure your media center. Start by setting up your network settings and connecting to your Wi-Fi or Ethernet connection. From there, you can begin organizing your media library and adding content to your hard drive. Step 4: Add Content to Your Media Library Once your media center is set up, it's time to add some content to your media library. You can do this by navigating to the Kodi interface and selecting the "Add-ons" menu. From there, you can browse through various streaming services and add them to your library. Step 5: Customize Your Media Center The final step in building your own Raspberry Pi media center is to customize it to your liking. This can include setting up personalized settings for your streaming services, creating custom playlists, or even installing additional software to enhance your media experience. With these steps complete, you'll be ready to enjoy a full-featured media center that's all your own. So why wait? Get started today and discover the endless possibilities of building your own Raspberry Pi media center with hard drive storage!
With this file you will be able to print Raspberry Pi Media Centre with KODI with your 3D printer. Click on the button and save the file on your computer to work, edit or customize your design. You can also find more 3D designs for printers on Raspberry Pi Media Centre with KODI.
