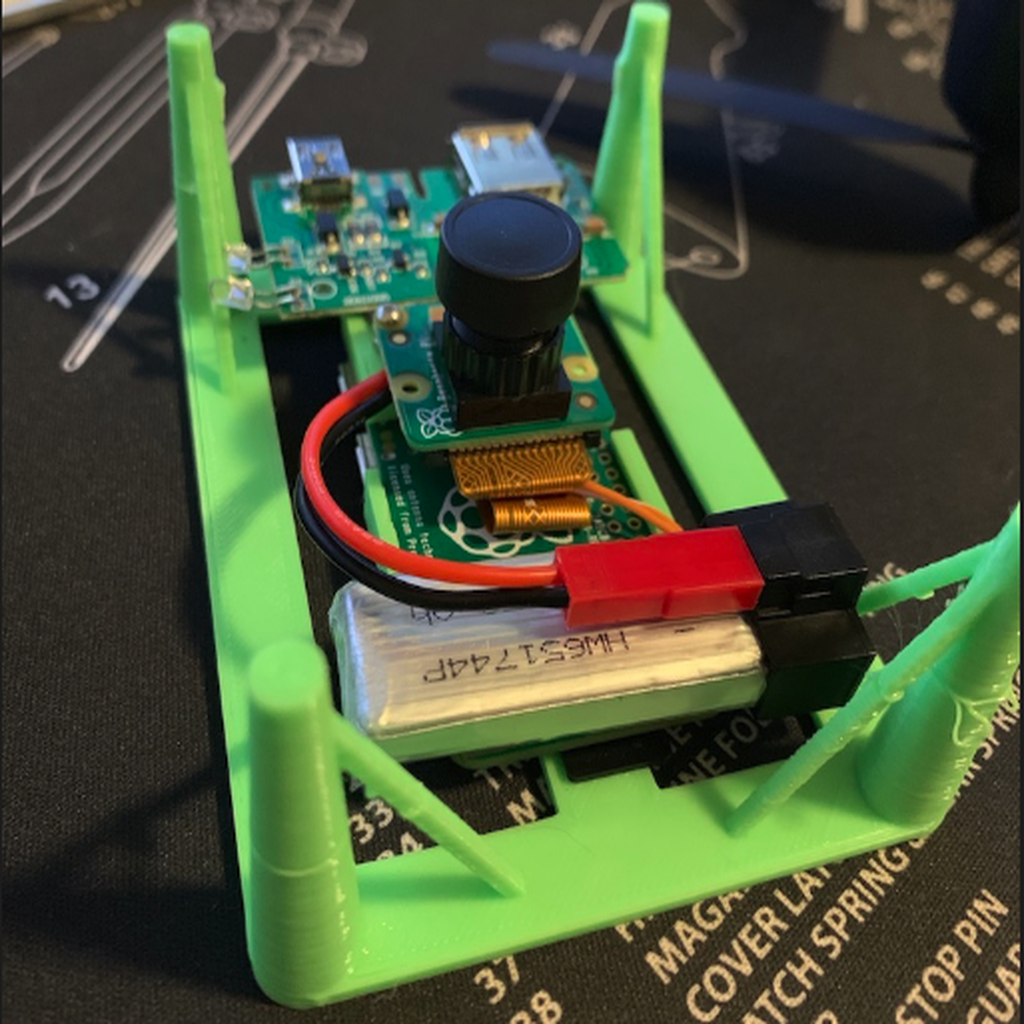
Raspberry Pi in the Sky (Drone Mount Raspberry Pi Zero W)
thingiverse
I needed a way to capture photos straight down from my Hubsan, so I crafted this compact carriage for a Raspberry Pi Zero W. I attached it to my drone using three meters of heavy-duty mounting tape. To take pictures, I included a systemd service file and a script I use. I secured the camera module to the pi with two m2 screws and the plate provided in this project. You can use a soldering iron to flatten down the pegs for mounting the camera plate onto the pi's mounting holes. The script and file need to be placed at the following paths on Raspbian: `/opt/DCIM/camerad.sh` `/etc/systemd/system/camerad.service` Then, run this command to enable it to take pictures on boot: `sudo systemctl enable camerad` I used a LiPo charging circuit from an old phone booster. The 5v output from the booster board is soldered directly to the Raspberry Pi's 5v and ground GPIO pins. With a budget-friendly 350mAh battery, I was able to capture photos for one hour and twenty-five minutes.
With this file you will be able to print Raspberry Pi in the Sky (Drone Mount Raspberry Pi Zero W) with your 3D printer. Click on the button and save the file on your computer to work, edit or customize your design. You can also find more 3D designs for printers on Raspberry Pi in the Sky (Drone Mount Raspberry Pi Zero W).
