Raspberry Pi Camera Case and Tripod
pinshape
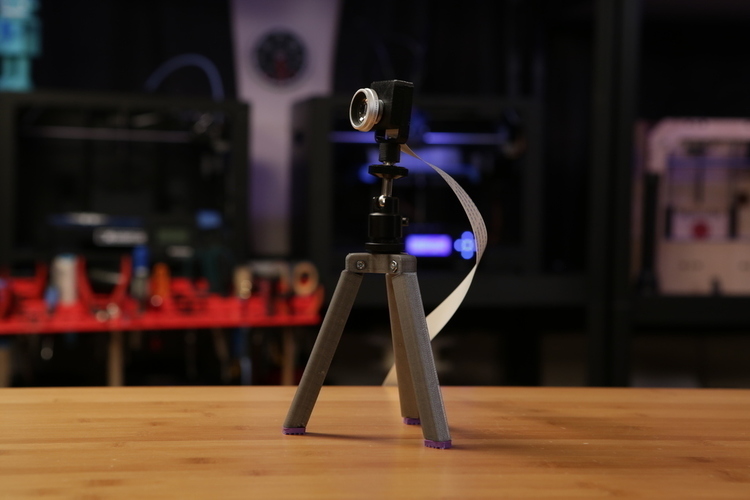
Summary: https://www.youtube.com/watch?v=ciCKvehNFDM The Raspberry Pi Camera Module is fitted snugly inside a 3D printed enclosure and mounted securely onto a 3D printed tripod. This simple design prints quickly and assembles in just minutes. To adjust the camera's position, use a Swivel-Head Adapter that provides free range of motion and locks into place with a side screw. You'll need machine screws, other camera parts, and 3D printed components to assemble this project along with the Raspberry Pi Camera Module. We're using this tripod for capturing timelapses with OctoPrint, but it can also serve as a security camera. Check out our playlist below for more Raspberry Pi projects: Full Tutorial on the Adafruit Learning System: https://learn.adafruit.com/3d-printed-pi-camera-case-and-tripod/overview Custom Section: Instructions to Start Begin by attaching the base connector to the enclosure using an M3 screw and then install the camera tripod adapter inside the base connector. Next, insert the flex cable from the Pi Camera through the opening of the enclosure part and pull it all the way through. Lay the camera board over the standoffs and hold it in place while fastening 4 machine screws into the back of the case. To attach a lens, use one commonly used for mobile phones by sticking the included o-ring to the front of the case. This is convenient because it uses a magnet, making it easy to swap out different lenses. Assemble the tripod by inserting a hex nut and then inserting a tripod leg into the slots near the bottom. While holding the hex nut in place, insert and fasten a machine screw into the hole on the side. For grippy feet, use Ninjaflex filament. Insert another screw here and fasten it to the bottom of the tripod leg. Next, insert the D-ring with the ¼ inch screw through the bottom of the tripod base and then install the swivel-head adapter by tightening it onto the tripod connector. Finally, attach the Raspberry Pi Camera to the swivel-head adapter by screwing it on tightly.
With this file you will be able to print Raspberry Pi Camera Case and Tripod with your 3D printer. Click on the button and save the file on your computer to work, edit or customize your design. You can also find more 3D designs for printers on Raspberry Pi Camera Case and Tripod.