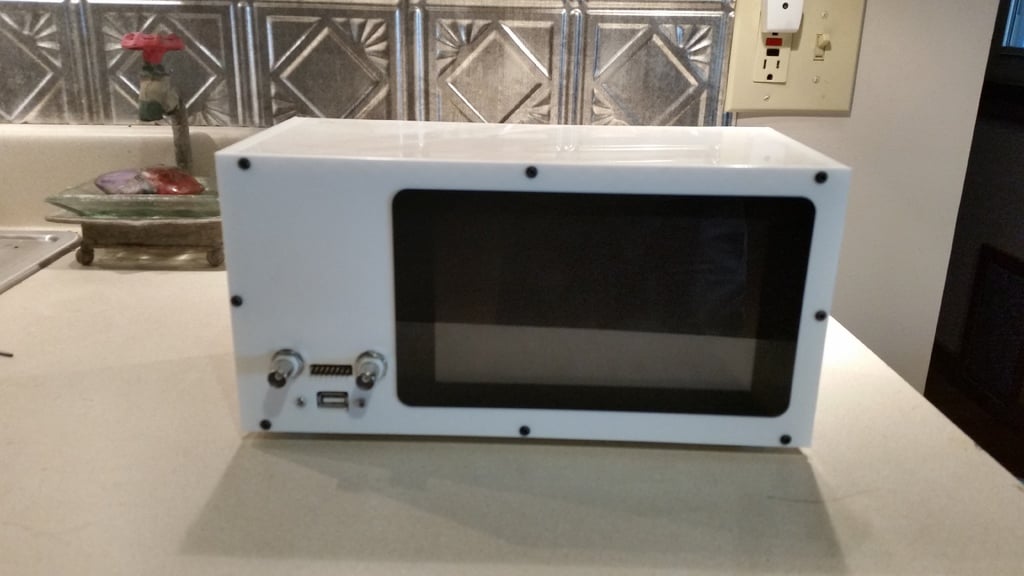
Raspberry Pi Bitscope
thingiverse
Raspberry Pi 3 B+ paired with Bitscope Micro and a 7" touch screen. This setup boasts a USB port upfront for connecting a mouse, while also offering ethernet connectivity at the back or utilizing the built-in wireless capabilities of the Raspberry Pi 3 B+. To power up the Raspberry Pi, simply hook up 5 volts from the power supply to the USB MicroB Plug Breakout. Meanwhile, attach the Fan to the 12 volt side of the power supply for optimal cooling performance. It took a bit of creativity to extend the Bitscope Micro and HammerHead Attachment with an extension cable, but it was worth it to fit everything into the case seamlessly. Parts List 1 x Raspberry Pi 3 B+ 1 x Bitscope Micro with HammerHead Attachment 1 x Raspberry Pi 7" touch screen 1 x Mean Well RD-65A 12 volt 5 volt Power Supply https://www.amazon.com/gp/product/B005T7EZM8/ref=oh_aui_detailpage_o04_s00?ie=UTF8&psc=1 1x USB MicroB Plug Breakout https://www.sparkfun.com/products/10031 1 x 12 volt fan https://www.amazon.com/gp/product/B005C31GIA/ref=oh_aui_detailpage_o04_s00?ie=UTF8&psc=1 1 x C14 socket https://www.amazon.com/gp/product/B06XV831F3/ref=oh_aui_detailpage_o04_s00?ie=UTF8&psc=1 1 x Panel Mount USB https://www.adafruit.com/product/908 1 x Panel Mount Ethernet https://www.adafruit.com/product/909 21 X M3 x 8mm cap screws (Front and Back plates and power supply) 12 X M3 x 12mm cap screws (Side plates) 4 X M3 x 30mm cap screws (Fan) 4 X M3 nuts (Fan) 28 X Threaded Inserts (https://www.amazon.com/gp/product/B00VGDR1LQ/ref=oh_aui_detailpage_o08_s00?ie=UTF8&psc=1) 1 X On/Off Rocker Switch (Ace Hardware P/N 61104)
With this file you will be able to print Raspberry Pi Bitscope with your 3D printer. Click on the button and save the file on your computer to work, edit or customize your design. You can also find more 3D designs for printers on Raspberry Pi Bitscope.
