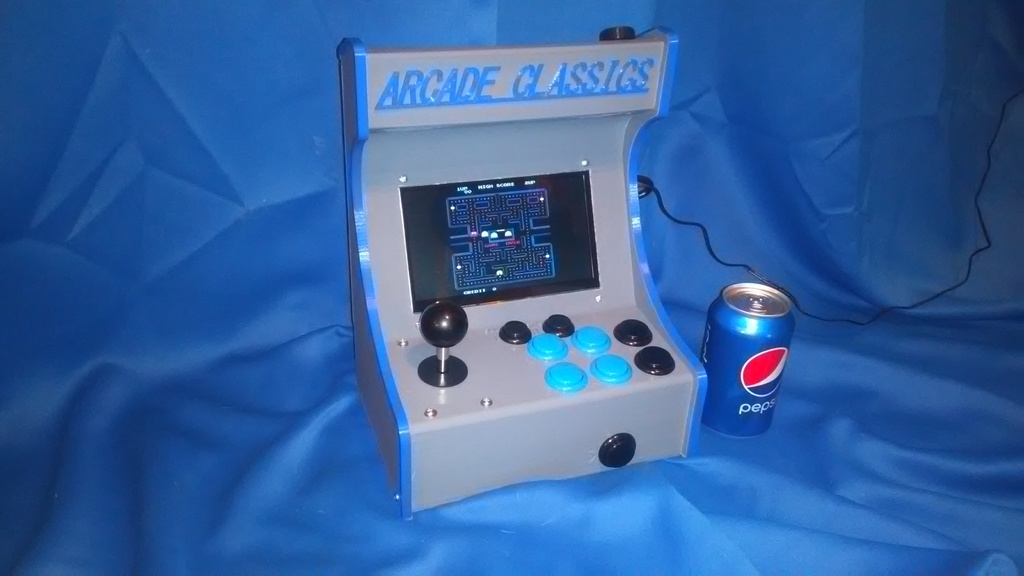
Raspberry Pi Arcade Cabinet
thingiverse
I built an arcade cabinet using a Raspberry Pi with a 7-inch HDMI LCD display and a small amplifier with micro speaker for sound. It works great, and I've made several of these cabinets. The parts I used can be found here: * Arcade stick and buttons: https://www.amazon.com/gp/product/B0788MJJX1/ref=ppx_yo_dt_b_asin_title_o09_s00?ie=UTF8&psc=1 * Amp with potentiometer: https://www.amazon.com/gp/product/B07GL3NCLV/ref=ppx_yo_dt_b_asin_title_o02_s00?ie=UTF8&psc=1 * Audio jack plug: https://www.amazon.com/gp/product/B077XNTSF9/ref=ppx_yo_dt_b_asin_title_o02_s00?ie=UTF8&psc=1 * Mini speaker: https://www.amazon.com/gp/product/B07FTB281F/ref=ppx_yo_dt_b_asin_title_o02_s00?ie=UTF8&psc=1 * 7-inch LCD: https://www.amazon.com/gp/product/B07N1P5YWR/ref=ppx_yo_dt_b_asin_title_o00_s00?ie=UTF8&psc=1 The single model is 240mm wide, 173mm long, and 312mm tall. The split model splits the cabinet in half for shorter printers, but it doesn't have a hole for the amplifier volume pot. I used an Anet A8 plus printer to make the single model, with Slic3r settings of 25% infill, .25 layer heights, and a 0.4 nozzle. I also added removable supports to the models so that no slicing supports are needed. To improve the finish and handle overhangs, I used variable layer heights near the joystick, buttons, and top of the cabinet. It takes about 36 hours to print the single model, according to my memory. To assemble the cabinet, use #6 x 3/4" long wood screws for the lower plate, #6 x 1/2" long bolts and nuts for the joystick and LCD, and #4 x 1/4" long wood screws for mounting the side molds, Pi, and USB control board. If using split models, use #6 x 3/8" long wood screws to connect the top and bottom. The amplifier and speaker mount to the amp mount, with the volume pot sticking out through a hole in the top. To wire the audio jack, connect the right or left channel from the jack to the amp signal input, the ground from the jack to the negative voltage amp input, and the amp voltage input + to one of the Pi's + output pins. The amp outputs to the speaker. Print, assemble, and have fun! I've included an IGES file for anyone who wants to modify the cabinet.
With this file you will be able to print Raspberry Pi Arcade Cabinet with your 3D printer. Click on the button and save the file on your computer to work, edit or customize your design. You can also find more 3D designs for printers on Raspberry Pi Arcade Cabinet.
