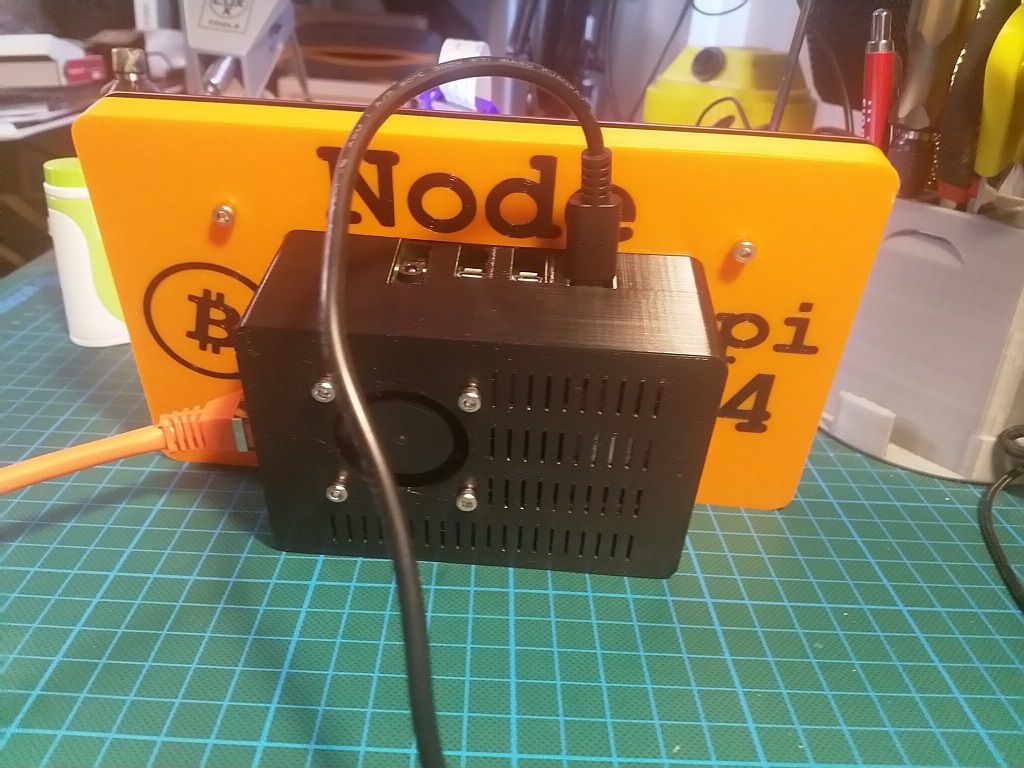
Raspberry Pi 4 LCD Case - Bitcoin Edition
prusaprinters
<p>This is a standalone case for the Raspberry Pi 4 with the official 7" LCD Touchscreen. It covers the back of the LCD and the Raspi 4 and has cut-outs for a case fan, ventilation and all ports. The fan can be mounted inside or outside but after a while I found it less noisy when mounted outside.</p> <h3> Intro</h3> <p>As you might have guessed from the pictures, I use it as a bitcoin full node and the Raspi 4 is perfectly capable for doing the initial sync of the blockchain and keeping it in sync with Tor enabled. With the low energy consumption of Raspi 4 it can run 24x7 and because it is a true desktop you can use it for other things too, like showing the current price in tradingview or use it as a gui for the Electrum Wallet with Personal Server. Search the web for "raspberry full node" and pick any instruction that suits you or follow the links below.</p> <p><em>Note: the cut-outs for the ports on the case only cover the upper part. I couldn't think of a way to cover the bottom too without making the model overly complicated. It's a minor imperfection with no negativ effects (my fan blows air inside, no dust comes in) but please let me know if you've redesigned the part to fully cover the cut-outs.</em></p> <h3> Print Instructions:</h3> <p>(see printer settings for more details)</p> <ul> <li>print "rip4_case"</li> <li>singlecolor: print "base_single"</li> <li>multicolor: print all files named "base_multi" - add them to the slicer as one model and give each part the color you like Build Instructions:</li> </ul> <hr/> <ul> <li>mount the Raspi 4 on the LCD screen as shown in the included manual</li> <li>attach the base to the back of the LCD with 4 M3 screws. Tighten the screws of all corners evenly and not too much</li> <li>push the case into the back until it's secure Parts needed:</li> </ul> <hr/> <ul> <li>LCD Screen: <a href="https://www.raspberrypi.org/products/raspberry-pi-touch-display/">https://www.raspberrypi.org/products/raspberry-pi-touch-display/</a></li> <li>Case Fan: <a href="https://www.raspberrypi.org/products/raspberry-pi-4-case-fan/">https://www.raspberrypi.org/products/raspberry-pi-4-case-fan/</a></li> <li>Screws: any M3x10mm</li> <li>Optional: any USB keyboard Links:</li> </ul> <hr/> <ul> <li>Raspi 4 full node tutorial: <a href="https://github.com/kdmukai/raspi4_bitcoin_node_tutorial">https://github.com/kdmukai/raspi4\_bitcoin\_node\_tutorial</a></li> <li><p>Electrum PS: <a href="https://github.com/chris-belcher/electrum-personal-server">https://github.com/chris-belcher/electrum-personal-server</a> have fun ;)</p> <h3>Print Settings</h3> </li> </ul> <p><strong>Printer Brand:</strong></p> <p>Prusa</p> <p><p class="detail-setting printer"><strong>Printer: </strong> <div><p>i3 MK2 MMU</p></div><strong>Rafts:</strong></p> <p>No</p> <p><p class="detail-setting supports"><strong>Supports: </strong> <div><p>No</p></div><strong>Resolution:</strong></p> <p>0.15mm</p> <p><p class="detail-setting infill"><strong>Infill: </strong> <div><p>25% Cubic</p></div><br/> <strong>Filament:</strong><br/> FormFutura PLA <br/> <p class="detail-setting notes"><strong>Notes: </strong> </p><div><p>Slic3r settings I used:</p>* 1st layer: 0.2mm</div></p> <ul> <li>other layers: 0.15mm</li> <li>solid layers top/bottom: 3</li> <li>top/bottom infill: hilbert curve</li> <li>perimeters: 2</li> <li>seam position: rear</li> <li>all quality settings except "Avoid crossing perimeters"</li> </ul> </p></p></p> Category: Electronics
With this file you will be able to print Raspberry Pi 4 LCD Case - Bitcoin Edition with your 3D printer. Click on the button and save the file on your computer to work, edit or customize your design. You can also find more 3D designs for printers on Raspberry Pi 4 LCD Case - Bitcoin Edition.
