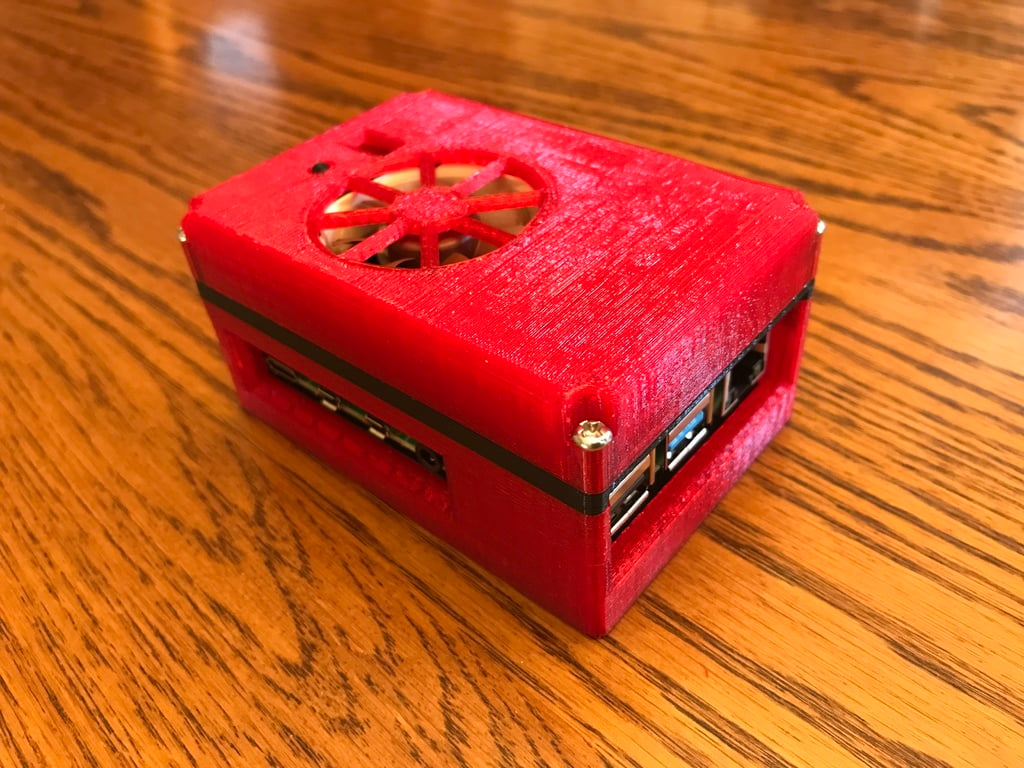
Raspberry Pi 4 Heatsink and Argon40 Fan Case
thingiverse
The Argon40 Pi Fan Hat is a smart fan designed specifically for the Raspberry Pi, available for versions 4, 3B, and 3B+. This innovative device allows users to set their own temperature/fan speed curve, making it ideal for quiet desk use. No longer will you have to deal with fans running at maximum capacity on a 5V setup. I'm currently using the "Aluminum Alloy Passive Cooling Case Shell" for my Pi 4 model B, which provides reliable cooling even under sustained loads and allows me to put it in a protective case. To ensure proper airflow, I've chosen to use an overcase that holds the Pi in place within the aluminum casing while providing space between the Argon40 fan hat's circuit board and the metal. The overcase is held together by four M3x20 screws, allowing for easy assembly and disassembly as needed. To accommodate the Argon40's unique design, I used a 2x20 GPIO extension header (available on Amazon) to create a suitable spacer between the fan hat and the aluminum case. This setup provides an optimal distance of 13.5mm with 5.5mm of pins sticking out. The Argon40 comes equipped with a thinner sleeve bearing fan, but I opted for a Noctua NF-A4x10 5V, Premium Quiet Fan, 3-Pin, 5V Version (40x40x10mm) due to its superior bearing and sound levels. This upgrade is perfectly compatible with the overcase, although it does leave some unused space above the fan. However, if you choose to stick with the stock fan, you'll need to splice or solder new leads onto the fan's circuit board. For a seamless integration of the Noctua fan, I recommend using M3x12 screws and ensuring that their heads don't protrude from the frame. The Argon40 daemon is downloaded and installed separately via a command-line interface (CLI). Although it's simple to use, running this daemon poses a security risk due to its use of sudo commands. To check the script before installation, simply run "curl https://download.argon40.com/argon1.sh > argon1.sh" from your CLI. The actual installation process involves executing the following command: "curl https://download.argon40.com/argon1.sh | bash". Please note that Thingiverse's formatting may break web links onto separate lines, but these commands should be entered as a single line. The daemon's python script is relatively lightweight and uses a 30-second sleep to prevent excessive resource usage. However, if you're using the fan on a bare board rather than in an aluminum case, this delay can lead to dramatic temperature fluctuations during the sleep period. To adjust the sleep time, simply modify the two time.sleep commands within the /usr/bin/argononed.py file. Lastly, it's worth noting that the daemon doesn't appear to be limited by the number of points defining your fan curve. My setup features 9 pairs of points, spanning from 40°C to 48°C and corresponding to 10% to 100% fan speed respectively: 40=10 41=15 42=20 43=25 44=35 45=50 46=65 47=80 48=100
With this file you will be able to print Raspberry Pi 4 Heatsink and Argon40 Fan Case with your 3D printer. Click on the button and save the file on your computer to work, edit or customize your design. You can also find more 3D designs for printers on Raspberry Pi 4 Heatsink and Argon40 Fan Case.
