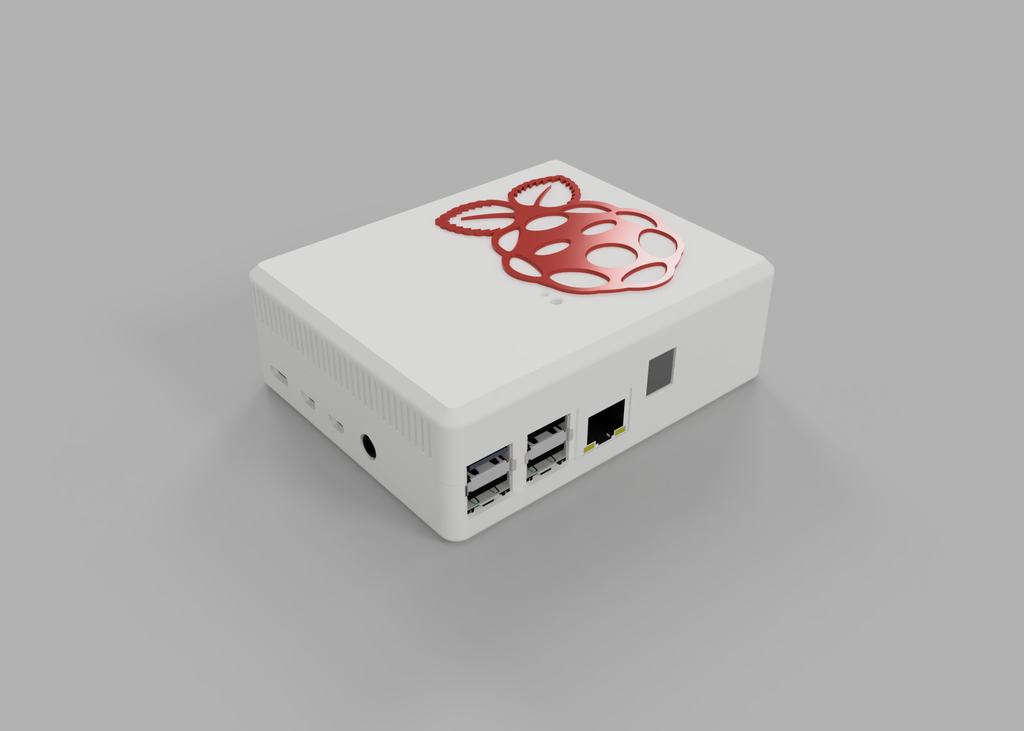
Raspberry Pi 4 Case with Homematic RPI-RF-MOD
prusaprinters
<h3> THIS IS A WORK IN PROGRESS - I COULDN'T TEST IT YET - STILL WAITING FOR MY ADA4079 TO ARRIVE</h3> <p>This is an easy to print case for the Raspberry Pi 4B version of my <a href="https://www.thingiverse.com/thing:4200574">Raspberry Pi 3 and Homematic RPI-RF-MOD</a> case.</p> <p>You need:</p> <ul> <li>3x M2.5x6mm screws</li> <li><p><a href="https://www.adafruit.com/product/4079">2x20 Socket Riser Header for Raspberry Pi</a><br/> The Socket Riser is needed due to the changed PCB layout of the RPi 4 compared to the RPi 3. The RPI-RF-MOD PCB hits the LAN port without it.<br/> Maybe I will design a version for the tall stacking headers in the near future. But this is the version I prefer. Print the parts, insert the RPi and fix it with 2 screws to the bottom part.<br/> Then put the Riser Header on the GPIO pins of the Pi and install the RPI-RF-MOD and close the case with the top. insert the last M2.5x6mm screw into the square hole and secure it.<br/> One hole at the top of the case shows the Status LED (bigger one) and the other is to press the reset button with a needle or similar small and thin piece of whatever (maybe Clippy could be used ;-) ).<br/> I highly recommend to use small rubber bumpers (like 3M bumpon) with a diameter from 7-9mm on the bottom part to keep some distance to the wall/surface and not covering the venting holes.</p> <p>I designed a clickable insert for this square hole so you can make your own "stickers" on it. (or use the raspberry in the example). For this please use the Nupsi.step as a start.</p> <p>Parts to print:</p> </li> <li><p>1x Bottom_RPi4.stl</p> </li> </ul> <ul> <li><p>1x Top_RPi4.stl (Top without venting holes)<br/> OR<br/> 1x Top_vent_RPi4.stl (Top with venting holes on three sides)<br/> OR<br/> 1x Top_small-vent.stl (Top with venting holes only on the long side facing up when wall-mounted) optional:</p> </li> <li><p>Logo_example.stl<br/> or any of your own designs using the Nupsi.step as mounting base</p> <h3>Print Settings</h3> </li> </ul> <p><strong>Printer Brand:</strong></p> <p>Prusa</p> <p><p class="detail-setting printer"><strong>Printer: </strong> <div><p>i3 MK3</p></div><strong>Rafts:</strong></p> <p>No</p> <p><p class="detail-setting supports"><strong>Supports: </strong> <div><p>No</p></div><strong>Resolution:</strong></p> <p>0.2</p> <p><p class="detail-setting infill"><strong>Infill: </strong> <div><p>23%</p></div><br/> <strong>Filament:</strong><br/> N/A PETG N/A</p> </p></p></p> Category: Household
With this file you will be able to print Raspberry Pi 4 Case with Homematic RPI-RF-MOD with your 3D printer. Click on the button and save the file on your computer to work, edit or customize your design. You can also find more 3D designs for printers on Raspberry Pi 4 Case with Homematic RPI-RF-MOD.
