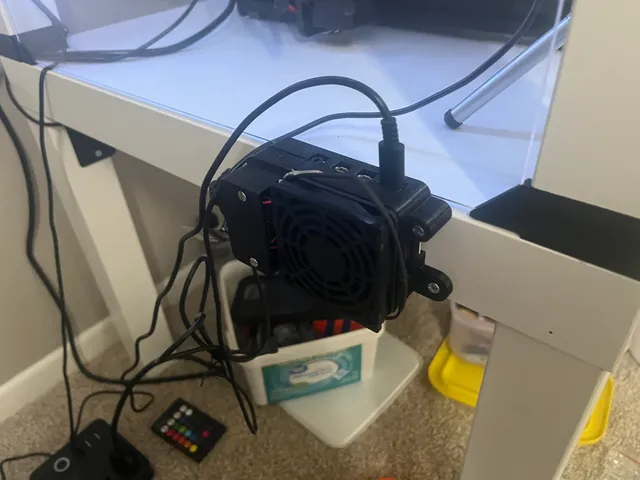
Raspberry Pi 4 case mount for Ikea lack enclosure
prusaprinters
I have successfully designed and 3D printed a custom Raspberry Pi 4 case to accommodate a larger 5V fan and an additional PCB responsible for controlling the fan's functionality. The PCB features a transistor that serves as a switch, enabling the fan to be turned on and off via a bash script.Since it is not feasible to directly drive a 5V fan using the Raspberry Pi GPIO pin, the transistor and the PCB circuit are essential components. For a comprehensive understanding of the PCB connections, you can refer to this link: https://howchoo.com/g/ote2mjkzzta/control-raspberry-pi-fan-temperature-python.Furthermore, I have developed shell scripts that automatically activate the fan when the temperature of the Raspberry Pi exceeds 48 degrees Celsius. To access the shell script, you can visit the following GitHub link: https://github.com/gpokhark/Octopi_Setting/blob/master/temp_fan.sh. To ensure continuous fan control, a cron job should be set up to run this script every 2 minutes. Detailed instructions on how to implement this can be found in the repository's README.md file.To initiate the printing process, kindly download the relevant files and proceed with printing. The provided exploded view offers guidance on assembling the components, and you may find it necessary to use some super glue for certain parts' secure attachment. Feel free to utilize the provided files and information to experiment and adapt the design to your needs. Happy 3D printing!Smitten by this model's charm? Show some love with a like and stash it in your curated collection. Speak your mind in the comment zone! Snap and share your printed model – let's see that swag!
With this file you will be able to print Raspberry Pi 4 case mount for Ikea lack enclosure with your 3D printer. Click on the button and save the file on your computer to work, edit or customize your design. You can also find more 3D designs for printers on Raspberry Pi 4 case mount for Ikea lack enclosure.
