Raspberry Pi 3 (Model B/B+) Project Enclosure
prusaprinters
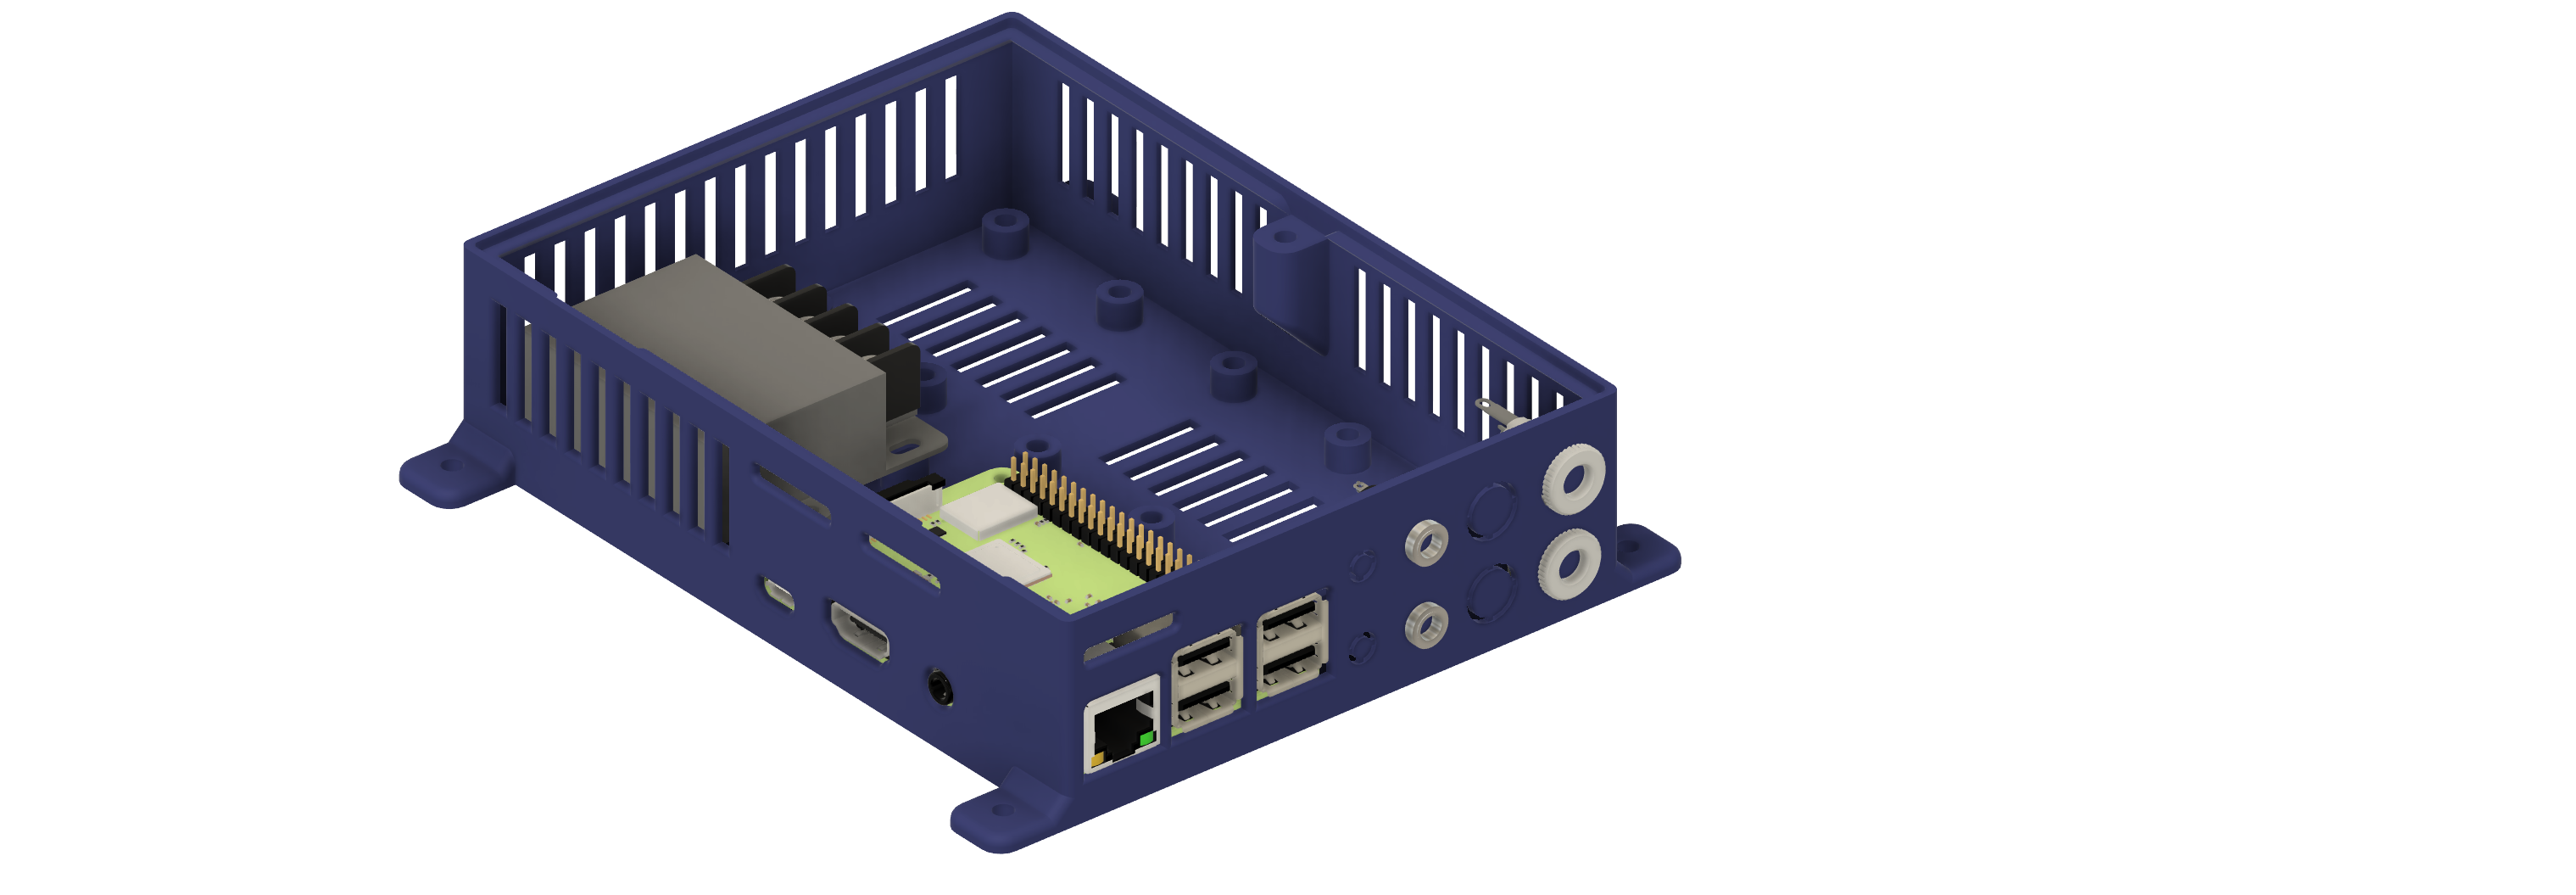
<p>I've designed this for a 3D Printing enclosure controller initially for the Raspberry Pi 4, but as many people use a Pi 3 for Octorint, I've remixed the design to accommodate a Raspberry Pi 3 b/b+.</p><p>The photograph shown is of the case printed using Prusament Anthracite Grey PETG, this was a slightly earlier revision, but you get the idea.</p><h4>Design Features</h4><ul><li>1.6mm thick walls for sturdy construction</li><li>4 x 11mm knockouts for panel mount DC barrel jacks</li><li>4 x 6mm knockouts for panel mount 3.5mm jacks</li><li>3 x 20mm x 3mm slots for ribbon cables or other wires.</li><li>Mounting posts for M2.5 brass inserts for Raspberry Pi 4</li><li>Mounting post for DC-DC converter if you wish to power the Pi via GPIO (best to add protection circuitry if you do)</li><li>Mounting posts for M2.5/M3 bass inserts to support other components</li><li>Lid secured via M3 bolt into M3 brass insert on base.</li></ul><h4><strong>Printing</strong></h4><p>PETG was recommended for the Pi4 version, as the Pi3 runs considerably cooler, PLA should be just fine.</p><ul><li><strong>Main Body</strong>:<ul><li>Material: PLA or PETG</li><li>Print Settings (PrusaSlicer): 0.20mm Quality, 15% infill</li><li>Supports: None</li></ul></li><li><strong>Lid</strong>:<ul><li>Material: PLA or PETG</li><li>Print Settings (PrusaSlicer): 0.20mm Quality, 15% infill</li><li>Positioning: Print the lid top side down.</li><li>Supports: Ideally paint on some supports for the small lips that lock into the base. Or select support on build plate only.</li></ul></li></ul><h4><strong>Hardware</strong></h4><ul><li>Raspberry Pi 3</li><li>12/24V to 5V DC-DC Converter:<ul><li><a href="https://amzn.to/3EAHHIW">10A (50W) version</a></li><li><a href="https://amzn.to/3EwhN9s">3A (15W) version</a></li></ul></li><li><a href="https://amzn.to/3FswtHP">2.5mm DC Barrel sockets and jack plugs</a></li><li><a href="https://amzn.to/3py4cu2">3.5mm 3 pole chassis socket and 3.5mm 3 pole plugs</a></li><li><a href="https://amzn.to/3sShR19">3.5mm 4 pole chassis socket</a> and <a href="https://amzn.to/3sDMHug">3.5mm 4 pole plugs</a> (these connectors may require the holes to be enlarged slightly).</li><li><a href="https://amzn.to/32EcGGG">M2.5 Brass inserts</a></li><li><a href="https://amzn.to/3EzqiAt">M2.5 x 5mm bolts</a> (for Pi)</li><li><a href="https://amzn.to/3z3WTx7">M3 Brass inserts</a></li><li>M3 x 8mm bolt (for lid)</li><li>M3 x 4mm for DC-DC Converter and other mounting points</li></ul><h5>Additional Notes</h5><p>This is my original design taking some inspiration from <a href="https://www.prusaprinters.org/prints/79181-compact-fysetc-spider-and-rpi-4-case-and-120mm-fan">Dan Andersen's Compact Fysetc Spider and RPI 4 Case and 120mm Fan</a> <br> </p><p><strong>Version History</strong></p><ul><li>V10 - Initial Release</li></ul>
With this file you will be able to print Raspberry Pi 3 (Model B/B+) Project Enclosure with your 3D printer. Click on the button and save the file on your computer to work, edit or customize your design. You can also find more 3D designs for printers on Raspberry Pi 3 (Model B/B+) Project Enclosure.