RAMPS 1.4 Board Cooling Fan Mount
thingiverse
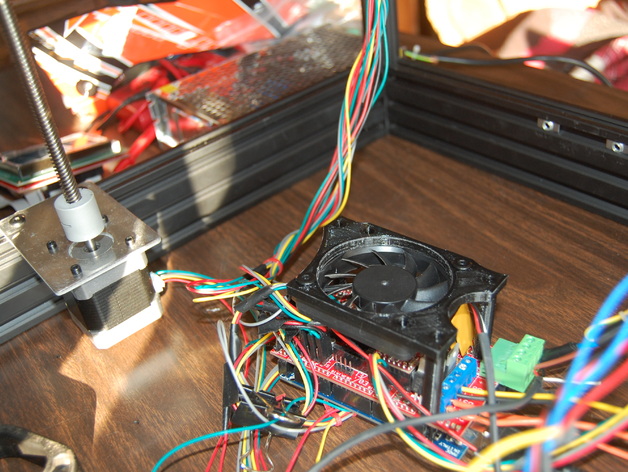
I was underwhelmed by existing fan mount designs so I decided to create my own. It's designed specifically for 60mm fans but its center hole is easily adjustable. Prior to this fan, I experienced overheating issues with my RAMPS board, but now that problem has been eradicated. I've run around 20 hours of continuous printing without any issues, whereas problems would typically arise within 15 minutes previously. Print Settings Printer: Cobblebot Basic Rafts: No Supports: No Resolution: .2mm Infill: 10% Notes: This part doesn't require exceptional strength or aesthetic appeal, so .2mm and 10% are perfectly sufficient. Post-Printing Requirements Parts Needed: 2 (or 4 if you're feeling adventurous) - M5x18 cap head bolts 3 - 20mm pieces of 1.75 or 3mm plastic Instructions: 1.) Attach the fan to the frame by screwing the mount into place using the cap head bolts. I had to thread the fan holes to accommodate the bolts. 2.) Use hot glue to secure three small pieces of plastic to the bottoms of each leg on the mount, creating miniature feet. Leave about half (10mm) exposed - these will be inserted into the top of the RAMPS board, holding the mount in place. 3.) Connect your 12v fan directly to the power source on the RAMPS board (or wherever you prefer), ensuring the fan turns on as soon as power is applied. Design Process I utilized Autodesk Inventor for my design work. If you require the files in a different format, I can provide them.
With this file you will be able to print RAMPS 1.4 Board Cooling Fan Mount with your 3D printer. Click on the button and save the file on your computer to work, edit or customize your design. You can also find more 3D designs for printers on RAMPS 1.4 Board Cooling Fan Mount.