Rain gauge
prusaprinters
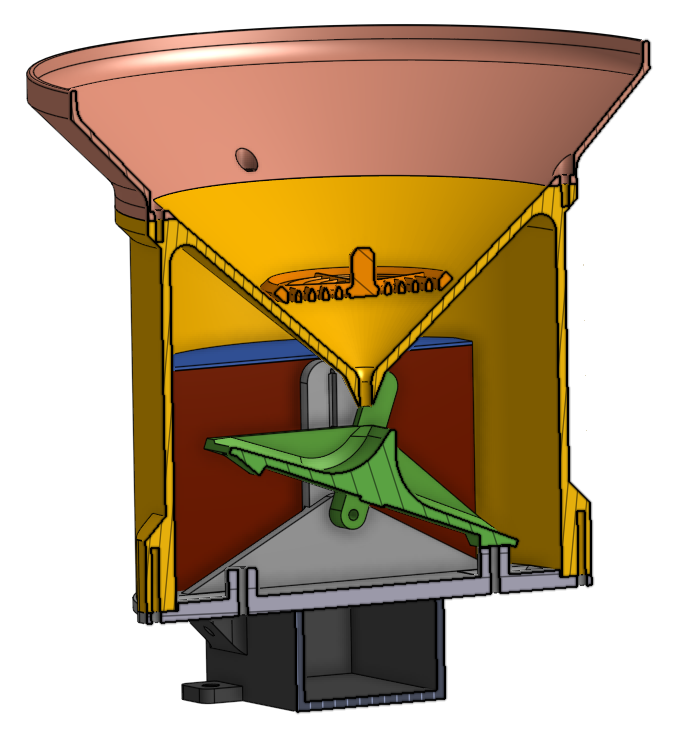
<p>Print your own rain gauge for measuring rainfall. Add some microcontroller like arduino or esp and you can gather and chart the daily rainfall in home automation system like OpenHAB or HomeAsisstant.</p><h4>Description</h4><p>There are three options how to use it:</p><ol><li>put microcontroller inside the can into inside box or</li><li>put microcontroller into outside box under the rain gauge or</li><li>just use wiring from reed switch to microcontroller on better accessible place</li></ol><p>Use round magnet 5x2mm together with magnetic reed switch to count impulses. One impuls from reed switch equals 0.2 mm of rainfall. It is possible to adjust the amount a bit with the adjusting screws under the bucket (see the picture)</p><h4>Printing tips</h4><p>Everything is designed to be printed without supports. I recommend to use 0.6mm nozzle for bigger parts. I printed everything with PETG and then painted it with gray UV resistant color paint.</p><ul><li>bucket - print on side with magnet holder</li><li>can - print upside down</li></ul><h4>Assembling </h4><p>Screw the can with top ring with four M3x6 or M3x8. Glue the magnet into bucket, connect reed switch (be carefull not to brake it) and test if the bucket can move smoothly and if the switch is generating correct impulses.</p><p>At the end screw together the can with base with four M3x8 screws. </p><p>Don't forget to put the strainer into can to avoid jamming the small hole with leaves or insect.</p><p> </p>
With this file you will be able to print Rain gauge with your 3D printer. Click on the button and save the file on your computer to work, edit or customize your design. You can also find more 3D designs for printers on Rain gauge.
