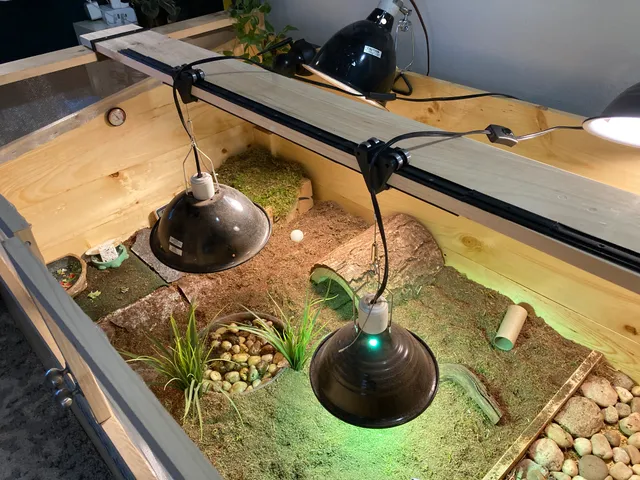
Rail and Carriage designed to be mounted on wood
prusaprinters
This model was designed to hold the lights above my tortoise enclosure but can be used for other purposes. Materials:5x 8mm x 22mm x 7 mm bearings.5x m2.6 12mm bolts5x nuts 6.2mm wide 2.2mm tall. 1x 1/16 wire cable thimble. 1x 1/16 wire cable crimping sleeve(depending on what your connecting to the other end you might need more)1/16 wire cable. I used this kit: https://www.amazon.com/dp/B07TQSHY1X?ref=ppx_yo2ov_dt_b_product_details&th=12x small wood screw per 100mm track 2.8mm shaft thickness 5mm head. (one for the top track one for the bottom) Clips used to hole the lights shown in photos: https://a.co/d/eaBQ1WV instructions:this is designed with the intention that the print will be paused in a few places and the final assembly to be placed inside the clip. print Carriage A on its back. it will need supports for the center bar but make sure to do build plate only so it doesn't fill the holes that the wire and nut go into. avoid putting supports in the screw holes since its annoying to get out and not needed. set it to pause when it gets to the layer that covers the center. place the 1/16" wire and thimble in the hole. align the crimp piece to line up with the rectangle or crimp it outside the area of the part. this part will need to be paused again near the top to insert a nut. the ones I used are 6.2mm wide and 2.2mm tall. print Carriage B on its side such that the axis of the bearing slots will be vertical. it will need supports. there are 4 nuts to be placed inside this part. where you need to pause should be obvious. each hole needs 2 nuts. print Carriage C and D on their backs. supports needed for the center barAssemble Carriage A - D with the bearings and m2.6 bolts. the last step is not necessary and truthfully I haven't tried it yet. print the clip such that it is oriented to be tall. pause it before it prints the top wall of the square and insert the assembled Carriage inside it. when the print resumes, it should fully enclose the assembly. print as much track as you need 100 mm each. one top and one bottom. the bottom one is slightly thicker to compensate for the thickness of my board. I've included the fusion 360 files so adjustments can be easily made.
With this file you will be able to print Rail and Carriage designed to be mounted on wood with your 3D printer. Click on the button and save the file on your computer to work, edit or customize your design. You can also find more 3D designs for printers on Rail and Carriage designed to be mounted on wood.
