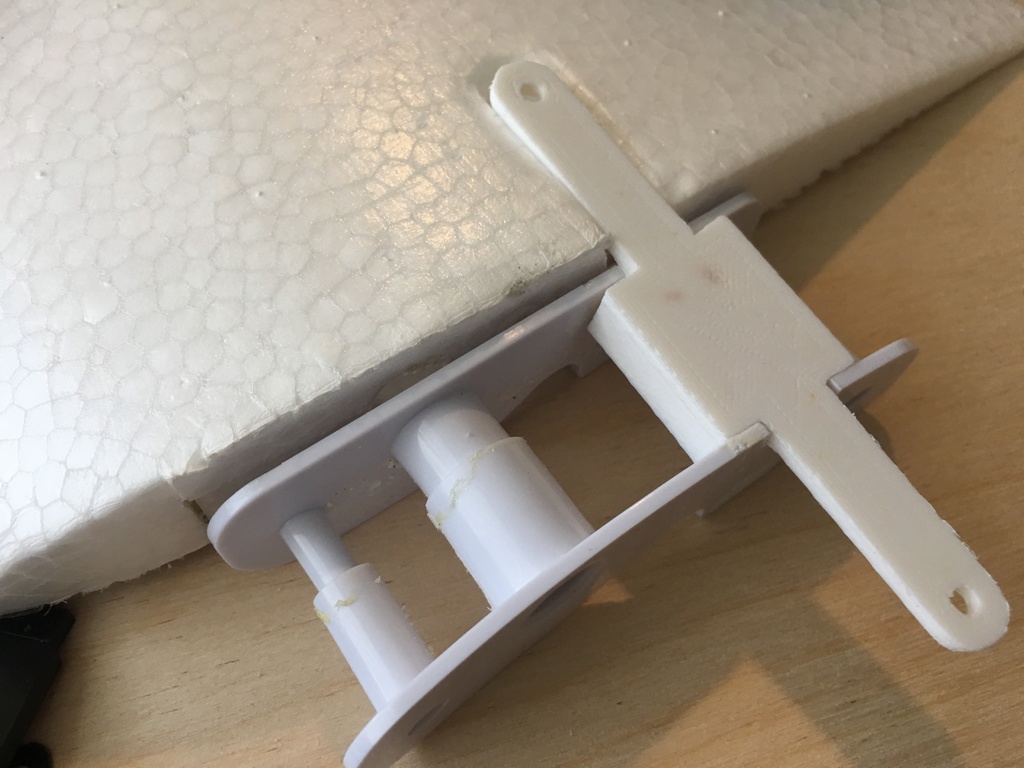
Radian upper wing joiner
thingiverse
The Radian and Radian Pro are fantastic gliders but suffer from one significant drawback: the wing joiner screws from below instead of above, which means you must flip the model over at the field. If you don't have a stand, you risk damaging the rudder or elevator. This section requires some minor surgery, but it's not too challenging to install. The hardest part is removing the stock plastic joiner. I applied rubbing alcohol around the edge of the stock plastic joiner and pried it out with a flathead screwdriver. The adhesive they use is quite rubbery but does come loose. You'll also need to remove the stock plastic parts that the screw threads into. I relocated these to the bottom, and I recommend drilling a small hole on the other side so you can use screws as long as you prefer. Next, slice about 1-2mm of foam off the top slot so the new joiner sits flush. Use the wing as a guide and mark the slot on the stock joiner, then use a Dremel to cut a roughly 3mm deep slot on the top so the new joiner can sit inside. The interior cut needs to be at an angle because I added a stress relief fillet to the new joiner. Use the stock joiner as a guide when cutting the foam on the Radian. I suggest using low-temperature hot glue to secure the new joiner in place because you can remove it by applying a few drops of rubbing alcohol. If you want to take this even further, it's relatively easy to create a channel through the foam so you can plug the wires into the top. You'll never have to flip the model over again.
With this file you will be able to print Radian upper wing joiner with your 3D printer. Click on the button and save the file on your computer to work, edit or customize your design. You can also find more 3D designs for printers on Radian upper wing joiner.
