RADDS case
thingiverse
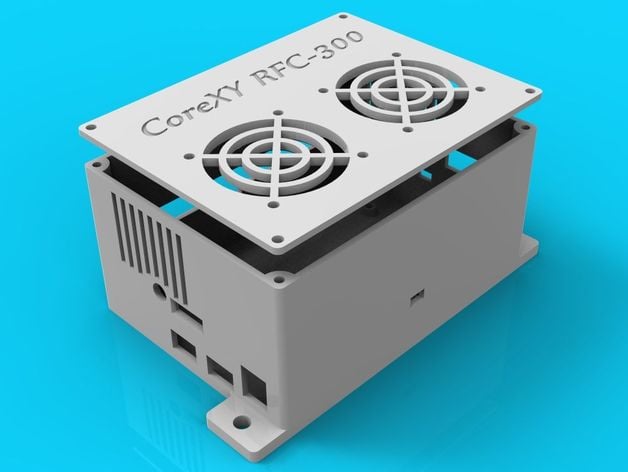
RADDS Case \nI built this case for my heavily modified C-Bot/D-Bot style CoreXY machine, which features a large number of custom parts. I'm releasing this case now because it's not specific to any particular machine (beyond its 20mm extrusion mounting tabs).\nFeatures:\nDual fans and side exhaust vents.\nFull width access slot for the Power Input and MOSFET Output terminal block.\nRight side slot for miscellaneous wires - endstops, thermistors, display, etc.\nPrecisely located holes and slots for the RADDS SD card and reset button, Due USB ports and power input connector.\nMounting tabs to allow attachment to 20mm extrusions with up to 5mm screws.\nSlots to facilitate insertion of a small screwdriver to pry the RADDS board from the Due board for easier disassembly.\nModeled in SpaceClaim.\nUpdate: The V3 lid provides more clearance for the fans, ensuring that wires don't press against them.\nPrint Settings\nPrinter:\n Custom Kossel 2020\n \n Rafts:\n No\n \n Supports:\n Yes\n \n Resolution:\n 200 micron\n \n Notes:\n Support will be required under the long terminal block slot and possibly the right side wiring slot. I also used supports under the SD slot, USB slots, and power connector hole, but these are at your discretion.\nPrint lid top face down.\nThe walls and board standoffs were optimized for printing with a 0.4mm nozzle and 0.48mm extrusion width (auto extrusion width setting in Simplify 3D). I recommend using an M3 tap to thread all holes for the M3 screws.\nThe RADDS and Due boards cannot be inserted into the case when connected together. First, install the DUE board, insert screws, then drop the RADDS board into place and secure it. Verify that the access holes are clear to ensure the RADDS board is fully seated.
With this file you will be able to print RADDS case with your 3D printer. Click on the button and save the file on your computer to work, edit or customize your design. You can also find more 3D designs for printers on RADDS case.
