Rack Mount System 19"
thingiverse
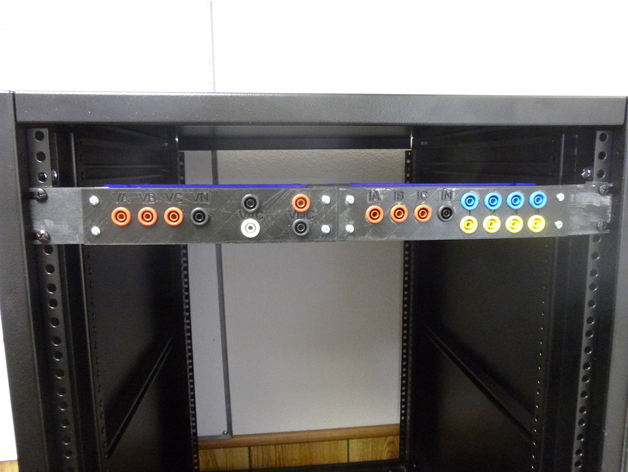
I am designing a relay testing rack mount system that requires custom brackets. By designing and printing them myself, I have significantly reduced the costs associated with custom manufacturing. Hardware Required: * 6-32 1/4" length machine screws, Digikey H154-ND * 6-32 1/2" length machine screws, Digikey H360-ND * 2" Hex Standoffs 6-32 female-female, Keystone Electronics 2214, Digikey 36-2214-ND * 1/2" Hex Standoffs 2-36 female-male, Keystone Electronics 8414, Digikey 36-8414-ND Assembly: Printed Parts * 2 Panel_Mount pieces * 2 Center_Mount pieces * 2 Rear_Brackets (Modified to suit your needs) * 2 Front_Plates (Modified to suit your needs) * ? Rear_Mount_Vert/Horz for terminal blocks or wiring harness * ? Back_Plates (Modified to suit your needs) First, take the two Center_Mount pieces and insert four 2" standoffs into one of them. Then, press the second Center_Mount onto the exposed 2" standoffs ends. Use 6-32 screws to pull the spacer into its properly seated position. 1.1 Remove all screws from the completed center mount assembly that were used to seat the spacers. Next, take the two Rear_Brackets and attach them to the center mount assembly using the 6-32 1/2" machine screws. Insert 2" standoffs into the outer ends of the Rear_Brackets and secure these spacers using 6-32 1/2" machine screws. Attach the two Panel_Mount pieces to the spacers that were just installed in the previous step. Do not install any machine screws at this time. Take the two front plates and attach them to the Panel_Mount and Center mount assembly using 6-32 1/2" machine screws. If using Rear_Brackets, they must be tapped. Perform this using a 6-32 tap, taking care to clean the tap after completing each hole. It would also be beneficial to tap the small holes in the Rear_Mount_Horz/Vert at this time. Install the 1/2" Standoffs to the Rear_Bracket tapped holes. The purpose of these standoffs is to allow additional room for wire/cable management. Depending on whether you are using horizontal or vertical back plates, install the appropriate Rear_Mount to the standoffs and secure using 6-32 1/4" machine screws. Install the Back_Plates to the Rear_Mounts using 6-32 1/4" machine screws Changes: * 4/8/2017: Added a 45 degree angled terminal block rear mounting bracket, not yet tested. Print Settings: * Printer: Flashforge Creator Pro and Hatchbox Alpha * Rafts: No * Supports: No * Resolution: 0.2 * Infill: 15% * Notes: Print with 2-3 shells due to tapping holes. Print with 3 or more top and bottom layers.
With this file you will be able to print Rack Mount System 19" with your 3D printer. Click on the button and save the file on your computer to work, edit or customize your design. You can also find more 3D designs for printers on Rack Mount System 19".