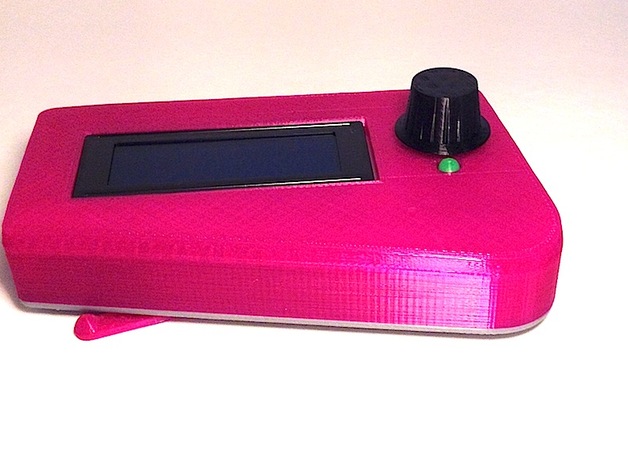
Quickmount Reprapdiscount Smart Controller Case
thingiverse
I designed this removable case for Reprapdiscount LCD controllers using OpenScad, making a complete, enclosed case with an emergency stop button, a mounting bracket for printers at a 90-degree angle, and a lock-kit that attaches the case to the mounting bracket. Use your own reprapdiscount knob; here is a suggested option: http://www.thingiverse.com/thing:172996. The back plate cover has two tiny nubs on the inside to prevent accidental unlocking. The mounting bracket's holes match the printer plate on the Hadron OrdBot, allowing for secure attachment. You can add your own drilling or matching mounts based on your specific printer setup. The LCD controller can be installed in a couple of ways: by mounting the lock directly onto the printer's vertical back support (optional) by attaching printed risers to T-Slot extrusion and installing the lock plate into those risers, then attach them together through corresponding holes. --- March 14, 2015 Update --- New modifications were added: the SCAD file was revised to incorporate an adjustable height riser bracket for elevated placement above X-axis Z-heights in printers. You'll need to print new components, specifically 'Chris_lcd_riser-Right.stl' and 'Chris_lcd_riser-Left.stl.' Attach them via T-slot nuts; you can then secure the back plate onto the new risers. I built this removable case for your Reprapdiscount LCD controller using OpenScad. To build a removable case, we need a removable top part and an entire back piece, which encases everything else like a full encapsulation. In addition to those pieces there are mounting brackets as well as emergency stop button, all of these elements combine together so you will not lose your device during operation when its needed the most by having them fully attached with screws. This assembly requires about three hours and a half, in comparison it would take around two hour twenty minutes plus twenty-five minutes for just printing all other parts involved. The full details on how to build one is located below within printable section at end. Please read following instructions for building this device carefully: 1) Print out required components such as main top casing and enclosure; these will make up total 8 parts which includes: 4 long horizontal brackets, four round small round screws and an aluminum metal bracket. 2) Take necessary time by printing those extra pieces of components which we listed above. Here is some more additional information that should help clarify things: There's a detailed photo illustrating disassembled components which show exactly where each screw needs to be inserted in order to keep device from breaking easily so that anyone can assemble it easily. We advise against making changes or adjustments unless user feels completely comfortable using programming code for open-scad, due to risk involved of changing certain things might accidentally prevent working properly.
With this file you will be able to print Quickmount Reprapdiscount Smart Controller Case with your 3D printer. Click on the button and save the file on your computer to work, edit or customize your design. You can also find more 3D designs for printers on Quickmount Reprapdiscount Smart Controller Case.
