Quick swap lightweight magnetic power bank 5000mAh mount for Quest 2 with Rift CV1 strap
prusaprinters
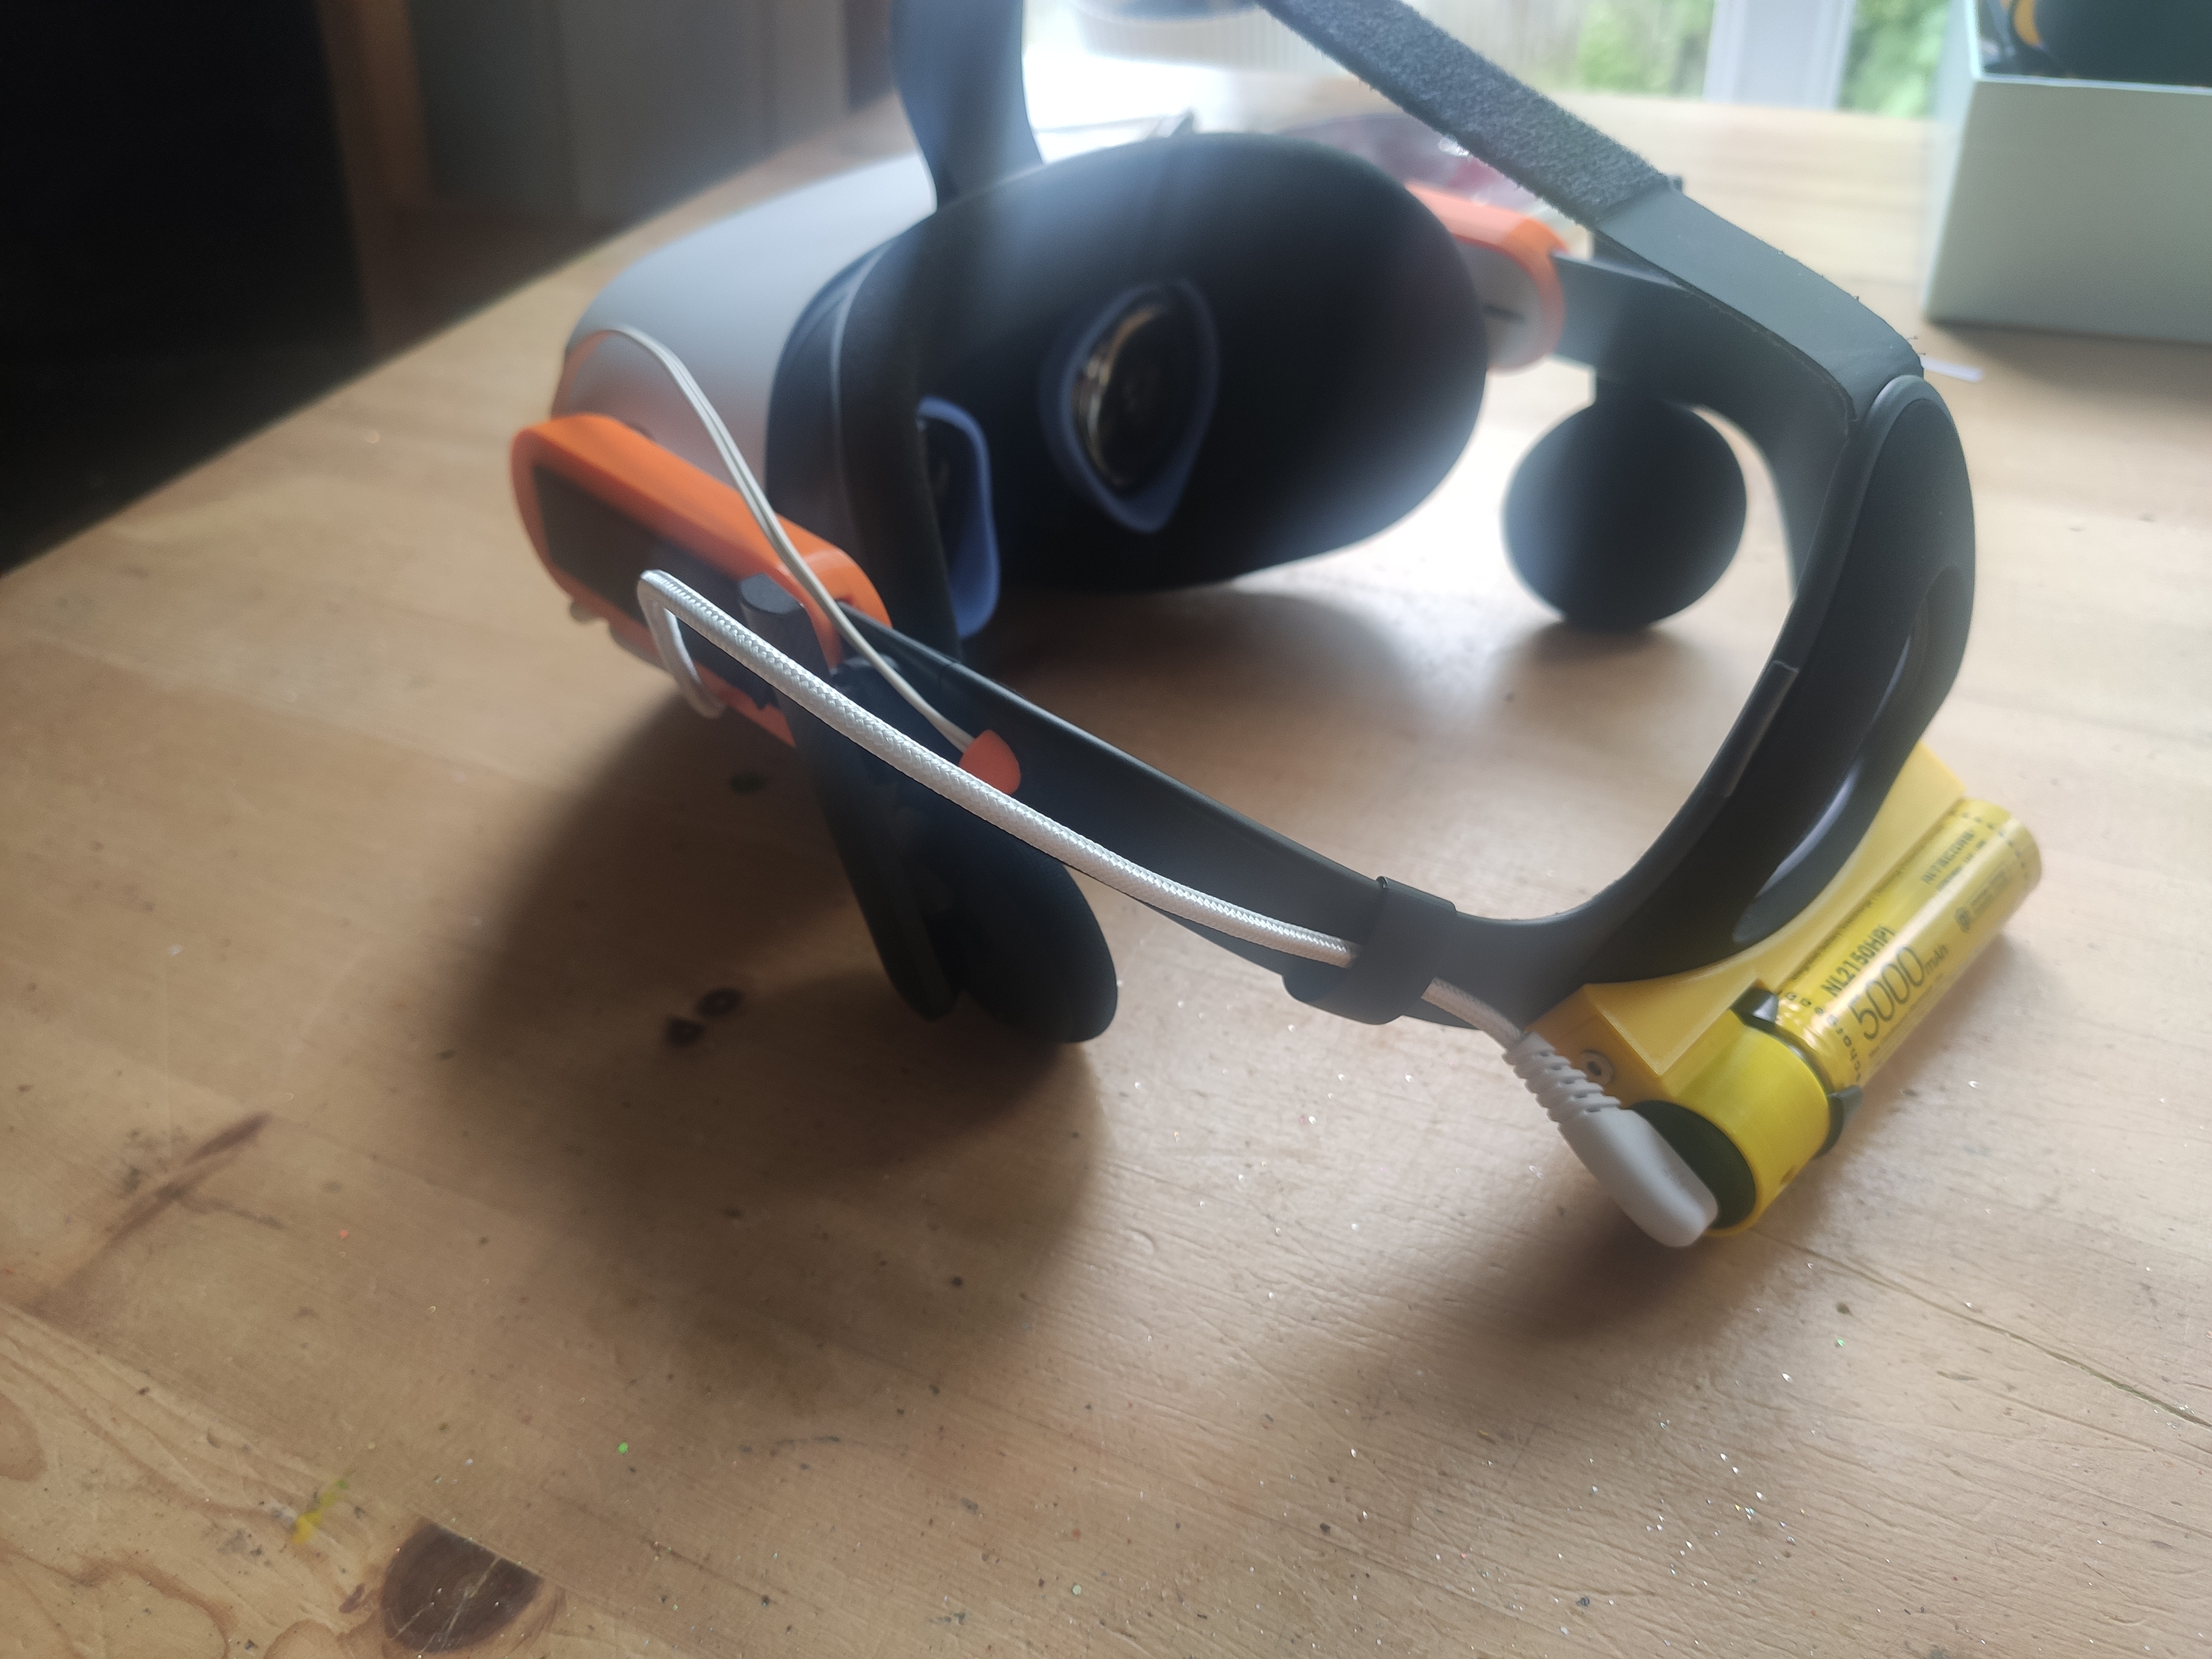
<p>For a while wanted to have very light power bank mount for my Quest 2/Rift CV1 strap with option to quick swap batteries when needed without even taking off the headset. </p><p>Decided to use extremely power dense but very light Nitecore 5000mAh battery with included magnetic power bank attachment. The weight of the total set of printed part plus battery is only 106 grams! and without the attached battery its only a small fraction of that. The output power of the power bank is 1.38A which is similar to my other power banks I used. </p><p>For this to work you will need:</p><ul><li>1 x Nitecore MBP21 intelligent battery system kit</li><li>2 printed parts. See pictures for printing orientation suggestion as you will need to inset magnets.</li><li>3 x 20mm x 6mm x 1.5mm magnets</li><li>3 x M3 x 6mm countersunk/flat screws</li><li>3 x 3mm inserts ( and probably something to install them - soldering iron works great)</li><li>I also provided small printed template for easy drilling into head strap but that is option.</li></ul><p>Nitecore MBP21 set with NL2150HPI battery.</p><figure class="image image_resized" style="width:70.37%;"><img src="https://media.prusaprinters.org/media/prints/67324/rich_content/173c7d1a-53e8-4387-8205-c9ac3d99d398/img_20210519_133034.jpg#%7B%22uuid%22%3A%226fd81830-1885-4282-b199-4b7fdf21305d%22%2C%22w%22%3A4000%2C%22h%22%3A3000%7D"></figure><p>Battery with magnetic power bank attached. </p><figure class="image image_resized" style="width:69.7%;"><img src="https://media.prusaprinters.org/media/prints/67324/rich_content/c6e9edff-6c52-4cfa-8f14-9464dcd49e19/img_20210519_133322.jpg#%7B%22uuid%22%3A%22bd36a051-debf-4a09-9f21-0b008cc6f415%22%2C%22w%22%3A4000%2C%22h%22%3A3000%7D"></figure><p>Printed parts:</p><figure class="image image_resized" style="width:70.52%;"><img src="https://media.prusaprinters.org/media/prints/67324/rich_content/51d8dcbe-70e8-448a-b93e-d889d556c58b/img_20210519_133116.jpg#%7B%22uuid%22%3A%22486eaccb-cfef-4de6-9bad-2c960eda2990%22%2C%22w%22%3A4000%2C%22h%22%3A3000%7D"></figure><figure class="image image_resized" style="width:70.24%;"><img src="https://media.prusaprinters.org/media/prints/67324/rich_content/b6578445-5a8d-4529-8466-97e51d5cd205/img_20210519_133130.jpg#%7B%22uuid%22%3A%22a62d4c15-e7b5-44ea-a788-1999e1a132b0%22%2C%22w%22%3A4000%2C%22h%22%3A3000%7D"></figure><p>Installation instruction: Make sure you install first 3mm insert. Power bank attachment has two cutouts. One for charging cable so you can even charge back the battery using this attachment and also one inspection hole to see status/charging diodes. </p><figure class="image image_resized" style="width:69.58%;"><img src="https://media.prusaprinters.org/media/prints/67324/rich_content/ba499271-1ae2-498c-ada0-e9e1c826236b/img_20210519_133718.jpg#%7B%22uuid%22%3A%22c24669fe-9a4d-421d-b2e1-eb2966ac1c39%22%2C%22w%22%3A4000%2C%22h%22%3A3000%7D"></figure><figure class="image image_resized" style="width:70.39%;"><img src="https://media.prusaprinters.org/media/prints/67324/rich_content/2f8ab381-1c67-41a2-8e64-c9e7e92023fc/img_20210519_133815.jpg#%7B%22uuid%22%3A%22c3834fd5-094e-4820-af78-03aa2bacdf87%22%2C%22w%22%3A4000%2C%22h%22%3A3000%7D"></figure><p>I recommend using 30cm angeled (on both sides) usb C to usbA cable. </p><figure class="image image_resized" style="width:69.55%;"><img src="https://media.prusaprinters.org/media/prints/67324/rich_content/9c6dd20f-1bc3-4cf1-b339-a9019b2b8d09/img_20210519_134402.jpg#%7B%22uuid%22%3A%22a855031d-dadc-4b0b-99b0-23c226dce073%22%2C%22w%22%3A4000%2C%22h%22%3A3000%7D"></figure><p>Weight check</p><figure class="image image_resized" style="width:71.16%;"><img src="https://media.prusaprinters.org/media/prints/67324/rich_content/6de945c0-eceb-4345-9d83-b12d91d5249e/img_20210519_133917.jpg#%7B%22uuid%22%3A%223cd0d385-0b7a-46e3-bfab-d2dcd59b6b63%22%2C%22w%22%3A4000%2C%22h%22%3A3000%7D"></figure><p> </p><p>Remember to print on the side to inset the magnets! The magnets of the power bank attachment alone are not enough to hold the battery. Once installed properly you will be able to achieve that sweet sweet tacticool snap-on effect. </p><figure class="image"><img src="https://media.prusaprinters.org/media/prints/67324/rich_content/2faadb17-9ffb-489c-bdb3-a2502befa4cb/20210521_194927.gif#%7B%22uuid%22%3A%2200f36667-fa00-4270-b30e-fb9c24ed90f1%22%2C%22w%22%3A486%2C%22h%22%3A382%7D"></figure><p>Two additional inserts for installation on the headstrap.</p><figure class="image image_resized" style="width:69.7%;"><img src="https://media.prusaprinters.org/media/prints/67324/rich_content/3d668ce9-f906-4a14-bf7b-afb5ae469f97/img_20210519_133827.jpg#%7B%22uuid%22%3A%227345997f-d5fa-4bb2-ac77-95e0a5bfa216%22%2C%22w%22%3A4000%2C%22h%22%3A3000%7D"></figure><p>Use the below template for easy drilling. Print it with the brim! To install the screws on the other side you will need to carefully peel the glued on felt from the inside and install screws under so they can be then covered by the fabric. </p><figure class="image image_resized" style="width:75.74%;"><img src="https://media.prusaprinters.org/media/prints/67324/rich_content/39ea4bf6-04a8-4841-8ad3-d2c72ca8037e/img_20210520_100156.jpg#%7B%22uuid%22%3A%229ee07140-599e-463f-87ed-333b663c186f%22%2C%22w%22%3A4000%2C%22h%22%3A3000%7D"></figure><p>The effect:</p><figure class="image image_resized" style="width:76.35%;"><img src="https://media.prusaprinters.org/media/prints/67324/rich_content/598bd942-fd01-4922-8c2c-04242d092601/img_20210520_100559.jpg#%7B%22uuid%22%3A%224b4f8770-0c39-4654-9697-b01faf5bfee2%22%2C%22w%22%3A4000%2C%22h%22%3A3000%7D"></figure><figure class="image image_resized" style="width:72.96%;"><img src="https://media.prusaprinters.org/media/prints/67324/rich_content/82c6effd-0eaa-4e90-8870-534125cbb60b/img_20210520_100609.jpg#%7B%22uuid%22%3A%220bf0df82-e99d-47c0-9e3c-fb28afb682b1%22%2C%22w%22%3A4000%2C%22h%22%3A3000%7D"></figure><p> </p>
With this file you will be able to print Quick swap lightweight magnetic power bank 5000mAh mount for Quest 2 with Rift CV1 strap with your 3D printer. Click on the button and save the file on your computer to work, edit or customize your design. You can also find more 3D designs for printers on Quick swap lightweight magnetic power bank 5000mAh mount for Quest 2 with Rift CV1 strap.