Quick Overhang and Stringing Test
prusaprinters
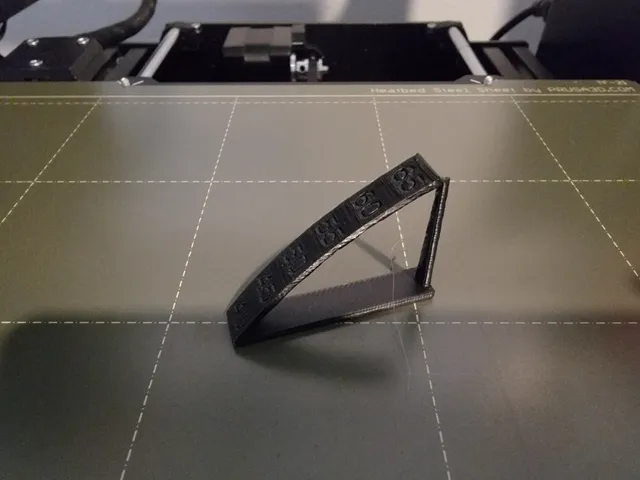
This is more or less a remix of the linked Nano All in One 3D printer test. I printed all of that just fine except the overhang after 45 degrees. It took me awhile to dial in the settings to get my overhangs looking good.After probably 20 prints of this model, I found that the following settings were the most helpful:1. Print Settings > Speed > Speed for print moves > Overhangs: 20% (this can probably be higher, but 20% still had some small defects underneath the overhang. You may also need to adjust the Modifiers > Small perimeter speed > Min Length. I set mine to 8mm because it seemed like the small overhangs in this print were difficult.2. Print Settings > Perimeters and Shell > Overhangs > Extrusion Direction: check Reverse on odd
With this file you will be able to print Quick Overhang and Stringing Test with your 3D printer. Click on the button and save the file on your computer to work, edit or customize your design. You can also find more 3D designs for printers on Quick Overhang and Stringing Test.