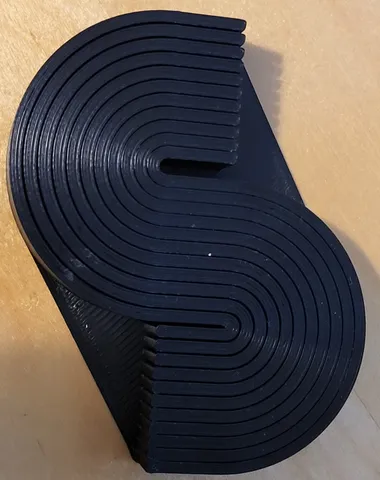
Quick clearance test.
prusaprinters
Based on a great idea of J Jake 3D https://www.prusaprinters.org/prints/127569-s-shaped-tolerance-test-01-04mm-in-002mm-increment I upped the challenge such taht the test also includes layer and line changes and thus zits will show up as fused points.Start with printing J Jake 3D's test as its way quicker to print, when your tuning is such that 0.1 mm is achievable this is the next level challenge.print settings:0.2 mm layer height0.4 mm outer layer width0.45 mm inner layer widthother settings as per your typical print settings.My learnings how to improve clearance:Properly tune Pressure/Linear Advance. This is probably the setting reducing the zits the most.Your filament flow has to be tuned properly, any over-extrusion will close the gaps. I set outer layers to under-extrude 5% and inner layers to over-extrude 2% to achieve the best accuracy, esthetics and strength compromise.Retraction may be set ~20% higher than the minimum outcome of retraction tests (http://retractioncalibration.com is my favorite retraction test).Next challenge: https://www.prusaprinters.org/prints/129499-clearance-test-a-new-challenge-who-unlocks-the-006
With this file you will be able to print Quick clearance test. with your 3D printer. Click on the button and save the file on your computer to work, edit or customize your design. You can also find more 3D designs for printers on Quick clearance test..
