 Thingiverse
2-in-1 - Center Finder and Radius measuring tool. by
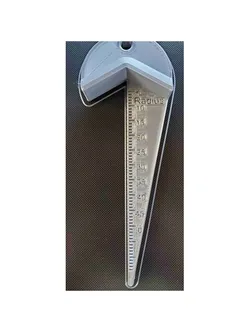
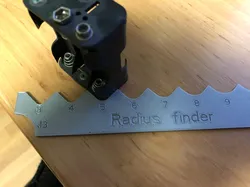
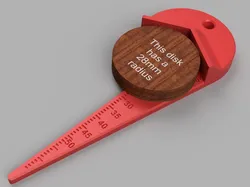
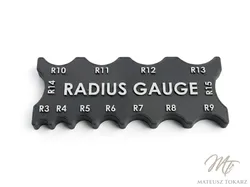
With one side you can draw intersecting lines to determine the center point of a cylinder; while the other side can be used for rough measurement of a cylinder's radius and fairly accurately measures radius' up to 64mm.A radius can be measured without needing to draw & measure a center line. This results in faster & easier measurements while still providing an accuracy within 1mm.First off, my thanks to the original Thingiverse designer Jean-Marie Astruc, for the nice clean design.Hopefully the following will help clarify confusion on the remix; regarding what & how this accomplishes it's measurements, as well as address comments on possible readability or legibility issues.Please bear in mind, that while it is measuring across the "Diameter" of a cylinder; it reports values relating to the cylinder's "Radius".For example, in the rendering of the tool & disk with a 28mm radius, it is reporting back a radius of 28mm as shown on the Center Finder's scale; with the disk itself having a Diameter of 56mm or alternatively a Radius of 28mm.So, you can think of it as Measuring the Diameter, and reporting back the Radius (i.e. 1/2 the diameter).I had several design goals & reasons for having it "report" the Radius instead of the Diameter:1) Saving space for the text. So instead of showing a 100mm Diameter,the same reading can be restated and shown as a 50mm Radius;which in this instance saves one extra digit in a very limited space.This permitted all the markings to be the same font size and yet keepthem as legible as possible.2) Readability. I figured it was easier to read increments of 1mmin the radius size, rather than increments of 2mm in diameter.3) The precision is doubled, as mistakes in reading are halved.For example, measuring the longer distance (i.e. the diameter)is more accurate than only measuring half way across (i.e. the radius).So after having determined the diameter, that doesn't preclude the toolfrom reporting back 1/2 of that value as a "Radius".Past experience & prints (with my Ender 3 using a 0.4mm nozzle) show that depending upon the font type, text which is at least 4.5mm tall & embossed 1.6mm high is highly legible. However, given that this text is a bit shorter at only 4mm tall and is instead debossed to a depth of 1mm, I needed to confirm it's legibility.So I've printed one with the text and included a photo (here's where my neighbor benefits, as he gets the extra one w/o the markings).As for the clarity of it's text & markings and whether or not it's readable at all, I'll let you be the judge.Keep in mind that some filament colours show blemishes & details better than others, which is why I printed mine in grey; as I wanted it to have the best chance of printing clearly. In hindsight, I should have bolded the text, which would have increased it's legibility; but all-in-all I think it's still readable as-is. In any case, I've uploaded another version which has a bolded font and offers improved legibility.By the way, if you want to save yourself some filament, don't bother printing it with infill set any higher than 30%. Even printing it at 20% I feel that it's more than strong & durable enough. With infills of 50% and higher, it merely adds to a potentially higher quality feel through it's additional weight/heft.While I may not print each and every one of my designs or remixes; I do rely upon past experience to understand the difficulties in doing a print and how it might turn out. Thus renders of designs I've worked on are merely for display purposes only; and if I believe that there may be issues with printing a design, I try to identify them up front, in order to help save people both their time & filament.===== Update===== I've added another version with the markings 1mm further away from the edge; as the edge in my print was a bit rough, due to the printer having to create the markings so close to the edge. If you have already printed either of the two previous versions, a couple of gentle strokes on that edge using fine sandpaper will smoothen it out, without destroying the edge.
Direct link to the original creator's page
Similar Models
 Thingiverse
 Printables
 Cults3D
 Printables
 CrealityCloud
 Thingiverse
 Printables
 Thingiverse
Model Specifications
Frequently Asked Questions
How do I download 2-in-1 - Center Finder and Radius measuring too...?
Click the "View on Thingiverse" button above to visit the original model page on Thingiverse. You can download the STL file directly from the creator's page for free.
What 3D printer can I use for this model?
This model is compatible with most FDM 3D printers (Creality Ender 3, Prusa MK3S+, Bambu Lab, etc.) and resin printers (Elegoo, Anycubic). Check the original page for recommended print settings and materials.
Is this 3D model free to download?
Yes, this model is available as a free download on Thingiverse. Some creators accept tips or donations.
Can I modify this file?
Check the license (see original page) on the original Thingiverse page. Most STL files can be modified using free software like Blender, TinkerCAD, or Meshmixer.