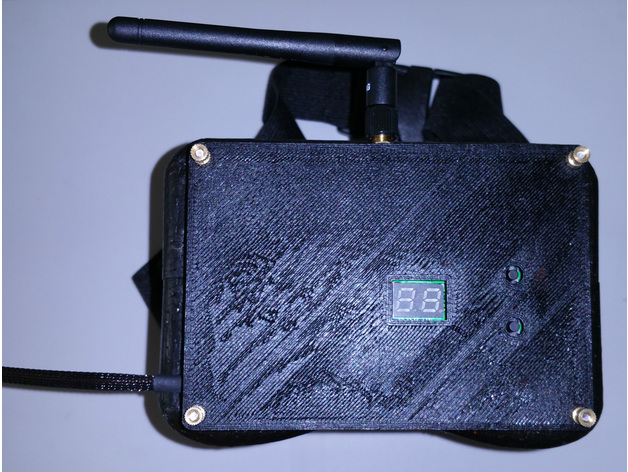
Quanum DIY FPV Goggle RC832 Cover
thingiverse
Instructions integrate the FPV 5.8 GHz 32CH RC832 receiver board into the Quanum DIY FPV Goggle Set with Monitor (KIT). To begin, remove the RC832 from its original case and solder power and video lines directly to the board. The same procedure applies for the LCD display. Assemble all necessary parts, including: 4 x M3*20mm Button Head Hex Socket Cap Screws 4 x M3*10Φ5 Knurled Nuts (or equivalent M3 nut) Ream out the cover screw holes with a 1/8" drill bit, leaving the frame's screws intact. Next, press-fit the RC832 board onto the standoffs and secure it using hot-melt or CA glue. For added stability, attach four M3*20mm button head screws to the back of the cover and thread them gently, securing them with M3 nuts. Finish by gluing the frame to the goggle exterior, clamping it lightly as it dries. To aid alignment, the sprue legs can be trimmed after the glue is set, allowing for a smooth separation of the goggle body halves. I installed pigtails with connectors on each device and constructed a custom power splitter cable featuring JST ends. Note that the cover's zip-tie hold down point keeps the power cable securely in place.
With this file you will be able to print Quanum DIY FPV Goggle RC832 Cover with your 3D printer. Click on the button and save the file on your computer to work, edit or customize your design. You can also find more 3D designs for printers on Quanum DIY FPV Goggle RC832 Cover.
