QIDI X-Max - Improved X-Gantry With Tensioners
prusaprinters
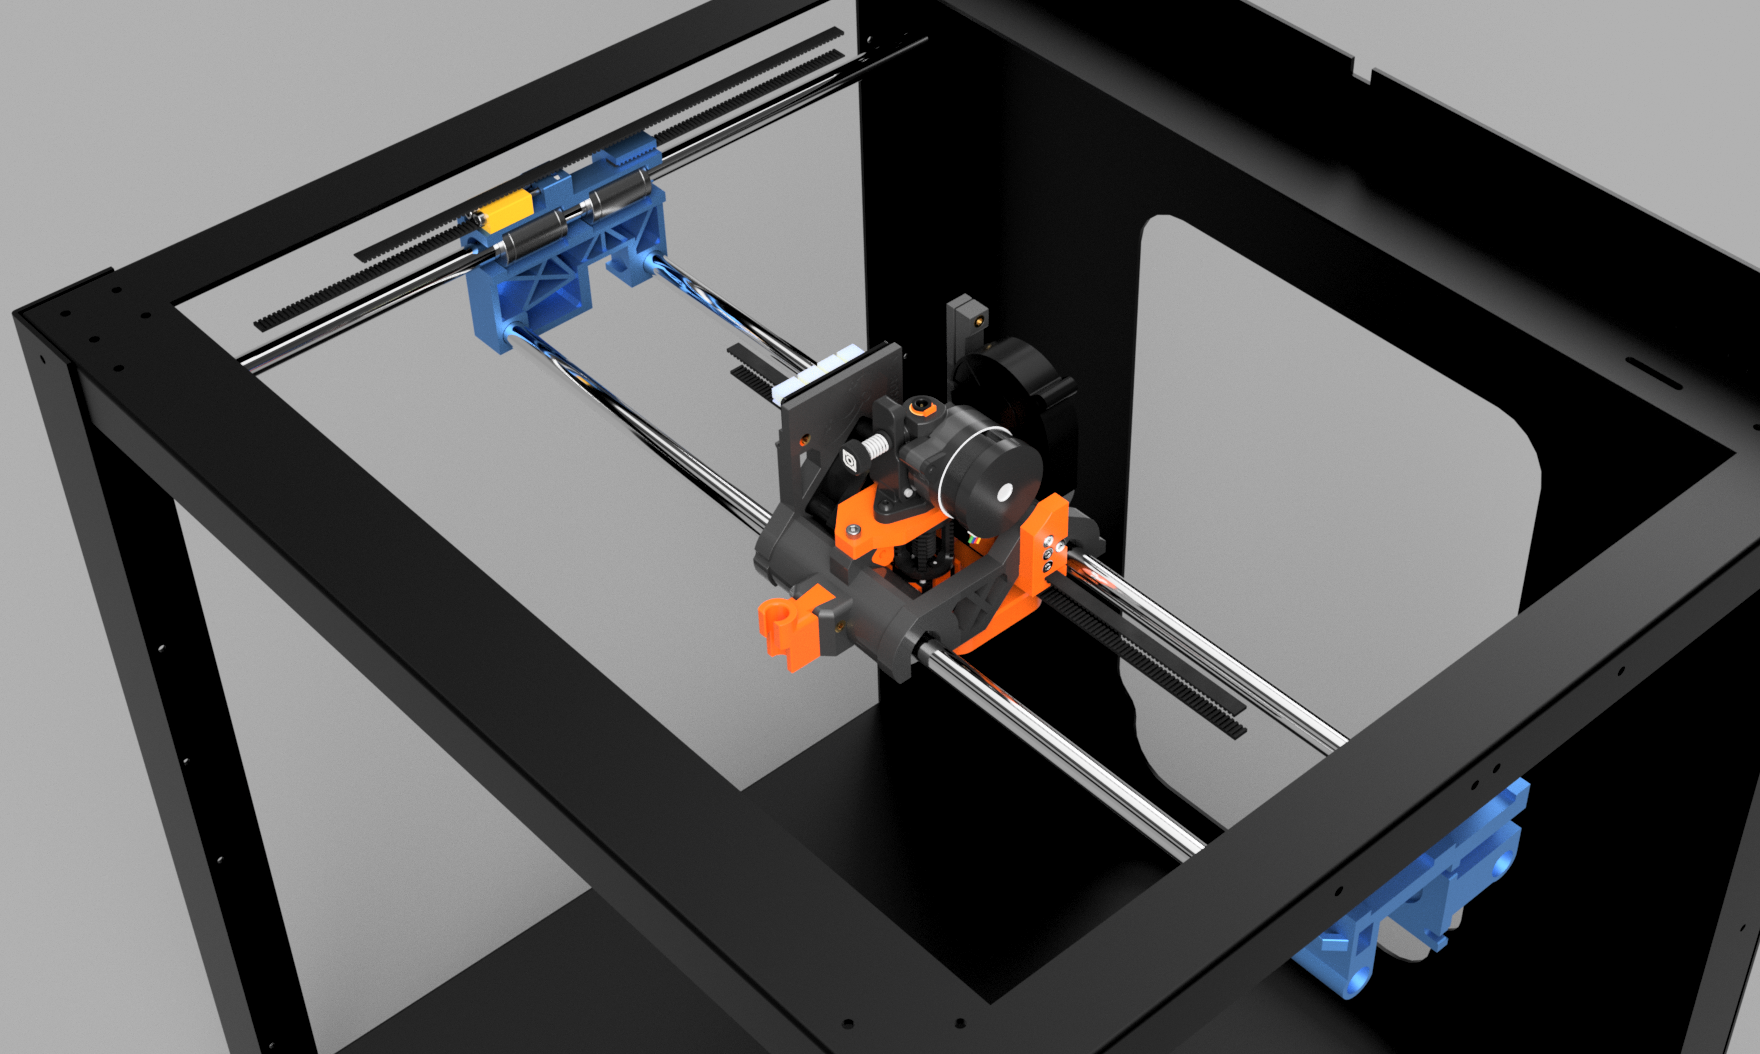
<p><strong>Update March 30, 2022</strong></p><p>I've posted a fix of the right gantry. If you've had issues about it hitting the frame you can reprint version 1.01 which I've just uploaded.</p><p><strong>About</strong></p><p>This is a redesigned X-Gantry for the QIDI X-Max. The original parts were not of the quality I wanted (poor molds) and specifically, I wanted an accurate rod distance for the Icarus 2 conversion with proper belt tensioners and some extra clearance for aftermarket 20T GT2 pulleys (Qidi uses smaller plastic 17T pulleys).</p><p>The rod distance of 69.9 mm matches exactly that of Icarus 2. It also fits stock printers of course.</p><p>It should also fit QIDI X-Plus and I-Mate (and I-Mate S) but I've only tested it on my X-Max.</p><p><strong>BOM - Bill of Materials</strong></p><p>I buy most of my 3D printer parts from quality stores on AliExpress and Banggood. Shipping takes a while from China but quality is excellent and the prices are good. </p><p>You need some M3 hex bolts (socket head) and M3 nuts. It's best to grab the kit below, it will have everything you need for this build and many more:</p><p><a href="https://s.click.aliexpress.com/e/_AD1eFU"><strong>440 pcs M3 Hex Socket Head Cap Kit</strong></a></p><p><strong>Optional parts:</strong></p><p>I also recommend replacing the stock pulleys and belts for both this X gantry and the Y as well while you're at it. The original parts are pretty cheap (plastic pulleys that are pressed on) and the belt is of standard quality. As a replacement I recommend using genuine Gates GT2 belt and these pulleys sold by Trianglelab:</p><p><a href="https://s.click.aliexpress.com/e/_AnA3Cb"><strong>Genuine GATES-LL-2GT 2GT belt 6 mm (3 m required)</strong></a></p><p><a href="https://s.click.aliexpress.com/e/_97JwoR"><strong>Trianglelab 2GT 20T Aluminum Pulley for 6mm (6 pcs required, ID 5 mm)</strong></a></p><p><strong>Don't forget to Loctite the grub screws! </strong></p><p><i>I will post a proper walkthrough soon.</i></p><p><strong>What to print</strong></p><p>Everything prints without supports. I recommend using Polycarbonate if possible but ABS or ASA should also work well.</p><p>Print the following parts, they're rotated correctly:</p><p>gantry-left.stl</p><p>gantry-right-stl</p><p>gantry-tensioner.stl (print 2 of these, one for each side)</p><p><strong>E-step correction</strong></p><p>If you use the Gates belts and larger pulleys I linked above, download and print this gcode:</p><p><a href="https://www.minux.se/humebeam/estep-20t.gcode"><strong>estep-20t.gcode</strong></a></p><p>If you use stock belts and pulleys you should <strong>not </strong>change your e-steps. You can always revert to stock later.</p><p><strong>How to install</strong></p><p>To install you must remove the left and right covers of your printer. Then remove the X belt and pulley. Next, pull hard on the left carriage of the gantry and it will pull off and out of the bearing sockets. It will require quite some force. Pull out the rods from the right carriage. </p><p>Unplug the limit switch and motor cable. Remove the limit switch cable. Unscrew the stepper motor (4 screws) and remove it.</p><p>Install in reverse then attach one belt to the set belt teeth and the other to the belt tensioner. Insert 2 M3 nuts in the slot in each carriage and tighten the M3 bolts to tension the belt.</p><p><strong>Do not overtighten the belts.</strong></p>
With this file you will be able to print QIDI X-Max - Improved X-Gantry With Tensioners with your 3D printer. Click on the button and save the file on your computer to work, edit or customize your design. You can also find more 3D designs for printers on QIDI X-Max - Improved X-Gantry With Tensioners.