qharley's mostly wooden Greg's Hinged Accessible Wade's Extruder
thingiverse
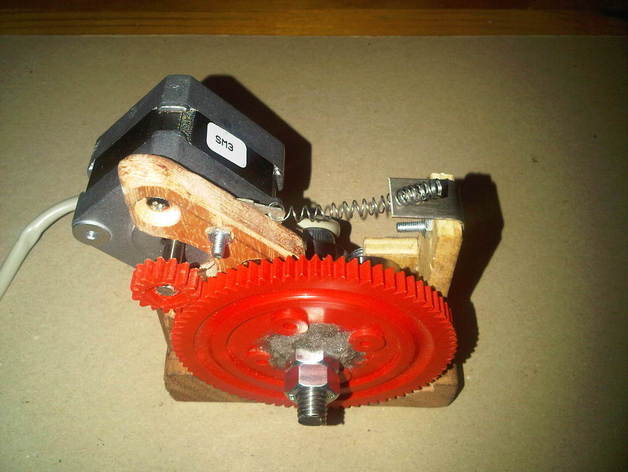
Initially, I was tempted to cheat when constructing this part last weekend. Greg's extruder is so finely tuned that it might be one of the first upgrades I print for my self-made repstrap. However, it's all about the journey, and I had a blast putting together this extruder. For those brave souls who want to give it a try, here are the instructions: 1. Obtain a strong Maranti decking plank cutoff, trimming 2cm off one side (requires two cuts). 2. Open Greg's extruder SCAD file, modifying it for your hot-end configuration while using it as a reference. 3. Modify the 2cm piece to match your hot-end setup on screen. 4. Cut another 8cm plank section and stand it vertically on the 2cm piece. Mark the hot-end filament feed hole. 5. Using the large gear as a guide, mark and drill a 4mm hole through the plank for shaft securement. 6. Drill a 20mm flat wooden bit into both sides, leaving a 1cm center piece (depending on plank thickness). 7. Use a 10mm drill bit to create through holes. 8. Drill at a 45-degree angle from the bottom front right of the gear shaft to the top, and cut accordingly. 9. Install an M8 threaded rod or bolt onto the large gear, adding two 608 bearings in the 20mm bearing holes. 10. Position the stepper motor with a small gear adjacent to the large gear and mark its position (refer to photo). 11. Cut a 45-degree angle next to the motor mount for weight reduction, then recess the motor into the plank to align gears. 12. Glue the two pieces together using wood glue. 13. Mount the large gear (you may need to recess the bottom piece around the gear). 14. Cut a slot for the lever in the base of the extruder and create a lever using available materials (refer to photo). Secure the 608 idler with an M8 rod, and attach the lever with a spring. Adjustments may be necessary. 15. Mark the drive shaft and hob it using your preferred method. A gear ratio of around 5 should work well. Good luck!
With this file you will be able to print qharley's mostly wooden Greg's Hinged Accessible Wade's Extruder with your 3D printer. Click on the button and save the file on your computer to work, edit or customize your design. You can also find more 3D designs for printers on qharley's mostly wooden Greg's Hinged Accessible Wade's Extruder.