Q8 Dracula
thingiverse
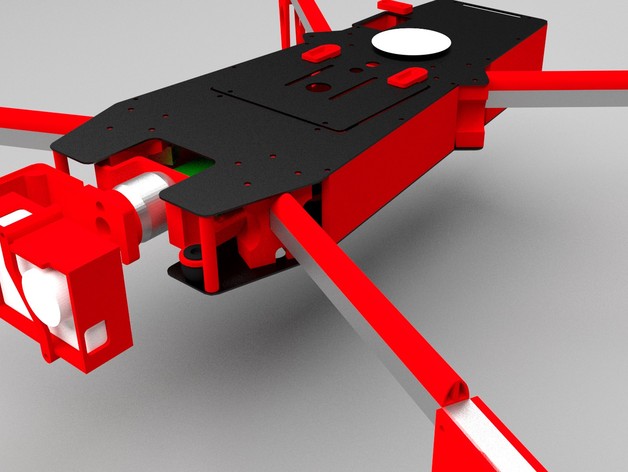
This is the Q8 Dracula Quadcopter. I have spent numerous hours on various designs, resulting in the current Q8 iteration. The market is saturated with quad designs resembling traditional X configurations; I wanted to stray from this convention. The result was a more streamlined design devoid of obstructive equipment mounts atop each other, thus negating the appearance of a flat, irregularly-shaped pancake. Unsightly protruding wires detract from overall aerodynamic integrity. Typically, the gimbal resides below the craft necessitating longer landing supports; however these obstruct crucial camera views. The Q8 was designed to work seamlessly with Naza controllers and incorporates arms patterned after the original design for simplicity's sake but utilizing a 10x10mm aluminum tube instead. Not only do these arms prove more stable than their Naza counterparts, they also possess less weight. Extensive refinement went into crafting this model, and I'm eager to share it with others. You can watch this Q8 quadcopter in action on our YouTube page. Instructions RED parts illustrated were crafted using 3D printing technology. I opted for G10 laminate on the upper and lower plates. Attached files featuring CNC cutting and STL designs are made available, but the latter was not intended for use with traditional printers; only viewing purposes should apply. Bolts & nuts fasten each part together securely. Naza frames can be installed then secured into place before effortlessly placing the controller in a more accessible area. A foam block can help keep the apparatus snug and in place within its confines. A rectangular hole provides 10x10 space for an aluminum tube. 215mm was chosen as my preferred length for cutting. Using a single bolt, one may secure their square tubing. Motors or supports for landing must be drilled into your aluminum frame to secure it in position effectively. Streamlining efforts and improved airflow necessitate applying an arm profile onto this aluminium tube through adhesives or tapes; they can hold motor power or supports. A basic speed controller mount wasn't featured within the image, however does allow users the convenience of strapping on wire wraps when applicable. Some additional material in place near interior walls might prevent battery oscillation during insertion. Finally a strip in rectangular hole secured battery via velcro. I opted for using standard square frame and attaching them with double-sided adhesives underneath to produce circuit divider functionality for power.
With this file you will be able to print Q8 Dracula with your 3D printer. Click on the button and save the file on your computer to work, edit or customize your design. You can also find more 3D designs for printers on Q8 Dracula.
