Puzzle box 1
prusaprinters
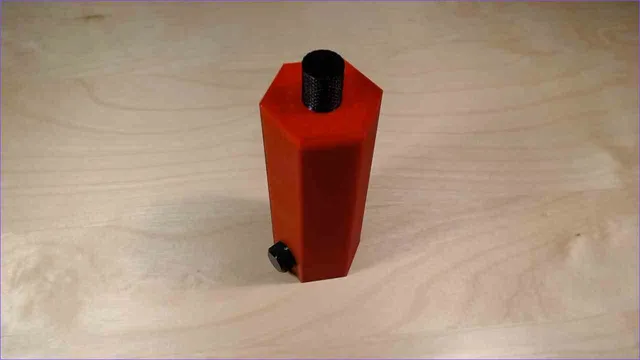
The Puzzle box consists of an inner chamber housed in an outer shell. There are 4 obstacles to overcome before you can access the contents of the box. There are hidden latches and magnets to help or hinder. Nothing apart from what is in included in the box itself is needed to open it.Additional parts needed and what to printThe puzzle box consists of multiple parts that needs to be assembled. In addition to the printed parts, you will need these additional parts:1x Strong (e.g. neodymium) round magnet 10x3mm2x M5x15 screw1x M5 nut1x M4x32mm screw (will work with length down to 25mm)1x M4 nut2x 3x18 screw with 7mm diam head. Can be made to work with various screws but the head of the screw should be 7mm diam.SuperglueFor assembly you will need some basic tools and a large washer with 5-7 mm hole. You will not need any advanced skills, anyone with a little patience can do it. Please read the entire instruction and get an understanding of the mechanism before you start.Complete description of the files can be found at the end of this text. To start now print these files:Puzzle box 1 Bottom (dual color)_0.2mm_PLA_MK3S_16m.gcodePuzzle box 1 Chamber_0.2mm_PLA_MK3S_4h42m.gcodePuzzle box 1 Knobs_0.2mm_PLA_MK3S_51m.gcodePuzzle box 1 Shell_0.2mm_PLA_MK3S_4h52m.gcodeI recommend printing the last one in a different colorNB: Please use the supplied gcode-files.They are sliced with precise part orientations and custom supports tested to ensure the function of the box. Reslicing may interfere with the mechanical functions.If you are not familiar with multi color gcode-files they are normal files but asks for filament change when color switches. This is done by following the instructions on the printer display to unload and load the filament. The first change (in the begining of the print) is to the “main-color", the second to the “text-color”, the third back to “main-color” and so on.Assembly instructionsPlease read the file contents at the end of this text to for correct identification of the parts referenced in the assembly instructions.PreparationsPrint and clean all the parts. The Shell and Chamber has custom supports which all should remove easily with minimum residue. The supports in the bottom of the Shell can be tricky but with pliers you should be able to pull it out.Chamber lid and Lid knob assemblyGet all the parts for the Chamber lid and Lid knob. Note there are two similar parts that could be the Lid knob bottom, you need the one with an hexagonal seat on the inside.Place the magnet and the spacer into the top of the Lid knob.Press a M5 nut into the Lid knob-bottom, temporarily using the M5 screw and a washer to pull it all the way in. Ensure the nut sits tight and secure, use some superglue if needed.Add some superglue to the inside of the Lid knob-top and press the top and bottom firmly together, don't forget the spacer, to make the complete Lid knob.Take the Chamber lid and screw the M5x15 screw partway through it from the inside to clear the threads in the lid. When the threads are ok, take the bolt out, add some superglue to the underside of the bolthead and screw it back in the whole way.Take the two screws and screw them into the holes in the sides of the Chamber lid. It may be a tight fit so take it slowly so the lid does not break.Place the Chamber lid into the Chamber and turn it. This is meant to be tight (which is why the screws should have 7mm heads) so if needed you can use the Shell as a tool. Take it easy though and work it back and forth until you are able to turn the lid by hand. When finished you can remove the lid and clean away the plastic residue that may have released from the Chamber.Put the Chamber on to the Chamber and twist it into lock position.Screw the finished Lid knob onto the bolt in the Chamber lid to complete the Chamber lid and Lid knob assembly.Push pin assembly (push pin = the M4 screw)In the side of the Chamber near the bottom if there is a 4 mm hole. On the inside of this is a hexagonal seat for a M4 nut, use the M4 screw, the washer and a pair of pliers to pull the nut into place.This is the "Push pin seat", where the Push pin is placed when it is not used.Take the bottom piece of the Push pin knob and screw the M4 screw from the inside. Before tightening it completely, add some superglue to the underside of the bolt head to securely fix it in place.Put some glue inside the top part of the Push pin knob and press the top and bottom firmly together to make the complete Push pin.Shell bottom lock assemblyMake sure the outside and the slot in the Shell bottom are smooth and without nags for the lock bolt to get stuck on. Put the remaining M5 screw into the slot and test it.Take the separate Outer bottom and see that the head of the bolt can run smoothly in the track in the inside of it.The looking mechanism uses a magnet to move the bolt, so the head of the bolt will need to glide freely while slightly pressed into the track. Polish the surfaces until everything feels ok.Take the small Plastic nut and use the bolt to clear the threads inside it.Use long nosed pliers and some patience to screw the Plastic nut onto the bolt inside the Shell, with the bolt placed through the slot from the outside. Do not tighten the Plastic nut all the way, only until it is secure on the bolt.Twist and remove the lid from the Chamber and slide the it into the Shell while holding the lock bolt in the center of the slot. The chamber should be positioned so that the lock tab of the Chamber lines up with the 4 mm hole in the side of the Shell, and that the push pin hole in the Chamber matches the 4mm hole in the Shell closer to the bottom.If the bolt in the bottom is dead center you should be able to slide the Chamber all the way in and it snaps into place.With everything in place use your pliers and a screw driver to adjust the Plastic nut so that the bolt can move freely in the slot, bot not wiggle around so much that it could twist and get stuck.Move the bolt back and forth and shake the whole thing to make sure the screw moves smoothly and predictably.Glue the Outer bottom to the Shell, putting superglue in all 6 corners of the Shell matching the feet of the Outer bottom. IMPORTANT: Make sure the track on the inside of the Outer bottom lines up with the slot in the Shell bottom.Press the Outer bottom firmly in place but remember to only put pressure where the feet are as not to crack it.Use the magnet inside the Lid knob to verify that you can move the bolt hidden inside the Outer bottom.The final piece is to hide the lock mechanism from the inside so that stuff stored in the box can not block it, this is done by the Chamber fake bottom. Place the part with the asymmetric side aligned with the lock tab of the Chamber i.e. the 4mm hole part way up the side of the Shell.Keeping that position, with the feet of the Chamber fake bottom pointing down, try to push it down the Chamber. It is a bit tricky but by using a long nose plier to apply even pressure you should get it in place. Done!The assembly is now complete. To complete the build you only need to put the parts together correctly. Extract the Chamber, using the magnet Lid knob to position the bottom lock in the center and the apply the push pin into the hole in the side, depressing the lock tab on the Chamber.The first few times you open the box the surfaces are still a bit rough, but after a couple of times the action tends to go smoother. When you got the chamber out, attach and lock the Chamber lid.Still with the magnet in place, replace the Chamber into the Shell. Take the Lid knob from the bottom and screw it back onto the Chamber lid. Shake the entire box so that the bottom lock bolt is positioned at the far end of the slot, opposite from the "push pin seat". Take the push pin and screw it into the "push pin seat", making sure that the lock bolt inside is out of the way so it is not demolished by the push pin.With the Push pin in its seat there should be no give in any part anywhere. I recommend opening it a couple of times to ensure that there is no snags or rough surfaces, but apart from that the box is now finished and ready to annoy someone you know.Good luck :-) File descriptions: Puzzle box 1 All parts (DO NOT USE before you read the instructions).stlNB! Please DO NOT USE this file unless you are certain you can slice it correctly.Correct orientations and custom supports for "Chamber" and "Shell" is critical to get the puzzle box to work properly. The Knobs have a random seem configuration. Use the 3MF and/or GCODE files if possible, the STL is only provided if you for some reason really, really want to reslice it yourself. Puzzle box 1 Bottom (dual color).3mfPuzzle box 1 Bottom (dual color)_0.2mm_PLA_MK3S_16m.gcodeThe outer bottom (alt 1) of the box in dual color (no MMU needed). Uses filament switch to allow marker ring to be printed in other color.You need this file OR the alt 2 versionParts in this file:Outer bottomOuter bottom marker ring in different color Puzzle box 1 Bottom (single color).3mfPuzzle box 1 Bottom (single color)_0.2mm_PLA_MK3S_14m.gcodeThe outer bottom (alt 2) of the box in single color. Marker ring will still show faintly.You need this file OR the alt 1 versionParts in this file: Outer bottomOuter bottom marker ring Puzzle box 1 Chamber.3mfPuzzle box 1 Chamber_0.2mm_PLA_MK3S_4h42m.gcodeThe inner chamber. NB! Correct orientation/support design is important!Parts in this file: ChamberChamber fake bottomPlastic nut Puzzle box 1 Knobs.3mfPuzzle box 1 Knobs_0.2mm_PLA_MK3S_51m.gcodeAll parts or the knobs, both Lid Push pin. NB! Correct seem setting is important!Parts in this file: Lid knob topLid knob bottomLid knob spacerPush pin knob topPush pin knob bottom Puzzle box 1 Shell.3mfPuzzle box 1 Shell_0.2mm_PLA_MK3S_4h52m.gcodeThe outer shell and the lid to the chamber. NB! Correct orientation/support design is important!Parts in this file: ShellChamber lid
With this file you will be able to print Puzzle box 1 with your 3D printer. Click on the button and save the file on your computer to work, edit or customize your design. You can also find more 3D designs for printers on Puzzle box 1.