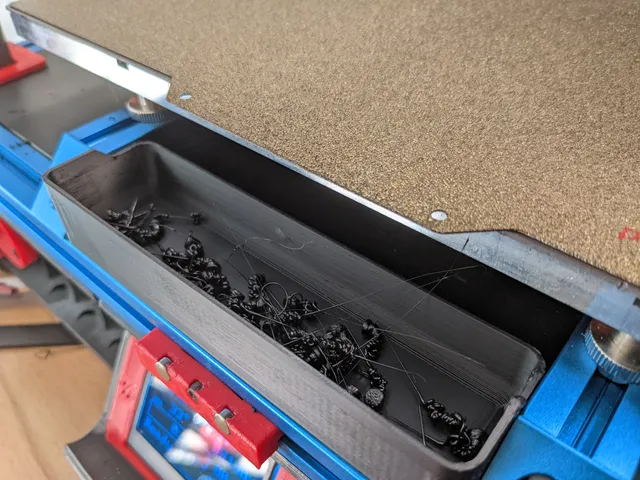
Purge Tray (with V2.4 purge macro)
prusaprinters
I was sick of scraping primelines and having them fly all over my place, so i got a little creative. This isn´t just a purge bucket, its convenient purging macro for your 2.4 that even cleans the mess up its made! The printer uses the toolhead to kik the previous purge tower into the purge tray in front of the bed. Why? Cause it looks cool! No more primeline scraping, no more looking for leftover primelines in your printer, its all being collected in the tray at the front and all you have to do is to empty it out when its full and can see stuff being kiked around by your printer!Here is a video of the macro in action: https://www.youtube.com/shorts/3e5eomud_js copy and paste this section into your config, info and instructions on customization are included in the macro:######################################################################################################################################################################################PRIMING MACRO###################################################################################################################################################################################### Info:#------# This macro is already configured for a V2.4 300mm with a 0.4mm nozzle and an afterburner toolhead.# The size of the purge tray can be adjusted in the slicer by extending or shrinking it in width. Measure the gap between your two "A" profiles that# are supporting the Bed and adjust the with accordingly.# # This macro assumes that your bed and gantry are trammed, otherwise there is a risk of the nozzle dragging over the Bed surface or the cleaning and wiping actions not working as # intended. Make shure you add the leveling infront of this "PRIMING" macro in your start gcode.# # how to configure:#-------------------# If you want to change the starting position of the purge macro you can do so in line .3; make shure your X value of the CLEAN macro in line .17 is the same value as in the # starting position (note: these values are absolute)# # If you have a nozzle size other than 0.4mm, you may need to chanage the amount of priming and purging, you chan change these extruder distances in lines .6 and .7 (note: these distances are incremental)# # The wiping moves are configured for an afterburner toolhead, you may need to change these moves if you have a different toolhead to increase clearence between your fanducts and # the purge tower during the down move.# If you find the need to change the wiping moves after the purge, you can do so in line .9 and .10 (note: these moves are incremental)[gcode_macro PRIMING]gcode: M106 S255 ;partcooling fan max .1 CLEAN ;call clean macro .2 G1 X180 Y0 F30000 ;move to purge position X/Y .3 G1 Z0.3 F5000 ;move to purge position Z .4 G91 ;incremental positioning .5 G1 E14 F500 ;prime hotend .6 G1 Z10 E25 F250 ;purge and move up .7 G1 Z10 F5000 ;move up by 10 .8 G1 X-30 Z-20.1 F5000 ;move to wiping start X/Z .9 G1 X-20 ;wipe end X .10 G1 Z10 F5000 ;move up .11 M82 ;extruder absolute .12 G92 E0.0 ;extruder reset .13 G90 ;absolute positioning .14 M107 ;partcooling fan off .15[gcode_macro CLEAN]gcode: M204 S6000 ;set acceleration to 6000 .16 G1 X180 Y30 F30000 ;move to position X/Y .17 G1 Z0.5 F5000 ;move to position Z .18 G1 Y0 F30000 ;kik the prime tower off .19 #####################################################################################################################################################################################
With this file you will be able to print Purge Tray (with V2.4 purge macro) with your 3D printer. Click on the button and save the file on your computer to work, edit or customize your design. You can also find more 3D designs for printers on Purge Tray (with V2.4 purge macro).
