Pumpkin Candy Dish
prusaprinters
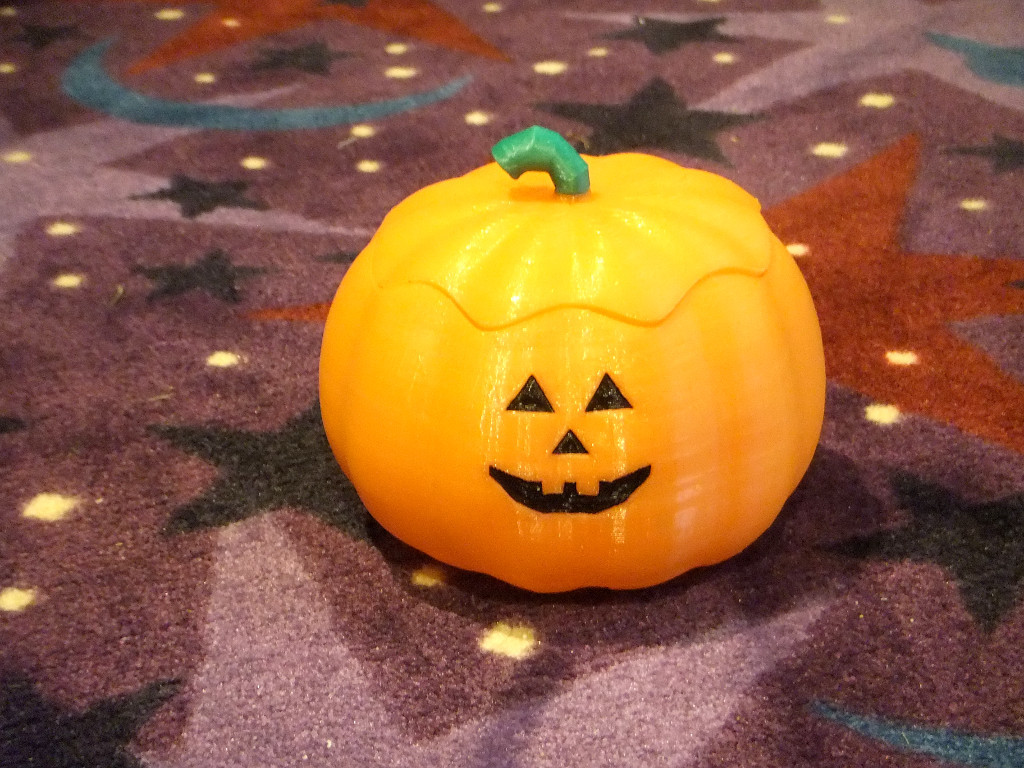
<p>This is a small-ish, 130mm wide candy dish that I made for Halloween. This is my first ever attempt at using Blender, so... be kind :)</p> <p><strong>-=[ UPDATE ]=-</strong></p> <p>I've made a couple of modifications. For starters, it turns out that the original bowl model was not manifold. I told you I was just learning blender :) So, I have corrected that and now [bowl-v2] is manifold. I have also added a new version of the lid - [lid-no_stem] - along with it's associated [stem] file. You can now print the lid and the stem as two separate entities to facilitate easier two color printing.</p> <h3>Print Settings</h3> <p><strong>Printer:</strong></p> <p>Tevo Tarantula</p> <p class="detail-setting supports"><strong>Supports: </strong> <div><p>Yes</p></div> <p><strong>Resolution:</strong></p> <p>0.1 - 0.3</p> <p class="detail-setting infill"><strong>Infill: </strong> <div><p>10%</p></div> <p><strong>Notes:</strong></p> <p>This needs [Supports Everywhere] turned on, especially for the lid. This will look best if you can print it in orange. Then, for the lid, you can pause the print as soon as the last layer of the pumpkin itself is printed and then switch to green filament. Slicing in Cura 2.6.1 at 0.3mm layer height, the pause was at layer 76, but your mileage may vary, so double check for yourself to be sure.</p> <p>If you go with the [lid-no_stem] and [stem] files, you will need supports for both. Print the lid in orange and the stem in green. You may want to use a brim for the stem if adhesion is an issue.</p> </p></p> Category: Containers
With this file you will be able to print Pumpkin Candy Dish with your 3D printer. Click on the button and save the file on your computer to work, edit or customize your design. You can also find more 3D designs for printers on Pumpkin Candy Dish.